If your radiator valve is dripping, isolate the radiator and try tightening the gland nut first: most minor leaks stop there. A worn washer or a stuck TRV pin accounts for most of the rest. Any leak that involves the boiler itself or drops your system pressure fast needs a Gas Safe registered engineer, not a DIY fix.
TL;DR:
- Most leaks from radiator valves are caused by a loose gland nut, worn washers, or a stuck TRV pin, which can often be fixed with simple tightening or part replacement.
- Conduct a tissue test around joints while the system is both hot and cold to accurately locate the leak source and determine if it is seal-related or due to corrosion.
- Tightening the gland nut or replacing a worn washer can stop most minor leaks within 15 to 60 minutes, but more extensive repairs require draining and part replacement.
- Avoid DIY fixes involving the boiler or gas pipework, as any repairs near gas systems must be performed by a Gas Safe registered engineer.
- When system pressure drops rapidly or water reaches electrics or the floor, professional help should be sought immediately to prevent further damage.
Table of Contents
- How to find exactly where the water is coming from
- Step-by-step DIY repairs you can try, simplest first
- What tools and replacement parts you need for these repairs
- When to stop DIY and call a professional
- Typical part costs, plumber call-out fees and repair timeframes
- Practical note from the author and real-world repair experience
- Why simple fixes deserve first attempt before anyone calls a plumber
- Quick booking info for homeowners who prefer a professional
- FAQ
- Sources
How to find exactly where the water is coming from
Before you touch a spanner, work out which part is actually leaking. Radiator valves have several joints, and tightening the wrong one wastes time and can make things worse.
- Dry the whole valve and the pipe beneath it with a cloth, then wrap a strip of tissue around each joint, the gland nut, the tail fitting and the valve body itself.
- Wait ten minutes with the heating on, then check which piece of tissue is wet: that pinpoints the exact source.
- Repeat the test with the heating off. A leak that only appears when the system is hot often points to a seal that expands and contracts rather than a loose fitting.
- Look at the TRV pin, the small pin at the centre of the valve head. Moisture around it usually means the pin seal has failed rather than the gland nut.
- If a valve knob spins without ever feeling like it is opening or closing anything, you are probably turning a balancing valve, not an isolation valve. Balancing valves have a plastic cap that lifts off to expose a brass spindle, which needs a flat-blade screwdriver or small grips turned clockwise to close, according to Which? Trusted Traders.
If the leak coincides with your boiler pressure gauge dropping steadily rather than holding steady, that is a sign the leak is feeding into the wider heating system rather than just dripping onto the floor. Energy Saving Trust guidance notes that ideal boiler pressure sits around 1 to 1.5 bar, and a sudden or repeated drop usually means there is a leak somewhere in the system that needs inspecting.
Step-by-step DIY repairs you can try, simplest first
Once you know where the water is coming from, work through these fixes in order. Stop as soon as the leak stops and recheck after a few hours of heating.
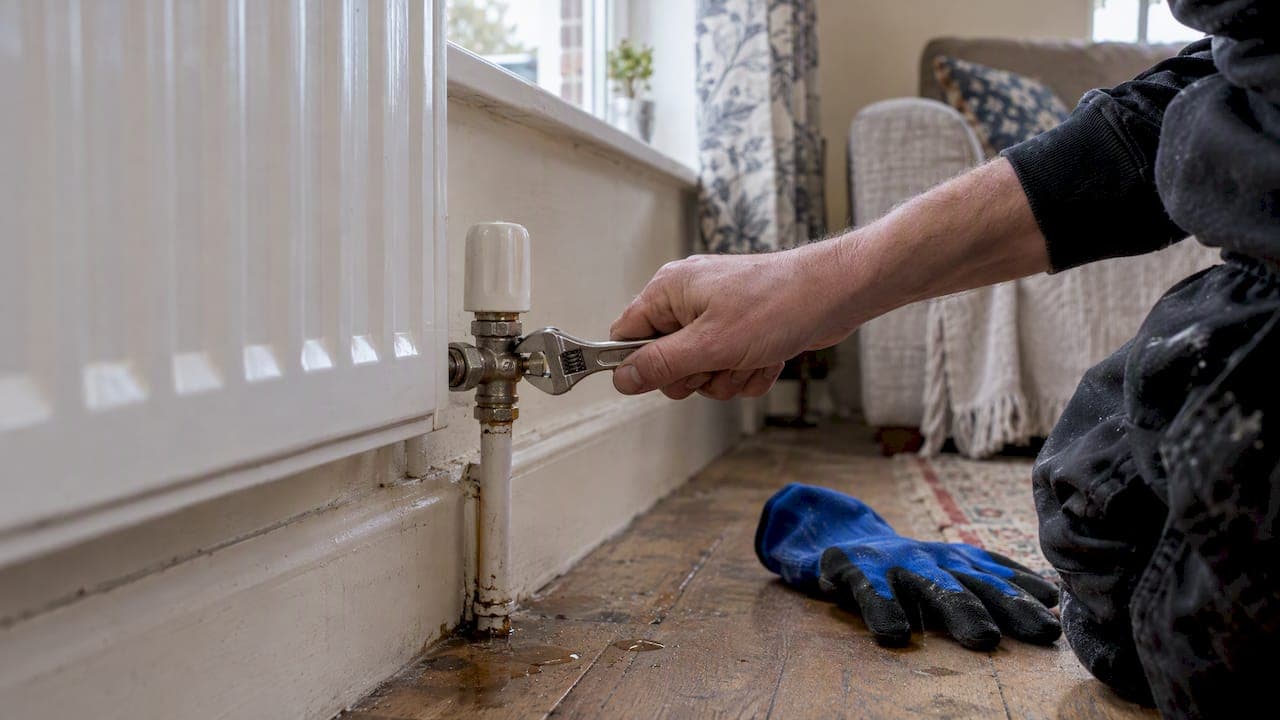
- Tighten the gland nut. Use an adjustable spanner to turn the nut just behind the valve handle a quarter turn clockwise, holding the valve body steady with grips so you do not twist the pipe. Overtightening can crack the nut or damage the spindle, so stop as soon as you feel resistance.
- Address a leaking TRV pin. Remove the TRV head (it usually unscrews or pulls off a locking ring) and check whether the pin underneath moves freely. Gently press it down and release it a few times. If it sticks or the leak continues, the fix is usually a new TRV head rather than forcing the pin.
- Use PTFE tape where it belongs. PTFE tape helps on threaded unions, such as where the valve tail meets the pipework, wrapped clockwise around the thread before reassembly. It does nothing for a worn internal seal or a cracked valve body, so do not reach for it as a default fix.
- Replace a washer or valve head. If tightening and PTFE tape have not solved it, the washer inside the union nut is probably worn. Undo the union, slide the old washer off, fit a new one of the same size, and reassemble by hand before nipping up with a spanner.
- Replace the whole valve if the body itself is cracked or corroded. This means draining the system down to below the radiator, which involves shutting off the boiler, closing the lockshield and isolation valves, and draining through the bleed valve into a bucket before the old valve comes off.
Pro Tip: Photograph the valve and its fittings before you dismantle anything; it saves guesswork when you are reassembling or ordering a replacement part.
Many minor spindle leaks stop with nothing more than a small turn of the gland nut, while a leak that keeps coming back after tightening and taping usually means a part needs replacing rather than another attempt at the same fix.
What tools and replacement parts you need for these repairs
Gather everything before you start so you are not dripping water across the carpet while you search the shed.
- Adjustable spanner and grips, to hold the valve body steady while you turn fittings.
- Radiator bleed key, for releasing trapped air once repairs are finished.
- PTFE tape and spare washers, matched to the thread size of your valve.
- A replacement TRV head, bought to match your existing valve body rather than any head on the shelf, since fittings vary between manufacturers.
- Bucket, old towels and rubber gloves, for the inevitable mess when you open a union.
Standard and smart TRV heads are widely available from plumbing merchants and DIY stores, and compatibility is worth checking against your existing valve body before buying. If a new part fails shortly after fitting, keep the receipt and photos: under the Consumer Rights Act, a faulty product remains the seller's responsibility, and Which?'s case studies show homeowners successfully claiming repair or replacement costs when new parts were defective.
When to stop DIY and call a professional
Tightening a nut or swapping a washer is safe territory for most homeowners. Anything involving the boiler itself, gas pipework or flues is not.
- Any gas appliance or gas pipework repair must be carried out by a Gas Safe registered engineer, not attempted as a DIY job, under HSE guidance.
- A leak you cannot isolate, where closing both valves fails to stop the drip, points to a fault inside the radiator or valve body itself.
- Water reaching sockets, light fittings or electrics nearby is an immediate reason to isolate power to that area and call for help rather than continue working.
- Boiler pressure that keeps falling even after bleeding and topping up suggests a leak elsewhere in the sealed system, which Energy Saving Trust flags as a sign the system needs inspection, not just a tightened nut.
A standard thermostatic radiator valve typically costs around £15, and smart radiator valves commonly run between £35 and £80, according to Which?. Knowing the rough part cost helps you judge whether a call-out fee for a quick swap is worth it compared with buying and fitting the part yourself.
When you do call someone, have the valve location, how the leak behaves, your boiler pressure reading and a couple of photos ready, and ask for a breakdown of parts and labour before work starts.
Typical part costs, plumber call-out fees and repair timeframes
Budgeting for a radiator valve leak depends on whether you fix it yourself or book a plumber, and on how far the problem has progressed.
- A standard TRV costs around £15, while smart radiator valves range from £35 to £80, per Which?.
- Plumber call-out fees and hourly labour rates vary by location, access and job complexity, and Which?'s guide to plumber costs sets out typical price brackets to help you budget before booking.
- A simple gland nut tightening or washer swap usually takes 15 to 60 minutes; a full valve replacement that requires draining the system typically takes 1 to 2 hours.
If a quote comes back far outside these ranges, ask what is driving the cost: access difficulties, parts needed, or an emergency call-out rather than a scheduled visit often explain the difference.
Practical note from the author and real-world repair experience
Most of the radiator leaks homeowners ask about come down to one of three things: a gland nut that needed a quarter turn, a TRV pin that had seized, or a washer that had simply worn out. For wider leak symptoms beyond the valve itself, our guide on stopping a leaking radiator pipe covers the pipework side, and our explainer on how thermostatic radiator valves work is useful if you are choosing a replacement head.
If a leak reappears shortly after a repair, treat it as a sign the part itself may be faulty rather than a sign you did the job wrong.
If you suspect a new valve or TRV head was faulty out of the box, keep your receipt and take photos as soon as you notice the fault: this protects your position under consumer law if a replacement or refund is needed.
Why simple fixes deserve first attempt before anyone calls a plumber
The instinct for a lot of homeowners is to assume a leaking radiator means a costly repair, when in practice a gland nut tightened a quarter turn solves most of what lands in a plumber's inbox. The conventional advice often skips straight to "call a professional," which is overcautious for a dripping spindle but dangerously under-cautious for anything touching the boiler or gas pipework.

What actually matters is sequencing: check before you tighten, tighten before you replace, and replace before you drain the whole system. Readers who jump straight to swapping a valve often create a bigger job than the one they started with. What is overrated is PTFE tape as a universal fix. It solves threaded unions and nothing else, and wrapping it round a worn washer wastes time.
Prioritise diagnosis over action. A five-minute tissue test tells you more than ten minutes of random tightening, and it is the difference between a job finished in an afternoon and one that drags on for a week.
— Michael
Quick booking info for homeowners who prefer a professional
When a leak turns out to be more than a gland nut, or it is anywhere near the boiler, booking a qualified engineer is the quickest way to stop guessing and get it fixed properly. We offer services from valve replacements to boiler diagnostics, aiming to provide clear pricing so you know the cost before work starts.

Before you book, have a few things ready: photos of the leak, your current boiler pressure reading, and the radiator's location in the house. That gets an engineer diagnosing the fault rather than asking questions on arrival.
- Book a general plumbing visit for a valve repair or replacement.
- Use our emergency heating engineer service for a 60-minute response if the leak is active and spreading.
- If the leak has reached your boiler and a replacement looks likely, request a new boiler quote at the same time.
If water has already reached flooring, skirting or nearby electrics, a specialist in emergency water shut-off and property dry-out can limit damage while repairs are arranged.
FAQ
Why is water coming out of my radiator valve?
Water at a radiator valve usually comes from a loose gland nut, a worn internal washer, corrosion inside the valve body, or a stuck TRV pin. A tissue test around each joint while the heating is on and off will show exactly which part is leaking.
How much does it cost to replace a radiator valve?
A standard thermostatic radiator valve costs around £15, while smart radiator valves typically run from £35 to £80, according to Which?. Labour costs on top of the part vary by location and access, so it is worth asking for a breakdown before booking.
What is the most common place for a radiator leak?
The gland nut, just behind the valve handle, is one of the most frequent leak points, alongside the TRV pin and the union joint where the valve meets the pipework. A dry-and-watch test over ten minutes usually narrows it down quickly.
My TRV is leaking from the pin. How can I fix it?
Remove the TRV head and check whether the pin underneath moves freely, pressing it gently a few times to see if it closes properly. If the pin stays stuck or the leak continues, fitting a new TRV head is usually the fix rather than forcing the pin further.
Sources
- Best smart radiator valves 2026 - Which?
- HSE – Gas safety: FAQs for homeowners
- Boiler service explained - Energy Saving Trust