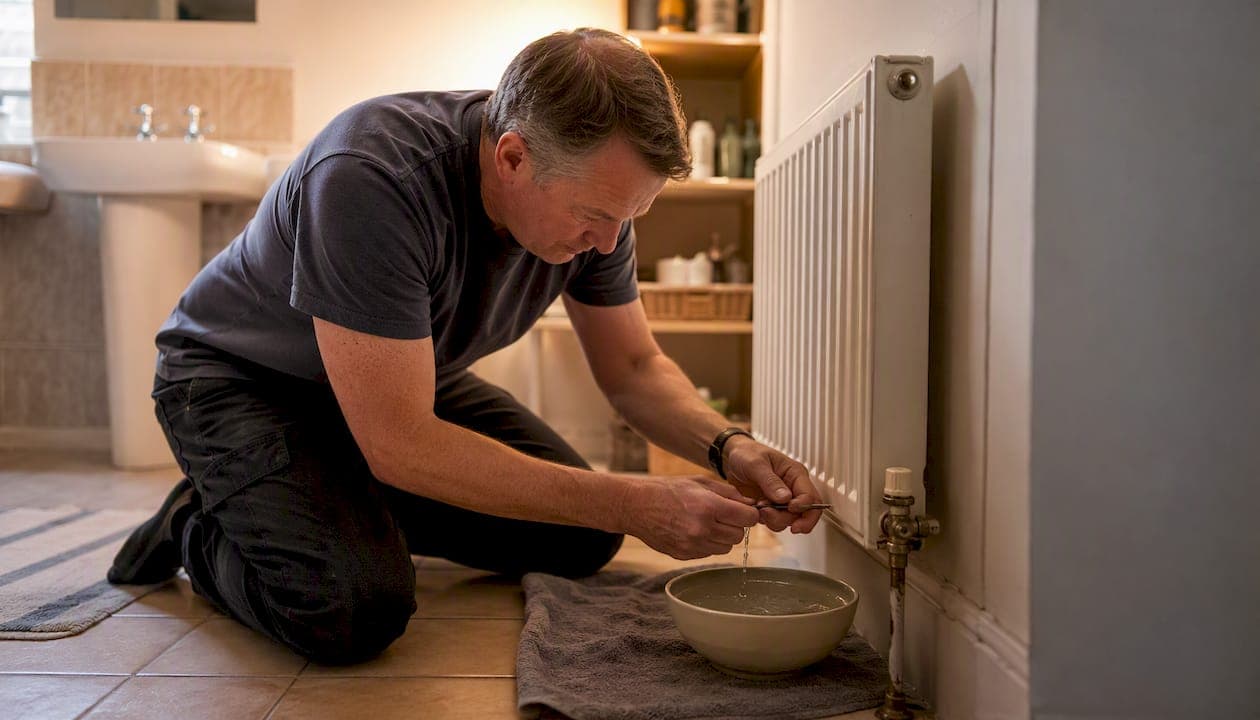
Bleed your radiators if they feel cold at the top but warm at the bottom, make gurgling or rattling noises, or take noticeably longer than usual to heat up. Turn the heating off, wait a safe cooling period for the system to cool, then grab a radiator key (or a flathead screwdriver for slotted valves), an old towel, and a small bowl. One more thing before you start: locate your boiler pressure gauge and filling loop, because you will almost certainly need to top up the pressure once you have finished.
- Signs you need to act: cold top, gurgling pipes, slow heat-up
- First step: switch off heating and let the system cool fully
- Tools: radiator key or flathead screwdriver, cloth, small container
- After bleeding: check boiler pressure and repressurise if needed
Table of Contents
- How to tell which radiators actually need bleeding
- What tools you need and the safety checks to do first
- Step-by-step: the correct order and technique for bleeding radiators
- Checks to do immediately after bleeding
- If bleeding doesn't fix it: stuck valves, sludge and other faults
- Why balancing is different from bleeding and when you need it
- How often to bleed radiators and a simple seasonal checklist
- Clear red flags and what to tell a Gas Safe engineer when you book
- Plumber-tested tips and common mistakes to avoid
- Key takeaways
- A local plumber's view on the calls we actually get
- Persistent radiator problems? Your-local-plumber can help
- Useful sources and further reading
How to tell which radiators actually need bleeding
Run the heating for 15–20 minutes, then walk around and feel each radiator carefully with the back of your hand. A radiator that is warm at the bottom but noticeably cooler or stone cold at the top almost certainly has trapped air sitting in the upper section of the panel. Gurgling or bubbling sounds from the pipes are another reliable indicator, as is a radiator that takes far longer to reach temperature than the others on the same circuit.
Mark each affected radiator with a sticky note or take a photo on your phone so you know exactly which ones to bleed. EDF Energy's practical guidance recommends this brief run-and-check approach as the most reliable way to identify problem radiators before switching the system off.
Worth knowing: a radiator that is completely cold, top and bottom, is not necessarily an air problem. The thermostatic radiator valve (TRV) may be stuck closed, or there could be a boiler or pump fault. Check the TRV head first and consult a heating engineer if the valve appears to be open but the radiator stays cold.
What tools you need and the safety checks to do first
The kit required is minimal and inexpensive. A radiator key fits the square bleed valve found on most UK radiators and costs a few pounds at any DIY shop. Some modern radiators use a slotted screw instead of a square head, in which case a flathead screwdriver does the job. Beyond that: an old towel or rag, a small jug or bowl to catch water, and optionally a pair of rubber gloves. A torch is useful for radiators tucked behind furniture or in poorly lit corners.
Before you touch a single valve, wait at least 20–30 minutes after switching off the heating. Bleeding a hot system risks scalding from pressurised water and can also allow the pump to draw fresh air back into the circuit as you open the valve. Neither outcome is what you want.
Safety check list before you start: heating off and system fully cooled; boiler pressure gauge visible and readable; filling loop located and accessible; bleed valve positions known on each marked radiator; towel and container ready.
Know where your filling loop is before you begin. It is usually a short braided hose connecting two pipes beneath the boiler, fitted with one or two small taps. You will need it to restore pressure after bleeding. If you are unsure what a filling loop looks like, the Energy Saving Trust notes that summer is a sensible time to familiarise yourself with these basics while the heating is off anyway.
Step-by-step: the correct order and technique for bleeding radiators
Turn the heating off and let the system cool completely before you open any valve. That single rule covers most of the safety risk.
For a single radiator:
- Place your towel on the floor beneath the bleed valve (usually at the top corner of the radiator).
- Hold your container under the valve.
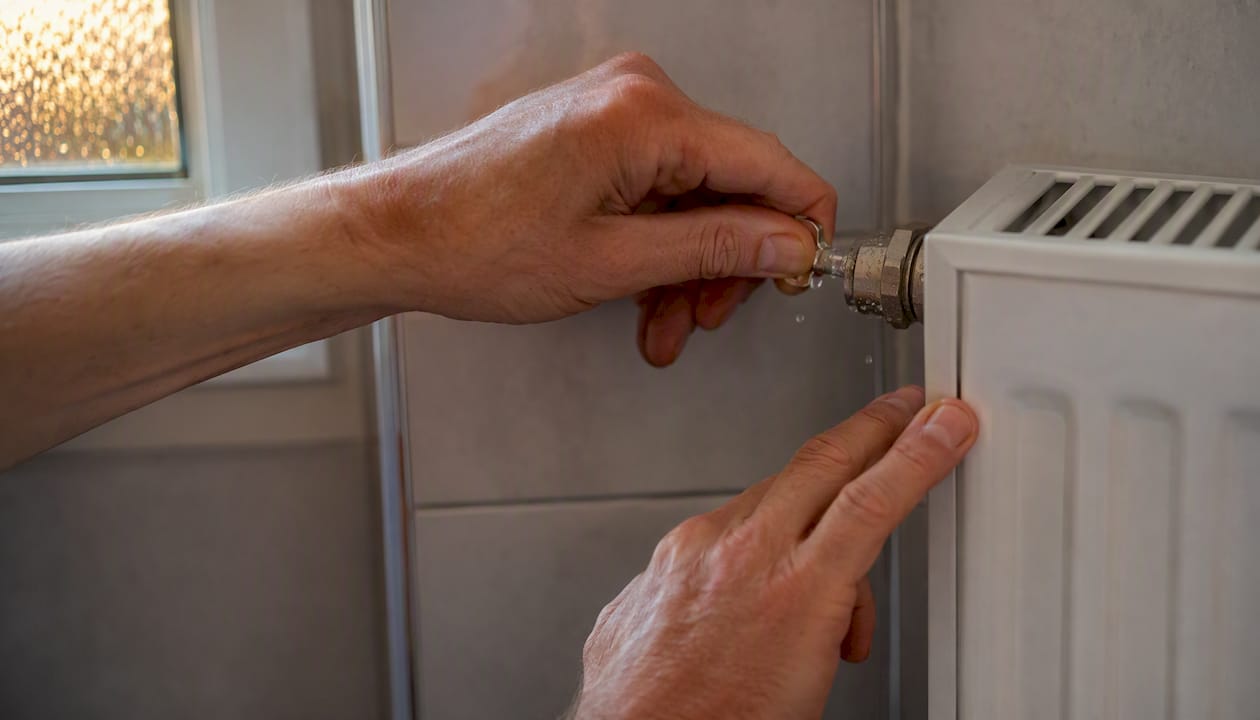
- Insert the radiator key and turn it anticlockwise by no more than a quarter to half a turn.
- You will hear a hiss as trapped air escapes. Keep the key in position and hold the container steady.
- When the hissing stops and a steady trickle of water appears, close the valve immediately by turning clockwise. Do not overtighten.
The whole process for one radiator typically takes under a minute once water flows. Expect a small amount of water to escape before you close the valve.
For a houseful of radiators, order matters. Smart Energy GB's step-by-step guidance confirms the standard sequence: start on the ground floor and work upwards. Within each floor, begin with the radiator furthest from the boiler and move progressively closer to it. This pushes air towards the boiler rather than redistributing it around the circuit.
Pro Tip: Have your radiator key in your dominant hand and keep two fingers of your other hand resting lightly on the valve body. The moment you feel water rather than air vibration, close the valve. That tactile cue is faster than watching the container.
Checks to do immediately after bleeding
Always check the boiler pressure gauge before you do anything else once bleeding is complete. Releasing air from radiators reduces the water volume in the system, which drops the pressure.
Pressure at a glance: a cold central heating system should read between 1 and 1.5 bar on the gauge. If the pressure drops too low, the boiler may lock out or fail to fire.
Normal cold-system pressure usually sits within a typical range around 1 to 1.5 bar; if the needle has dropped below that after bleeding, you need to repressurise via the filling loop. Open the filling loop tap(s) slowly and watch the gauge. Stop as the needle approaches the normal working pressure. Close the tap(s) firmly. Never allow pressure to climb above 2.0 bar — an overpressurised system will trigger the pressure relief valve and may cause damage.
Once pressure is restored, switch the heating back on and wait 20 minutes. Then revisit each radiator you bled. Run your hand from bottom to top: the panel should now heat evenly across its full surface. If a radiator still has a cold patch at the top, it may need a second bleed, or there could be a deeper issue such as sludge or a balancing problem.
If bleeding doesn't fix it: stuck valves, sludge and other faults
Not every cold radiator is an air problem, and not every air problem is solved by one bleed. Here is what to do when the standard approach hits a wall.
- Dark brown or black water: this is the most important warning sign. Dark water during bleeding indicates sludge or magnetite buildup — a byproduct of internal corrosion. Bleeding will not fix sludge. The system needs a chemical flush or a powerflush carried out by a heating engineer.
For persistent central heating faults that bleeding does not resolve, a professional inspection is the right next step.
Why balancing is different from bleeding and when you need it
Bleed first, balance second. That sequence is not optional.
Bleeding removes trapped air so water can circulate freely. Balancing is a separate process that adjusts how much hot water flows to each radiator so every room reaches the right temperature. Balancing should only be performed once the system is free of air — if you try to balance while air pockets remain, you are adjusting flow around an obstruction that will shift once you bleed, making your adjustments meaningless.
| Task | What it does | DIY or professional? |
|---|---|---|
| Bleeding | Removes trapped air from radiators | DIY with basic tools |
| Balancing | Adjusts lockshield valves to distribute flow evenly | DIY if confident; professional recommended for whole house |
| Powerflushing | Clears sludge and magnetite from the whole circuit | Professional only |
Balancing involves adjusting the lockshield valve (the capped valve on the opposite side of the radiator from the TRV) on each radiator to restrict or increase flow. Radiators closest to the boiler tend to get too much heat; those furthest away get too little. For a whole-house balance, most homeowners are better off calling a heating engineer — the process requires a thermometer and patience, and getting it wrong means some rooms stay cold. Understanding how thermostatic radiator valves work helps before attempting any balancing work yourself.
How often to bleed radiators and a simple seasonal checklist
Once a year is the standard recommendation for most UK homes, timed for early autumn before you start relying on the heating daily. The Energy Saving Trust suggests using the summer months to carry out routine checks while the system is off, which makes September the natural moment to bleed and verify everything is working before the cold arrives.
Bleed sooner than your annual schedule if: any radiator develops a cold top mid-season; you hear gurgling from pipes or radiators; the boiler pressure drops repeatedly without an obvious cause; or the system has been drained and refilled for any reason.
Seasonal checklist (early autumn):
- Check each TRV moves freely and is set correctly for the room
- Look for damp patches or rust stains around radiator valves and pipe joints
- Listen for unusual noises when the heating first fires up
- Bleed all radiators in the correct order (ground floor first, furthest from boiler first within each floor)
- Check and restore boiler pressure after bleeding
- If you know the system has inhibitor, ask a heating engineer to test the concentration at your next service
Clear red flags and what to tell a Gas Safe engineer when you book
Some problems are beyond the scope of a radiator key and a bowl of water. Call a Gas Safe registered engineer when you encounter any of the following:
- Pressure drops repeatedly within days of repressurising
- Visible water leaks from radiator valves, pipe joints, or the boiler itself
- Brown or black water released during bleeding (sludge or magnetite)
- Boiler displaying fault codes or locking out after bleeding
- Radiators corroded, blistered, or showing signs of structural damage
- The system has not had inhibitor added in several years
What to tell the engineer when you book: describe which radiators are affected and where in the house they are; say how often you have needed to bleed them; give the pressure reading you observed before and after bleeding; mention any unusual noises (banging, kettling, gurgling) and whether the boiler has shown any fault codes. That briefing cuts diagnostic time significantly.
Regulatory note: any work on the gas supply, boiler heat exchanger, or gas controls must be carried out by a Gas Safe registered engineer. This is a legal requirement under Gas Safety (Installation and Use) Regulations 1998 — not a recommendation. Boiler work carried out by an unregistered person is illegal and invalidates home insurance.
Plumber-tested tips and common mistakes to avoid
The mistakes that generate repeat call-outs are almost always the same ones.
Never bleed a hot system. The risk is not just scalding — a running pump creates pressure differentials that can pull air back into the circuit through the open valve, making the problem worse.
Open the valve only a quarter to half a turn. A full turn risks the valve spindle coming out entirely, releasing a jet of water you cannot easily stop. Quarter-turn is enough to release air; half-turn is the absolute maximum.
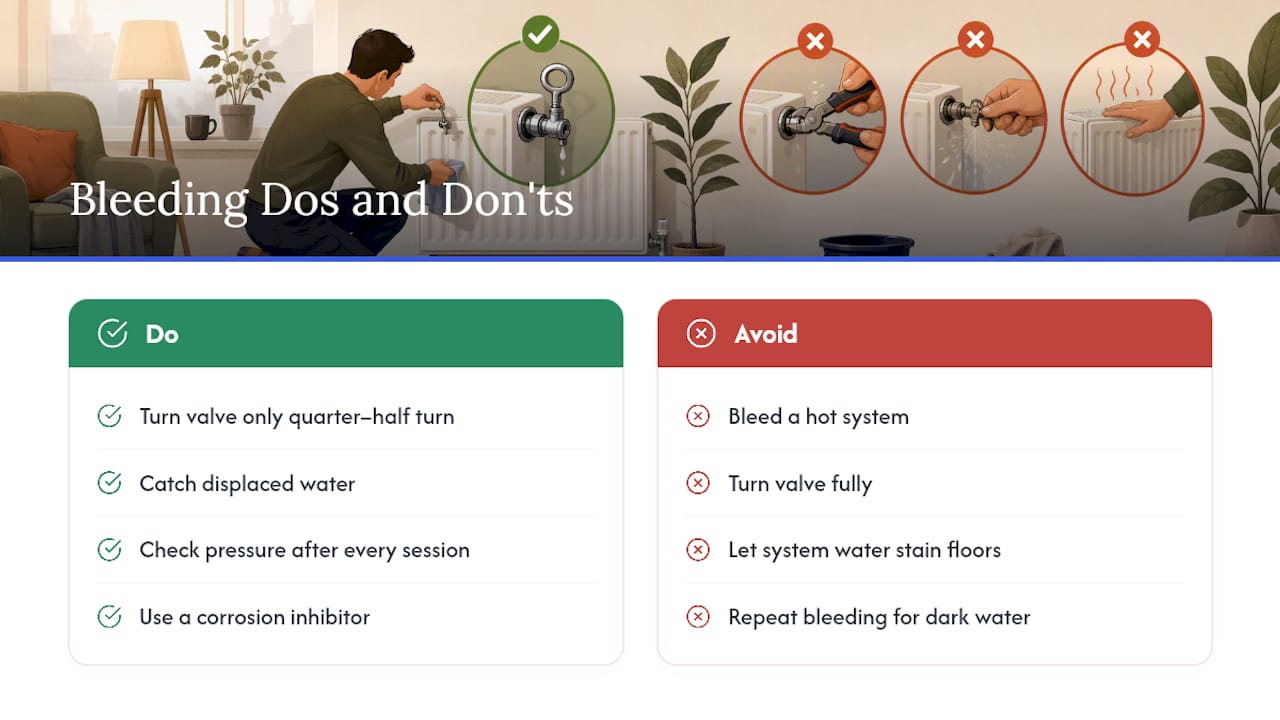
Always catch the water. Even a small amount of system water contains corrosion inhibitor and dissolved minerals. It stains carpets and can mark floorboards permanently.
Check pressure after every session, not just the last radiator. If you bleed six radiators and only check pressure at the end, you have no idea when the drop occurred or how far it fell during the process.
On BS 7593: this British Standard covers the treatment of water in domestic hot water central heating systems. It recommends the use of a corrosion inhibitor (such as Fernox F1 or Sentinel X100) and specifies water quality requirements. If dark water appears during bleeding, BS 7593 compliance — via a chemical flush or powerflush — is the appropriate remediation, not repeated bleeding. The BEIS domestic heating research supports the wider case for maintaining heating system efficiency through proper water treatment and regular upkeep.
Key takeaways
Bleeding radiators in the correct order, with the system cool and the boiler pressure checked afterwards, is the single most effective radiator maintenance task a UK homeowner can do.
| Point | Details |
|---|---|
| Spot the symptoms early | Cold tops, gurgling pipes, or slow heat-up all indicate trapped air needing attention. |
| Always cool the system first | Switch heating off and wait 20–30 minutes before opening any bleed valve. |
| Bleed in the right order | Start ground floor, furthest radiator from the boiler first; work upwards and inwards. |
| Restore boiler pressure | Check the gauge after bleeding; repressurise to 1–1.5 bar via the filling loop if needed. |
| Your-local-plumber for persistent faults | Book a diagnostic visit for dark water, repeated pressure loss, or leaks beyond DIY scope. |
A local plumber's view on the calls we actually get
The most common call we receive in autumn is some version of "the upstairs radiators aren't getting hot." Nine times out of ten, it is trapped air — and a straightforward bleed in the right order fixes it within the hour. The second most common is "I bled them but the pressure keeps dropping," which is a different problem entirely: usually a slow leak, a failing expansion vessel, or a system that has never had inhibitor added and is corroding from the inside.
What strikes me about both situations is how much unnecessary worry a bit of prior knowledge prevents. Homeowners who know their boiler pressure gauge, know where the filling loop is, and understand the difference between an air problem and a sludge problem make far better decisions — and avoid the expensive mistake of repeatedly bleeding a system that actually needs a powerflush.
The BS 7593 standard exists precisely because water quality inside a heating circuit matters enormously to long-term efficiency. A system running on untreated water corrodes faster, blocks up sooner, and costs more to run. If you have never had inhibitor added, ask about it at your next service. It is a small addition that makes a measurable difference to how long your radiators and boiler last.
Persistent radiator problems? Your-local-plumber can help
If you have bled your radiators, restored the pressure, and the problem keeps coming back, that is the point where a professional diagnostic saves you money rather than costs it.

Your-local-plumber provides on-site diagnostic visits, powerflush services, valve replacements, inhibitor top-ups, and TRV installation across multiple UK towns and cities, with fixed pricing and 24/7 availability. Every engineer is Gas Safe registered, so boiler work and gas-related repairs are covered in the same visit. There is no guesswork about what you will pay before the job starts.
If you are seeing dark water, repeated pressure drops, or a radiator that simply will not heat despite a clean bleed, book a heating diagnostic with Your-local-plumber and get a clear answer the same day.
Useful sources and further reading
A short list of the references used to compile this guide, for homeowners who want to check the originals or read further.
- Eight quick DIY jobs to save energy - Energy Saving Trust
- How to bleed a radiator | Smart Energy GB
- How to Bleed a Radiator in the UK - Step by Step Guide - The Garden Patch
- How To Bleed a Radiator Properly: UK Step-by-Step Guide | BookaBuilderUK.com
- Cold Radiators? How to Bleed, Flush & Fix Your Heating | City Plumbing
- How to balance radiators
- How To Bleed a Radiator
- BEIS DHDS final report