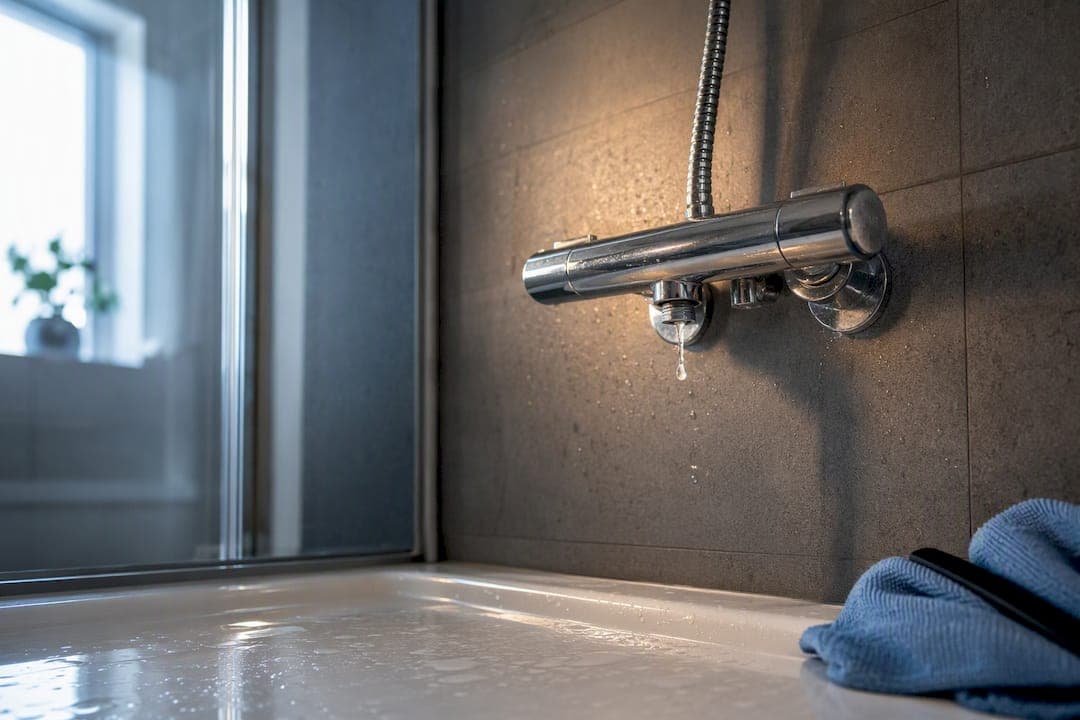
A shower mixer dripping constantly almost always means a worn cartridge or perished O-rings inside the valve body. Turn off the isolating valves feeding the shower, or the stopcock if there are none, before you touch anything. Then inspect the cartridge. If the drip continues after a straightforward cartridge swap, or you can't find an isolation point, that's your cue to call a plumber rather than push on.
TL;DR:
- Most dripping shower mixers are caused by worn cartridges, degraded O-rings, or clogged inlet filters, with scaled or damaged cartridges being the most common issue.
- Checking the leak’s origin, such as the shower head, handle seals, or inlet filters, helps diagnose whether the fault is local or broader in the plumbing system.
- Repairing a drip typically involves turning off the supply, removing the handle and cartridge, then cleaning or replacing damaged parts, often in under half an hour.
- If the leak persists after a cartridge replacement or the mixer is concealed or lacks isolation valves, calling a professional is advisable to avoid damage or safety risks.
- Routine inspection and cleaning of inlet filters and seals every three to twelve months can prevent leaks caused by scale build-up and worn internal components.
Table of Contents
- What's causing your shower valve dripping and where's it coming from?
- How to fix a shower mixer valve leak yourself
- When should you call a plumber instead of DIY-ing it?
- How often should you check your shower valve to prevent leaks?
- Author's checklist: what a plumber checks first, and why replacement often wins
- Prefer to have a plumber sort it? Here's how Your-local-plumber can help
- Sources
- FAQ
What's causing your shower valve dripping and where's it coming from?
Before you strip anything down, work out where the water is actually appearing. A drip from the shower head points to the cartridge or valve body upstream. Water pooling around the handle or escutcheon plate usually means a perished seal behind the trim. And if the leak only shows up for thirty seconds or so after you turn the shower off, that's often just residual water clearing the pipework rather than a genuine fault, according to Checkatrade's cost guide.
Run through these checks before deciding on a repair:
- Watch the drip pattern. A steady, ongoing drip that doesn't stop after a minute means a seal or cartridge has failed.
- Check the hose and head connections. A leaking shower faucet is sometimes nothing more than a loose or perished hose washer, not the valve itself.
- Remove the shower head and run the water briefly to see if the leak persists at the outlet without it fitted.
- Look for isolation valves near the shower, usually small screwdriver-slot taps on the supply pipes behind an access panel.
The most common culprits behind a genuinely leaking shower mixer are worn ceramic disc cartridges, degraded O-rings and seals, and debris or scale clogging the inlet filters. Mira Showers notes that a scaled or worn cartridge is the single most frequent cause, and that cleaning or replacing it is nearly always cheaper than replacing the whole unit. Less commonly, cross-flow through a failed non-return valve or a fault in the thermostatic mixing valve (TMV) can produce a drip that looks identical from the outside but needs different parts entirely.
If it's genuinely one tap or one shower misbehaving while everything else in the house runs fine, the fault is almost certainly local to that fitting rather than a wider plumbing issue. Which? makes the same point about single-tap faults generally: they're usually down to the cartridge, filters, or a flexible connector, not the boiler or the mains.
How to fix a shower mixer valve leak yourself
Most straightforward drips are fixable with basic tools and half an hour. Here's the sequence a plumber would actually follow.
Tools and materials you'll need:
- Adjustable spanner or basin wrench
- Flathead and Phillips screwdrivers
- Allen keys (many handles use hex screws under the cap)
- Replacement cartridge and O-ring set matched to your model
- PTFE tape, a small tub for parts, and a torch
- Old towel and a bucket for residual water
Step-by-step repair:
- Isolate the supply. Turn off the dedicated isolating valves if fitted, or the main stopcock if not. Open the shower fully afterwards to drain residual pressure and confirm no water flows.
- Remove the handle. Pop off the decorative cap (usually a gentle lever with a flat screwdriver) to reveal a fixing screw, then lift the handle away.
- Take off the escutcheon and retaining ring. This exposes the cartridge housing. On concealed mixers, you may need to remove a cover plate set into the tiling first, so work carefully to avoid cracking grout.
- Extract the cartridge. Some unscrew, others pull straight out or need a small retaining clip removed first. If it won't budge, don't force it. See the tip below.
- Inspect what you've removed. Look for chipped ceramic discs, a hardened or flattened O-ring, and gunge in the small mesh filters at the base of the cartridge or in the inlet ports.
- Clean or replace. Light scale often clears with a soak in a mild descaling solution and a soft brush. Chipped discs or perished rubber mean the cartridge needs replacing, not cleaning.
- Match the new part correctly. Measure the cartridge's overall length, diameter, and the spacing between the retaining lugs, and photograph it in situ before you remove it. Two mixers that look identical from the front often take completely different internals, so these measurements matter more than the brand name on the handle.
- Reassemble in reverse, fitting fresh O-rings lightly greased with silicone (never petroleum jelly, which degrades rubber).
- Restore the water supply gradually and check for leaks at every joint before turning the shower on fully.
- Run a thermal shut-off test if the mixer includes a TMV: set it to maximum temperature, briefly isolate the cold feed, and confirm the flow reduces or stops and the temperature drops. If it doesn't, the TMV needs servicing.
Pro Tip: If a cartridge won't pull free, resist the urge to lever it with a screwdriver. Soak the housing in warm water with a splash of descaler for twenty minutes first. Scale build-up around the cartridge base is what usually seizes it, not the fitting itself.
For a full walkthrough on sourcing the correct part, Measure 4 Things Before Replacing a Shower Cartridge covers the exact dimensions to check. If your issue turns out to be the tap body rather than the shower, Fix a Dripping Mixer Tap in 20–40 Minutes uses the same isolation and disassembly logic.

When should you call a plumber instead of DIY-ing it?
Some jobs aren't worth the risk of doing yourself, particularly where isolation isn't straightforward.
- No isolating valves near the shower, meaning any repair needs a full system drain-down first.
- A concealed mixer set into the wall, where trim removal risks damaging tiling if you're not confident.
- Signs the TMV itself is faulty rather than just the cartridge, since scald protection is a genuine safety issue.
- The drip continues after you've already replaced the cartridge and seals correctly.
Labour for simple tap or mixer maintenance typically runs from £80 to £260, with more complex jobs involving parts and drain-down pushing past £300, and call-out fees of £45 to £150 on top depending on the tradesperson. Attempting a job that actually needs isolation valves you don't have can turn a twenty-minute fix into a multi-hour drainage and re-commissioning task, so it's worth getting a quote before you start stripping the wall out. When you do call someone, have the leak location, what you've already removed, and the cartridge measurements ready. It speeds diagnosis considerably.
How often should you check your shower valve to prevent leaks?
A little routine attention keeps drips from coming back. Triton's maintenance guidance recommends checking inlet filters and running thermal shut-off tests roughly every three to twelve months, depending on the device and how hard your water is.
- Clean or descale filters more often in hard water areas. Scale build-up above roughly 200 ppm temporary hardness accelerates cartridge wear.
- Consider an inline scale inhibitor if you're descaling every few months regardless.
- Keep a note of the cartridge model, part number, and service date somewhere accessible, so the next fix takes minutes rather than another round of measuring.
Pro Tip: Stick a small label with the cartridge part number inside the bathroom cabinet door. It saves you dismantling the valve again just to find out what to order.
Author's checklist: what a plumber checks first, and why replacement often wins
On arrival, the checklist is always the same: isolate the supply, locate the actual source of the drip, check whether a TMV is involved, then remove the cartridge if it's safe to do so. Older or budget mixers often get replaced outright rather than repaired, simply because a new cartridge can cost nearly as much as a new valve body once you account for the time spent sourcing a discontinued part. Experienced plumbers work to that same triage order on every call-out, with fixed pricing agreed before work starts.
— Michael
Prefer to have a plumber sort it? Here's how Your-local-plumber can help
If the isolation valves are missing, the mixer is concealed, or you've already had a go and the drip won't quit, that's exactly the point where a professional visit pays for itself. Your-local-plumber handles tap and shower repairs and emergency call-outs with a same-day response and a no fix, no fee guarantee, so you're not paying for a wasted visit if the job turns out to be simpler than expected.

Before the engineer arrives, it helps to know where your stopcock is, have a note of what you've already tried, and, if possible, a photo of the mixer or its model number. That alone can shave real time off the visit. Repairs often carry a warranty, and pricing is agreed upfront with no call-out fee, so you know the cost before anyone starts work. To get someone out, book directly through the plumbing services page and describe the fault as specifically as you can. It's the fastest route from a dripping mixer to a dry bathroom.
Sources
For readers who want the underlying guidance rather than the summary, these cover safety standards, maintenance schedules, and cost benchmarks:
- How much do plumbers cost? - Checkatrade
- How to fix a dripping shower head — Mira Showers
- Which? expert advice on tap-specific faults
FAQ
How do I stop my shower mixer from dripping?
Isolate the water supply first, then remove the handle and cartridge to check for scale, chipped ceramic discs, or a perished O-ring. Cleaning clears light scale, but a chipped or worn cartridge needs replacing, and Mira Showers confirms this is the fix that resolves most persistent drips.
Why is my shower dripping even though the water is off?
A brief dribble for thirty seconds or so after you turn the shower off is usually just residual water clearing the pipework, not a fault. If the drip continues indefinitely, a worn cartridge or seal is letting water past even with the handle fully closed.
How do I fix a leaky shower mixing valve?
Turn off the isolating valves or stopcock, strip the trim to reach the cartridge, and inspect it for scale, chips, or degraded rubber before cleaning or replacing it. Measure the cartridge's length, diameter, and lug spacing before ordering a replacement, since mixers that look identical often take different internal parts.
Why is my mixer tap dripping when off?
This almost always points to a worn seat or cartridge inside the valve that no longer seals fully. Which? notes that a single dripping tap is usually a local fault in that fitting rather than a wider plumbing problem, so replacing the cartridge is typically the quickest fix.
How much does it cost to fix a dripping shower mixer?
Simple cartridge repairs typically cost £80 to £260 in labour, with call-out fees of £45 to £150 depending on the tradesperson. Some plumbing services charge no call-out fee and confirm pricing before starting the job.