
If your mixer tap drips from the spout, it is usually a worn ceramic cartridge or washer; if it leaks at the base of the spout, worn O-rings are the likely culprit. Isolate the water supply before touching anything. Most repairs take 20 to 40 minutes and cost only a few pounds in parts, but corroded valves or seized fittings mean it's safer to call a plumber than force the job.
TL;DR:
- Most leaks from a mixer tap come from worn O-rings, washers, or ceramic cartridges, with replacement parts needing to match exact measurements.
- Isolate water supplies before disassembling the tap, verify the valves turn properly, and photograph parts to prevent reassembly errors.
- Using the correct tools and silicone-based grease is essential; overtightening the retaining nut can cause future leaks.
- Persistent leaks after repair may indicate incorrect part sizes, leftover limescale, or a damaged tap body, requiring professional intervention.
- For recurring issues or seized valves, calling a plumber is often safer and more cost-effective than forcing repairs oneself.
Table of Contents
- Quick diagnosis: where is your dripping mixer tap actually leaking?
- Tools and parts checklist for fixing a leaking mixer tap
- How to isolate your mixer tap before starting any repair
- Replacing a ceramic cartridge in a modern mixer tap
- Changing a washer in an older compression-style mixer tap
- Fixing base leaks: replacing spout O-rings
- Why your DIY tap repair might still leak, and when to call a plumber
- How to identify and buy the right tap cartridge or washer
- Preventing your mixer tap from dripping again
- A plumber's honest notes on fixing a dripping tap yourself
- Need a hand with a leaking mixer tap? Here's how we can help
- Sources
- FAQ
Quick diagnosis: where is your dripping mixer tap actually leaking?
Before buying parts, work out exactly where the water is coming from. A drip from the spout outlet usually points to a failed washer or a worn ceramic cartridge, while water seeping around the base of the spout, where it swivels, almost always means the O-rings have perished.
A few checks narrow it down fast:
- Spout outlet drip: water only appears at the tip, even with the tap fully closed. This is your cartridge or washer.
- Base or handle seep: water pools around where the spout meets the tap body, or dampness appears near the handle. This is the O-rings.
- Isolation testing: turn off the hot supply valve only, then the cold. If the drip stops on one side, you've found the faulty half of the mixer.
- Handle travel test: a smooth quarter-turn action that shuts off cleanly usually means a ceramic cartridge; several full rotations before it stops points to an older compression washer.
A slight but constant drip can waste up to half a litre an hour, which adds up to nearly 4,400 litres over a year. Worth fixing sooner rather than later, both for the water bill and for the limescale it leaves behind.
Tools and parts checklist for fixing a leaking mixer tap
Gather everything first so you're not dripping water across the kitchen floor halfway through. You'll need an adjustable spanner, a flat and cross-head screwdriver, an Allen key set (for hidden grub screws), pliers, and a soft cloth to protect chrome finishes from scratches.
For parts, buy a replacement cartridge, tap washer, or O-ring set matched to your existing measurements, along with plumber's PTFE tape for threaded joints.
- Adjustable spanner or basin wrench
- Flat, cross-head and Allen key screwdrivers
- Replacement cartridge, washer or O-rings (measured, not guessed)
- PTFE tape and a small tub of silicone grease
Pro Tip: Only use silicone-based grease rated for potable water systems on O-rings and cartridges. Petroleum-based grease degrades rubber seals over time and can contaminate drinking water.
How to isolate your mixer tap before starting any repair
Never dismantle a mixer tap with the water still live. Most kitchen and bathroom taps have isolation valves under the sink; if not, you'll need the mains stopcock.
- Find the isolation valves under the sink (small chrome or plastic slotted valves on the supply pipes) and turn each a quarter turn with a screwdriver until the slot sits across the pipe. If there are none, shut off the mains stopcock instead.
- Open the tap fully to release pressure and drain remaining water, then plug the sink so small screws or seals don't vanish down the plughole.
- Photograph the assembly before removing anything, and lay parts out in order on a cloth as you go.
- If a valve doesn't turn, feels seized, or you can't confirm the water is fully off, stop. Forcing a corroded valve can snap it and turn a dripping tap into a flood. Call a plumber instead.
Replacing a ceramic cartridge in a modern mixer tap
Most mixer taps sold today use a ceramic disc cartridge rather than a traditional rubber washer, and this is the part behind most spout-outlet drips.
- Prise off the small cap on top of the handle to reveal a grub screw or bolt, then loosen it and lift the handle straight up.
- Unscrew or unclip the decorative shroud underneath to expose the retaining nut holding the cartridge in place.
- Undo the retaining nut with a spanner and pull the cartridge straight out. It may need a firm, even tug; don't twist it.
- Inspect it. If limescale is the issue and the ceramic discs aren't scratched, a soak in a 50:50 warm water and white vinegar solution followed by a gentle scrub can restore the seal. Cracked or scored discs mean it needs replacing, not cleaning.
- Fit the new or cleaned cartridge, matching the spline pattern and height exactly, then smear the O-rings lightly with silicone grease before refitting.
- Hand-tighten the retaining nut, rebuild the shroud and handle, then turn the water back on slowly and test.
Pro Tip: Overtightening the retaining nut is the single most common reason a "fixed" tap starts dripping again within weeks. Snug is enough; you're not trying to crush the cartridge into submission.
Changing a washer in an older compression-style mixer tap
If your tap needs several turns to shut off rather than a quarter turn, it's a compression valve with a rubber washer, not a cartridge.
- Isolate the water, then unscrew the handle cap and lift off the handle to expose the spindle and headgear.
- Unscrew the headgear with a spanner, wrapping the jaws in cloth to avoid marking the chrome, and pull the spindle out.
- The washer sits on a small nut or peg at the base of the spindle. Remove it and take note of its exact diameter before buying a replacement.
- Fit the new washer, reassemble in reverse order, and turn the water back on gradually while checking for drips.
If the tap still drips after a fresh washer, the valve seat underneath may be pitted. A seat-reseating tool can smooth this out, but work gently and check with a torch as you go. Aggressive grinding removes metal permanently and can make the fault worse rather than better.
Fixing base leaks: replacing spout O-rings
Water pooling where the spout swivels almost always means perished O-rings rather than a cartridge fault, and the fix is comparatively quick.
- With the water isolated, grip the spout body (protecting the finish with a cloth) and pull or twist it upward and off, depending on the design.
- Slide off the old O-rings and check the grooves underneath for grit or limescale that could be causing the seep.
- Fit new O-rings of the same size, using a light smear of silicone grease so they seat without pinching or twisting.
- Push the spout back down fully, restore the water supply, and check the base stays dry through a full swivel test.
Why your DIY tap repair might still leak, and when to call a plumber
If the drip continues after a repair, the cause is usually one of three things: the replacement part was the wrong size, limescale was left sitting in the seat, or the retaining nut was over or under-tightened.
- Wrong-sized cartridge, washer or O-ring for the specific tap model
- Limescale remaining on the valve seat after cleaning
- Retaining nut too loose (leaks) or too tight (distorts the seal)
- A cracked tap body or distorted thread that no new part will fix
Seized isolation valves, corroded tap bodies, or a spindle that won't budge are your cue to stop. A typical call-out for a small tap repair in the UK runs from around £60 to £120 depending on the job and your location.
How to identify and buy the right tap cartridge or washer
Guessing the part is the most common way DIY repairs go wrong. Cartridges are not interchangeable between brands: common UK diameters cover a range of sizes, and spline count and height vary just as widely.
- Photograph the old cartridge or washer next to a ruler before disposing of it, capturing diameter, height, and the number of splines on the stem.
- Note any brand markings or model numbers stamped on the body, shroud, or packaging if you kept it.
- Take the old part to a plumbers' merchant, or use a specialist identification service such as Tap Magician if the tap is unbranded or obscure.
- Check the listing confirms WRAS approval for potable water use before buying online.
Preventing your mixer tap from dripping again
A little maintenance now beats another repair in six months. Descale the cartridge and aerator every few months, particularly if you're in a hard-water area, since mineral buildup is a major driver of premature cartridge and washer wear.
- Wipe down and descale the spout and cartridge every few months
- Avoid cranking the handle shut with force; ceramic cartridges only need a light quarter turn
- Check O-rings for perishing whenever you clean the base of the spout
- Confirm isolation valves under the sink actually turn, so you're not fighting a seized valve during a future repair
Pro Tip: If you've had two cartridge failures in as many years, it's worth asking whether your water is unusually hard rather than blaming the tap itself.
A plumber's honest notes on fixing a dripping tap yourself
Most dripping mixer taps are genuinely fixable at home, and I'd rather see a homeowner have a go than let a small drip run for months. The mistakes I see most often aren't complicated: skipping the photo before disassembly, mixing up which small screw came from where, or cranking a retaining nut far tighter than it needs.
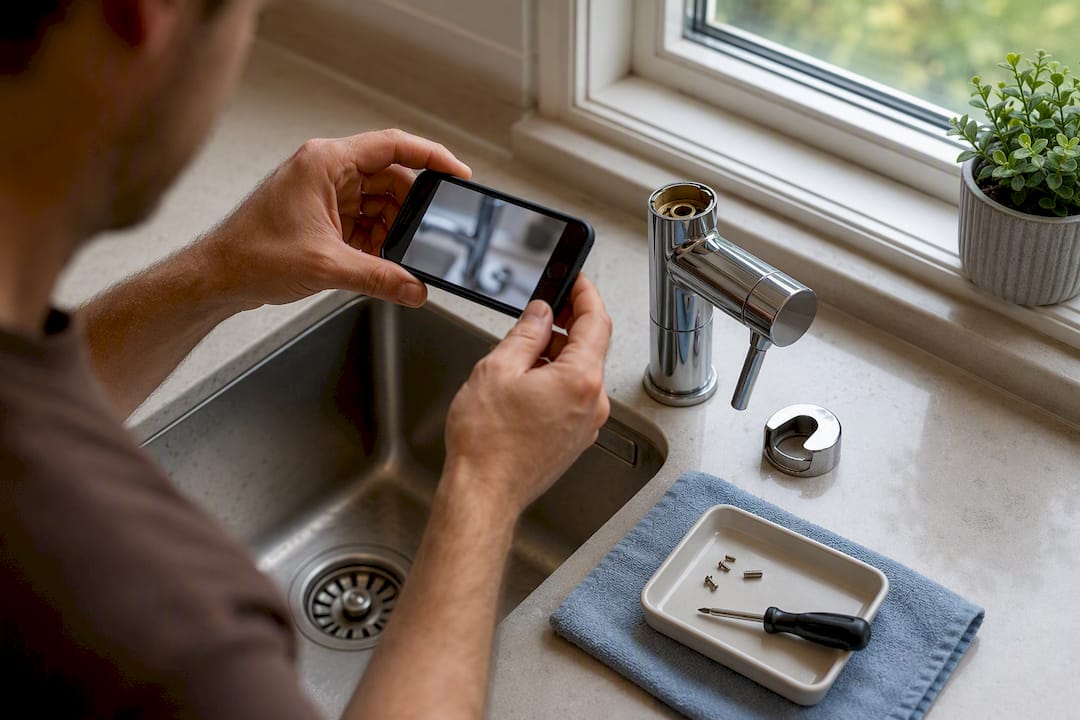
Test your isolation valves before you undo a single screw, not after. If a valve doesn't turn cleanly, that's information, not an obstacle to push through.
Michael has worked in residential plumbing and heating for years, including emergency call-outs and tap and cartridge replacements across households where DIY attempts had already gone sideways. Your-Local-Plumber built its reputation on turning up fast and pricing the job honestly before touching a spanner, and that's the standard worth expecting from anyone you call in.
— Michael
Need a hand with a leaking mixer tap? Here's how we can help
Sometimes the drip isn't the problem, it's the seized isolation valve underneath it, or a tap body that's corroded past the point of a cheap fix. That's where a call to a professional saves you more than it costs. Your-local-plumber runs on transparent pricing with no call-out fee and a fix no fee guarantee, so you know what you're paying before any work starts.

If your valves won't budge, the tap body is cracked, or you'd simply rather not spend your Saturday under the sink, our tap repair and replacement service covers exactly this kind of job, backed by a 12-month warranty on the work. For leaks that won't wait, our emergency plumbing response aims to get an engineer to you same-day, 24/7, including holidays. Book online or call for a same-day quote and let someone who does this daily sort it properly the first time.
Sources
The step-by-step procedures in this guide draw on established trade references, including DIY Doctor's mixer tap repair guide and Victorian Plumbing's tap-fixing advice. For cartridge identification specifically, Bathroom Spare Parts' cartridge guide and Hart Plumbing Spares' sizing chart are worth bookmarking before you order parts.
- Repairing a Leaking Mixer Tap or a Dripping Kitchen Mixer Tap | DIY Doctor
- How to fix a dripping tap (Victorian Plumbing)
- Unlocking the Mystery: How to Identify Ceramic Disk Tap Cartridges
- Tap valve cartridge guide | Hart Plumbing Spares
FAQ
How do I stop a dripping mixer tap?
Isolate the water supply, then replace the worn cartridge or washer if the drip comes from the spout, or the O-rings if it leaks at the base. Most fixes take under 40 minutes once you have the right part.
How do you change a washer in a mixer tap?
Isolate the supply, remove the handle and headgear, lift out the spindle, and swap the old washer for a new one measured to match before reassembling and testing slowly.
How much does a plumber charge to fix a dripping tap?
A typical call-out for a small tap repair in the UK runs roughly £60 to £120 depending on location and complexity; Your-local-plumber offers transparent pricing with no call-out fee, so you know the cost upfront.
Can you fix a leaking mixer tap yourself?
Yes, in most cases. Spout-outlet drips usually need a new cartridge or washer, and base leaks usually need new O-rings, both straightforward jobs if the isolation valves work properly. Seized valves or a corroded tap body are the point where calling a plumber is the safer, quicker option.