
Salt, wind and constant moisture attack a seaside property at a significantly faster rate than an inland equivalent, so the right rhythm is monthly rinsing of glass and metalwork, quarterly inspection of fixings and timber, and an annual full survey of roof, gutters and hidden connectors.
- Rinse windows, cladding and metalwork with fresh water
- Inspect fixings and fastener heads for early rust
- Keep indoor relative humidity in the 40 to 60% band
- Clear gutters and check flashings before storm season
| Cadence | Core tasks |
|---|---|
| Monthly | Fresh-water rinse of glass, render and railings |
| Quarterly | Fastener and sealant check, gutter clearance, timber inspection |
| Annual | Full roof survey, hidden connector inspection, HVAC service |
Pro Tip: A five-minute hose-down of windows, door furniture and railings after a salty spell costs nothing and does more to slow corrosion than almost any product you can buy.
Specify A4/316 stainless for anything exposed, follow BS 8104 for rain penetration risk, and treat 40 to 60% indoor humidity as your baseline, not an afterthought.
Key Takeaways
Preventing rapid coastal deterioration comes down to a fixed rhythm: monthly rinsing, quarterly fastener and humidity checks, and an annual full inspection of roof, gutters and hidden connectors.
| Point | Details |
|---|---|
| Rinse monthly | Fresh water on glass, render and metalwork removes salt before it crystallises. |
| Specify marine-grade fixings | Use A4/316 stainless and BS EN ISO 1461 galvanising anywhere exposed to sea air. |
| Hold humidity at 40 to 60% | Extraction, trickle vents and dehumidifiers stop mould and timber warping. |
| Budget a coastal uplift | Add roughly 20 to 30% to inland maintenance estimates for realistic planning. |
| Book Your-local-plumber for failures | Call in emergency leaks, drainage backups or storm damage once maintenance alone won't fix it. |
Table of Contents
- What are the best practices for coastal home maintenance by season?
- Should you soft wash or pressure wash a coastal exterior?
- Which metals and fixings resist coastal corrosion best?
- How often should you inspect a coastal roof and gutters?
- What humidity level prevents mould in a coastal home?
- When should coastal plumbing and drainage get a professional check?
- Which building materials suit coastal exposure best?
- How much should you budget for coastal home maintenance?
- Why does salt crystallisation damage coastal buildings?
- How do you prepare a coastal home for storms?
- A local tradesperson's view on hidden coastal failures
- When to call a plumber for coastal home problems
- Sources
What are the best practices for coastal home maintenance by season?
Coastal deterioration doesn't follow a calendar evenly. Spring is for structural inspection after winter storms; fewer people realise autumn is the more important window, because it's your last chance to fix weak points before the worst weather hits.
| Season | Priority tasks |
|---|---|
| Spring | Roof and flashing inspection, repaint prep, clear winter debris |
| Summer | Rinse cycles, timber oiling, HVAC filter change |
| Autumn | Gutter clearance, fastener check, storm-proofing |
| Winter | Humidity monitoring, leak watch, minimal exterior work |
- Check interior humidity monthly through winter, when condensation risk peaks
- Rinse render, glazing and metalwork every four to six weeks in summer
- Service HVAC filters each season change, more often if sea-facing
- Reapply timber oil or varnish annually; composite alternatives need only a wash
Homes facing directly onto open water need every one of these tasks roughly twice as often as a sheltered property a few streets back, because salt deposition falls off sharply with distance from the shoreline, a pattern confirmed by a study of building deterioration in Llandudno.
Should you soft wash or pressure wash a coastal exterior?
Soft washing, low pressure combined with a biocide detergent, is the safer default for render, painted timber and roof tiles, because high-pressure jets force water behind joints and lift paint that's already thinned by salt exposure. Reserve pressure washing for hard, non-porous surfaces like concrete paths and driveways where there's no risk of forcing moisture into a cavity.
- Rinse the whole surface with fresh water first to lift loose salt.
- Apply a biocide wash and leave it to dwell before rinsing.
- Let the substrate dry fully, ideally 48 hours, before any repaint.
- Scrape and feather any failing paint edges rather than painting over them.
- Prime bare timber or masonry before applying the topcoat.
For paint, silicone-based, elastomeric or mineral silicate coatings outperform standard emulsions in salt-laden air, particularly with biocide additives against algae. Timber fares best with marine-grade varnish or oil reapplied annually, though composite cladding needs only the occasional wash and skips the recoating cycle entirely.
- Marine-grade varnish or Danish oil for exposed timber
- Composite or fibre cement cladding where low maintenance matters more than authenticity
- Silicone or elastomeric topcoats over standard masonry paint
Pro Tip: Never paint over a chalky or salt-crusted surface. A quick rub test, run a dark cloth over the wall, tells you instantly whether it needs another rinse before primer goes on.
Which metals and fixings resist coastal corrosion best?

Corrosion rarely starts where you can see it. It begins at microscopic joints, fastener heads and the hidden underside of brackets, which is why an annual inspection of these non-obvious connection points catches failure while it's still cheap to fix.
Specify A4/316 stainless steel for anything within a few hundred metres of the shoreline, hot-dip galvanising to BS EN ISO 1461 for larger steelwork, and marine-grade coatings on any mild steel that can't be replaced. Powder-coated aluminium generally outlasts uPVC on window frames facing open water, though both need perimeter sealant checked yearly.
Most coastal corrosion failures trace back to one thing: a standard-grade fastener specified where a marine-grade one should have been used. The metal looks fine on the outside for years, right up until it doesn't.
- Fastener heads and brackets, checked for rust bloom or pitting
- Lintels and structural steel, checked where paint has chipped
- Flashing laps and fixing points, checked for movement
- Window and door perimeter sealant, checked for cracking
Coastal corrosion moves fast. Deterioration at the coast runs two to three times the inland rate, which is exactly why an annual fixing check earns its keep.
How often should you inspect a coastal roof and gutters?
Twice a year as a minimum, plus a check after any named storm. Look at ridge tiles, ridge cement, flashing laps around chimneys and dormers, and the eaves for lifted or cracked tiles.
- Ridge and hip tiles for movement or cracked mortar
- Flashing at every roof junction for lifted edges
- Gutters and downpipes for debris, sagging brackets and leaf guard damage
- Rainwater disposal points, checking they run clear to a soakaway or drain
Book a professional the moment you see loose flashing, a persistent leak after rain, or any sign of rafter movement inside the loft. A gutter and downpipe check is something most homeowners can do safely from ground level with binoculars, but anything requiring a ladder on a pitched roof is a job for someone insured for it.
Pro Tip: Clear gutters before the leaves fall, not after. A blocked downpipe during an autumn storm sends water straight down the wall, and that's how damp starts inside cavities.
What humidity level prevents mould in a coastal home?
Keep indoor relative humidity between 40% and 60%. Coastal air carries a near-constant vapour drive into the building fabric, and anything above 60% for sustained periods invites mould growth and warps timber joinery and flooring.
Fitting extract fans in bathrooms and kitchens, trickle vents in habitable rooms, and considering MVHR for a heavily insulated retrofit all reduce the moisture load. A portable dehumidifier is a reasonable stopgap in a single problem room. HVAC filters need changing every three months near the sea, roughly twice the inland rate, because salt-laden air clogs them faster.
- Buy a £10 hygrometer and place it in the worst-affected room.
- Treat any reading above 65% for more than a few hours as an action trigger.
- Run extraction during and after showers or cooking, not just when condensation appears.
- Service or replace HVAC filters every three months in exposed properties.
Pro Tip: If budget only stretches to one fix this year, put it into bathroom extraction. It's the cheapest single change that moves humidity readings the most.
When should coastal plumbing and drainage get a professional check?
External pipework near the coast corrodes at its metal clips and brackets long before the pipe itself fails, so check those fixings every quarter rather than waiting for a visible drip. Buried pipework in saline soil is harder to monitor and worth a specialist look every few years.
- Metal clips and brackets on exposed pipework, checked for rust
- Gutter-to-downpipe joints, checked they still run to a soakaway or the mains drain
- Sump pumps, tested seasonally where a property sits below street level
- Insulation around cold-water pipes, checked for salt staining or damp patches
Call a plumber or surveyor if you find repeated blockages, damp patches with no obvious source, or insulation that's visibly salt-contaminated, since retrofitted cavity insulation can trap salt-laden moisture against wall ties and accelerate hidden corrosion. An essential plumbing maintenance checklist is a useful reference for the routine side of this.
Pro Tip: Salt staining on pipe lagging is rarely just cosmetic. It usually means moisture has been sitting there long enough to start attacking the metal underneath.
Which building materials suit coastal exposure best?
BS 8104 sets out how to assess exposure to wind-driven rain, while BS 8500 governs concrete exposure classes, both of which should inform any renovation brief for a property within reach of sea spray. Denser, lower-porosity materials resist chloride ingress far better than standard specifications.
Engineering brick, silicone or polymer renders, fibre cement and composite cladding all outperform standard masonry finishes in salt-laden air. A ventilated rainscreen detail with generous eaves overhang keeps driving rain off the wall face rather than letting it track down and pool at weak points.
Specify to the exposure class the building actually faces, not the one that's cheapest to detail. The extra cost of A4 stainless fixings and a proper rainscreen gap is small next to the cost of chasing hidden corrosion five years later.
- Ask for BS 8104 exposure category on any quote
- Specify A4/316 fixings throughout, not just at obvious pinch points
- Request a ventilated rainscreen detail with adequate eaves depth
- Confirm concrete mix meets the relevant BS 8500 exposure class
How much should you budget for coastal home maintenance?
Prioritise by risk: hidden roof fixings and non-visible connectors first, HVAC coils and exposed metalwork second, cosmetic finishes last. A qualified surveyor can spot early-stage defects that a homeowner walkthrough will miss entirely.
- Soft wash of render or cladding: a few hundred pounds depending on size
- Full repaint with marine-grade coatings: a low-to-mid four-figure sum for an average house
- Gutter clearance and minor repair: usually under £200 per visit
- Fastener or bracket replacement: varies widely with access and scope
- Building surveyor inspection: worth commissioning every few years for planned preventative maintenance
Add roughly 20 to 30% on top of a typical inland maintenance budget. That uplift reflects the faster deterioration cycle coastal properties face, and it's cheaper than paying for reactive repairs after the damage is already structural.
Why does salt crystallisation damage coastal buildings?
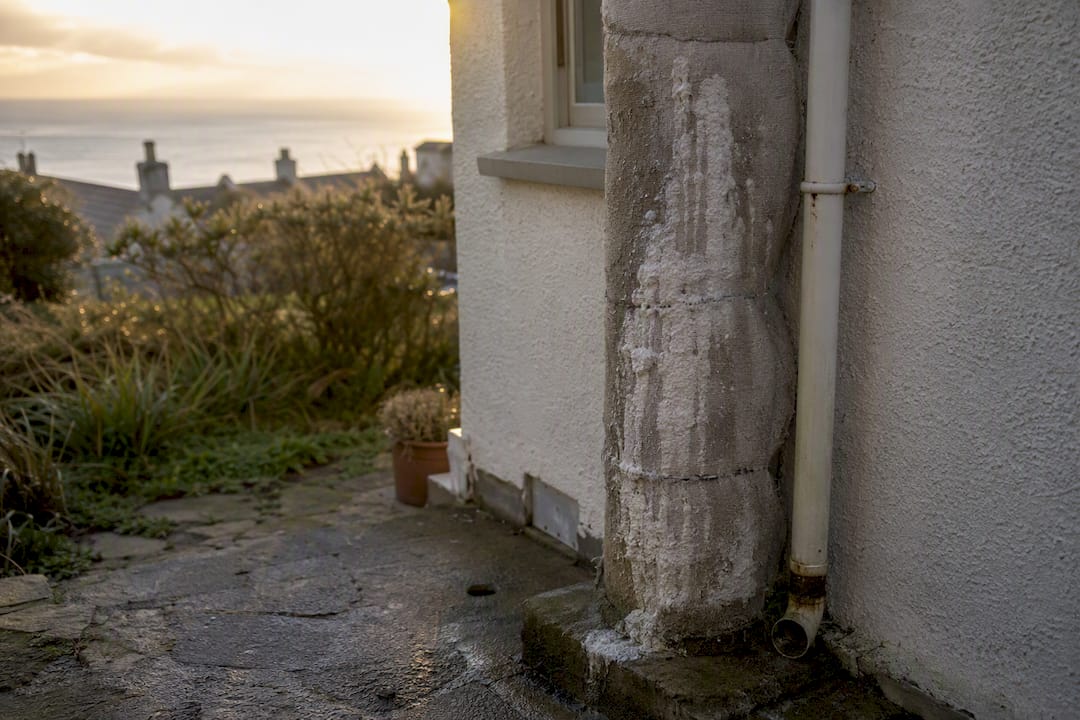
Salt carried in sea spray settles into porous materials, then crystallises as it dries, and that repeated cycle physically pushes surfaces apart from the inside. The closer you are to open water, the heavier the deposition, which is why aerosol salt exposure is a primary driver of deterioration in coastal building studies.
Salts don't just sit passively in a wall. They change how the material handles heat and moisture, which is exactly why blanket waterproof coatings often make things worse rather than better.
- Control water ingress before you worry about the salt itself
- Avoid indiscriminate water-repellent coatings that can trap salts inside
- Consider desalination treatment where crystallisation is already visible
- Monitor porous materials near ground level, where wicking is worst
Marine aerosol measurably alters the thermal and moisture properties of brick and render, which is the scientific case for treating salt exposure as a maintenance variable, not just an aesthetic one.
How do you prepare a coastal home for storms?
Secure loose garden furniture, bins and anything that can become a projectile, and check that gutters are clear before wind speeds pick up. Afterwards, work through checks in order of risk.
- Check the roof and flashings from ground level for obvious displacement.
- Look inside the loft for fresh damp patches or light coming through.
- Check gutters and downpipes for blockages caused by storm debris.
- Photograph any damage immediately for your insurer, before you touch anything.
- Torch, spare batteries and a phone charger kept accessible
- Photos of pre-existing condition on file before storm season starts
- Your insurer's claims line and an emergency tradesperson's number saved
Call an emergency plumber or roofer straight away for active leaks or anything that looks structurally compromised; document everything else for the claim before starting repairs.
A local tradesperson's view on hidden coastal failures
Most call-outs I see aren't dramatic. They're a bracket that's been quietly rusting behind a downpipe for three years, or insulation gone damp where nobody thought to check. The pattern is always the same: whatever's out of sight got skipped.
Pro Tip: Book an annual inspection of anything you can't see from the ground, brackets, flashing undersides, buried fixings. That's where the real damage starts.
DIY is fine for rinsing, gutter clearing and visual checks. Anything involving a ladder on a pitched roof, or suspected damp inside a cavity, needs a professional.
When to call a plumber for coastal home problems
A soft wash and a fresh coat of marine-grade paint will only get you so far if the pipework behind the wall is already failing. Your-local-plumber is the practical next step when maintenance turns into a repair: persistent leaks, drainage that keeps backing up, or damp patches that show up after a storm and don't dry out.

Our engineers handle emergency leak detection, drainage clearance, and HVAC coil and cylinder servicing, the exact jobs that coastal exposure pushes into failure faster than an inland home ever sees. If you've spotted salt staining on pipe lagging, a downpipe that never seems to run clear, or storm damage that's left standing water somewhere it shouldn't be, that's the moment to stop monitoring and start booking. Get a free on-site quote and we'll tell you straight whether it's a quick fix or something bigger.
Sources
- Selecting building materials for UK coastal climates — Durable & weather-resistant solutions
- Coastal exterior paint protection UK | Harsh British coasts — Environmental Coatings
- Why Coastal Properties Deteriorate Faster in Cornwall | Owner's Guide | Coast & Quay Property Care
For anything beyond routine upkeep, a qualified building surveyor can assess complex defects that a homeowner inspection will miss.