TL;DR:
- Draining a toilet requires careful removal of residual water and proper tool use to prevent messes and damage.
- Homeowners should follow a step-by-step process, including shutting off water, flushing, and removing remaining water manually.
- Complex problems or damaged components should prompt calling a professional plumber to ensure safety and proper repair.
Draining toilet for removal sounds straightforward until you're standing in a puddle of unpleasant water wondering what went wrong. Residual water trapped in the bowl and tank is the single biggest source of mess during a toilet swap, and most homeowners only discover this after the damage is done. This guide walks you through every stage of the toilet removal process, from the tools you need to the final check of your drain flange, so you can handle the job cleanly, confidently, and without a costly clean-up bill waiting at the end.
Table of Contents
- Key takeaways
- Draining a toilet for removal: tools and preparation
- Step-by-step: how to drain a toilet before removal
- Troubleshooting common problems
- After removal: preparing for the next steps
- My honest take on DIY toilet removal
- Need a hand with your toilet removal?
- FAQ
Key takeaways
| Point | Details |
|---|---|
| Shut off water first | Always confirm the shut-off valve fully stops water before touching the tank or bowl. |
| Flush, then mop up | One flush removes most water; a sponge or wet/dry vac is needed for what remains in the trapway. |
| Rusted bolts need cutting | Trying to force corroded nuts wastes time and risks floor damage. Cut them instead. |
| Seal the drain after removal | Block the exposed drain with a rag or plug immediately to stop sewer gas entering the room. |
| Inspect the flange before reinstalling | Cracks or damage to the flange must be addressed before fitting a new toilet to avoid future leaks. |
Draining a toilet for removal: tools and preparation
Getting the tools sorted before you start is not optional. The right kit makes the difference between a 30-minute job and an afternoon mopping up avoidable spills.
What you need:
- Adjustable wrench and channel-lock pliers
- Sponge, old towels, and a bucket
- Wet/dry vacuum (optional but highly recommended)
- Heavy-duty rubber gloves
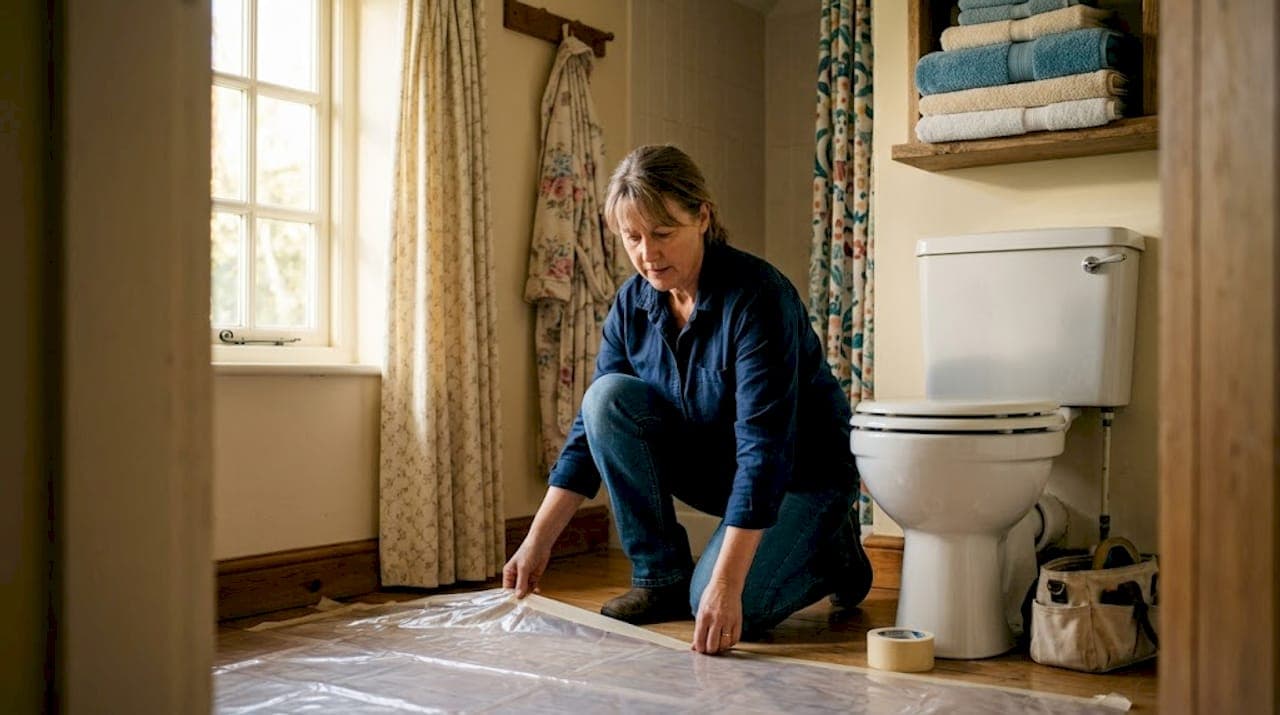
- Plastic sheeting or old newspapers to protect the floor
- Hacksaw or bolt cutters (for corroded bolts)
- Flathead screwdriver
- Utility knife (for cutting caulk)
- Clothes you don't mind ruining
Protecting your floor before you start is something a lot of homeowners skip and then regret. Lay plastic sheeting from the toilet base out to the door. Bathroom floors, particularly those with grout or older linoleum, absorb contaminated water fast. A few minutes of prep saves you a much longer clean-up.
| Item | Purpose | Essential? |
|---|---|---|
| Rubber gloves | Prevent contact with contaminated water | Yes |
| Sponge and bucket | Remove residual water from tank and bowl | Yes |
| Wet/dry vacuum | Fastest method for clearing stubborn water | Recommended |
| Plastic sheeting | Protect flooring from spills and drips | Yes |
| Hacksaw | Cut through rusted or snapped flange bolts | Situational |
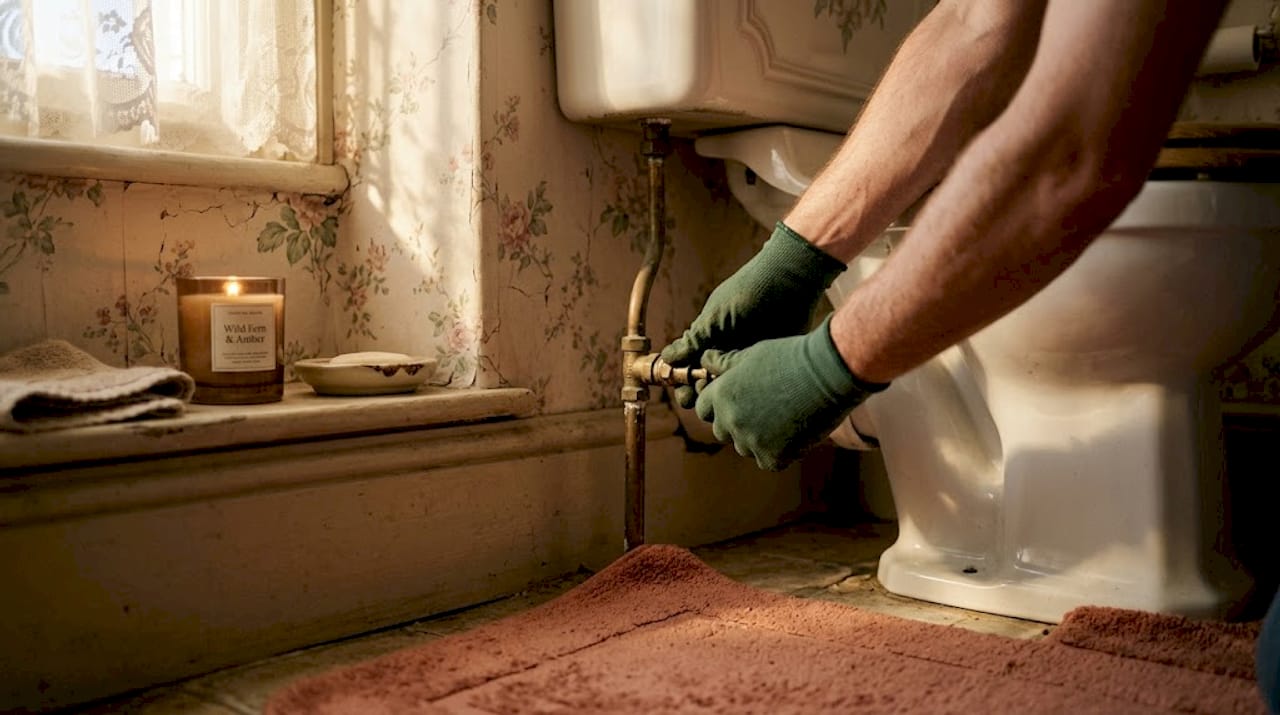
The shut-off valve deserves a specific mention here. It is the small valve on the wall or floor behind your toilet, and it controls the water supply to the cistern. Turn it clockwise until it stops. If it feels stiff or refuses to move, do not force it. A stuck valve is a separate problem, and forcing it can snap the fitting. Draining without a working valve can escalate a simple job into emergency plumbing territory.
Pro Tip: Run the shut-off valve through a full open-to-close cycle every six months. Valves that are never used seize up and often fail at the worst possible moment.
Step-by-step: how to drain a toilet before removal
This is the core of the process. Follow these steps in order and you will avoid the majority of the mess that catches homeowners out.
-
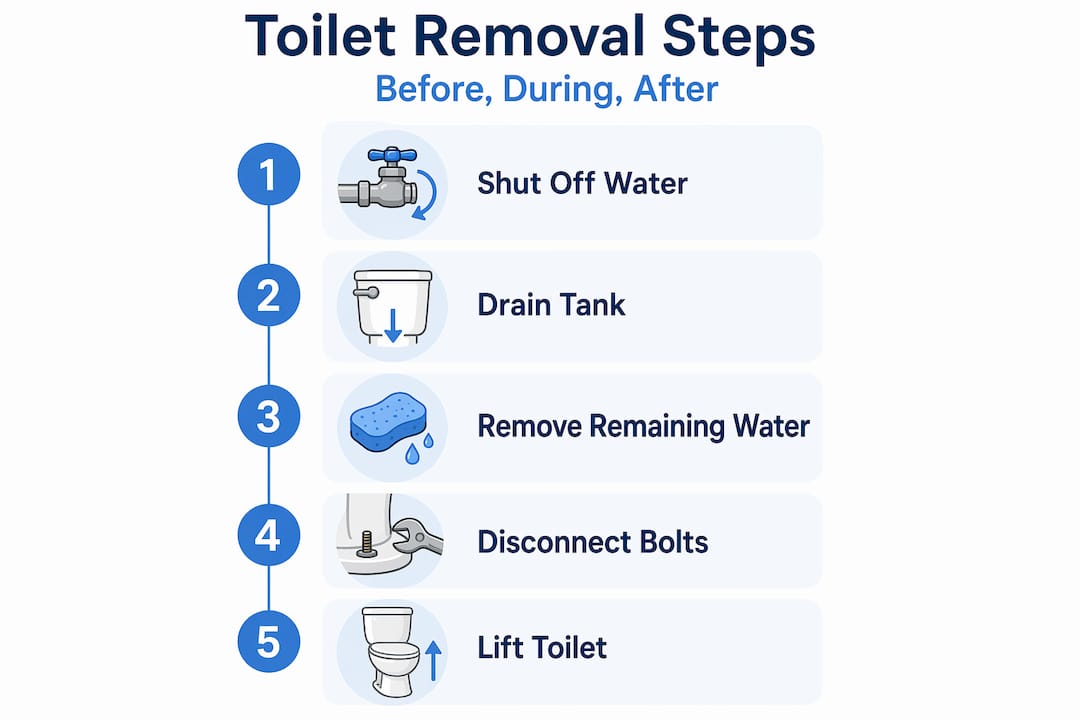
Turn off the water supply. Rotate the shut-off valve clockwise until it stops. This cuts water to the cistern immediately.
-
Flush the toilet. Hold the handle down fully so the cistern empties as completely as possible. This single flush removes the bulk of the water from both the tank and bowl.
-
Remove cistern water with a sponge. There will be a few centimetres of water left at the bottom of the cistern. Use a sponge and bucket to absorb and remove it fully. Squeeze the sponge into the bucket, not back into the cistern.
-
Tackle the bowl. Flushing leaves water in the trapway that gravity alone will not shift. Residual water in the trapway requires manual removal with a sponge, a small cup, or a wet/dry vacuum. A wet/dry vacuum is the quickest method here, but take care not to spread contaminated water across the floor.
-
Disconnect the water supply line. Place a towel under the connection point at the base of the cistern. Use an adjustable wrench to loosen the nut on the supply line. Unscrew it fully by hand and move the line away from the work area. A small amount of residual water may dribble from the line.
-
Remove cistern lid and set it aside safely. Porcelain lids are heavier than they look and break easily on tile floors. Stand it upright against a wall rather than laying it flat.
-
Locate the flange bolts. These are at the base of the toilet, one on each side, usually covered by plastic caps. Prise the caps off with a flathead screwdriver and expose the nuts underneath.
-
Cut the caulk. If your toilet is sealed to the floor with silicone or caulk, run a utility knife around the full base. Take your time here. Cutting too deep into vinyl or tile causes damage that is expensive to fix later.
-
Loosen the flange nuts. Use your wrench or pliers to turn the nuts anti-clockwise. If they spin freely without loosening, the bolt beneath may have snapped or corroded. You will need a hacksaw or bolt cutters for this. Cutting through rusted bolts is faster and far less damaging than forcing them.
-
Lift the toilet. With a second person if possible, grip the toilet at the bowl rather than the cistern and lift straight up. Rock it very gently if the wax seal resists. Expect a small amount of water to escape regardless of how well you drained it. That is normal.
Pro Tip: Slide the toilet onto the plastic sheeting immediately after lifting and carry it out of the room as a unit. Dragging porcelain across tile or hardwood causes scratches that are impossible to reverse.
Troubleshooting common problems
Even with good preparation, things do not always go to plan. Here is how to handle the most common issues that come up during the toilet draining and removal process.
Stuck shut-off valve
If the valve will not close fully, the cistern will keep refilling. Your short-term solution is to turn off the water at the mains stopcock, usually located under the kitchen sink or where the supply enters the building. This is not ideal, but it allows you to complete the job safely.
Water that keeps refilling the bowl
This usually means the shut-off valve is not fully closed, or it is worn and leaking past its seat. Addressing the valve properly is worth doing before you proceed. Improper shut-off during the toilet removal process can turn a contained job into a flooding situation.
Snapped or spinning flange bolts
This is one of the most common delays in toilet removal. Once the nut has been stripped or the bolt corrodes through, no amount of turning will shift it. Rusted nuts that spin are best handled with a hacksaw blade held flat along the floor, cutting through the bolt close to the flange.
Water and time are both your enemies during toilet removal. Standing water left in the bowl or around the base breeds bacteria and odours quickly. Sorting the draining properly, even if it takes 20 minutes longer, pays off every time.
Spills on the floor
Despite your best efforts, some water will escape. Blot it up immediately with old towels rather than wiping. Wiping spreads contamination across a wider surface. Follow up with a household disinfectant spray and leave the floor to dry before continuing.
Pro Tip: Keep a second bucket specifically for dirty sponge water. Mixing it with your clean tools bucket is an easy mistake that spreads bacteria unnecessarily.
When a problem compounds, such as a broken valve combined with a damaged flange, homeowners underestimate the risks of pressing on without proper knowledge. That is the point to stop and call a professional.
After removal: preparing for the next steps
With the toilet out, the work is not quite finished. What you do in the next 15 minutes determines whether your replacement installation goes smoothly or turns into a repair job.
Sealing the drain opening
The exposed drain hole releases sewer gas into your bathroom almost immediately. Stuff an old rag into the opening firmly, making sure it cannot fall through. A proper drain plug or rubber bung is better if you have one. Do not leave the drain open and walk away, even briefly.
Cleaning the flange and removing the old wax ring
The old wax ring must be removed completely before a new toilet goes in. Use a putty knife or old chisel to scrape every trace of old wax from both the flange and the toilet horn if you are reinstalling the same unit. Any wax left behind prevents a proper seal and causes leaks.
Inspecting the flange
With the wax clear, check the flange carefully for cracks, chips, or corrosion. Damaged flanges require replacement before a new toilet is fitted. A cracked flange leads to rocking, leaks, and floor damage that costs significantly more to fix than the flange itself.
| Flange condition | Action required |
|---|---|
| Clean and intact | Proceed with new wax ring and toilet installation |
| Minor surface corrosion | Clean with wire brush; assess stability before proceeding |
| Cracked or broken | Replace flange before fitting new toilet |
| Raised above floor level | May need spacer ring; seek professional advice |
Handling and disposing of the old toilet
Porcelain is heavy and sharp when broken. Wrap the old toilet in cardboard or old blankets before moving it to avoid injury and scratching floors. Most local councils in the UK accept porcelain as bulky waste for collection. Some plumbing merchants and recycling centres also take old sanitaryware. Check your council's website for the correct procedure. You can also read our full step-by-step toilet installation guide for what comes next once the space is ready.
My honest take on DIY toilet removal
I have spoken with a lot of homeowners who tackled this job themselves and were genuinely pleased with the result. I have also seen what happens when things go wrong, and there is a clear pattern in where people come unstuck.
The hidden challenge is not the draining itself. It is the sequence of smaller decisions that build on each other. A stuck valve leads to a mains shut-off, which exposes a corroded gate valve, which turns a two-hour job into a half-day plumbing repair. A toilet removal typically takes a plumber two to four hours, but complications like damaged flooring, broken seals, or corroded pipework extend that significantly. For a homeowner without experience, every unexpected step doubles in difficulty.
My view is that draining and removal is genuinely manageable for most people, provided they follow the sequence properly and stop when something unexpected appears. The mistake I see most often is pushing past a problem rather than pausing to assess it. Misalignment or improper sealing during removal and reinstallation causes bad odours, persistent leaks, and structural floor damage that is genuinely expensive to put right.
If you feel confident working through each step methodically, go for it. But if the shut-off valve is stuck, the flange looks damaged, or the floor around the base feels soft, those are signals worth taking seriously. Calling a plumber at that point is not admitting defeat. It is avoiding a far worse problem two weeks later.
— Michael
Need a hand with your toilet removal?
Sometimes the cleanest and most time-efficient decision is letting a professional take care of it. If your shut-off valve is playing up, the flange looks questionable, or you simply want the job done properly the first time, Your-local-plumber has engineers ready to help with the full toilet removal process across the UK.

Whether it is a straightforward swap or a more involved replacement with pipework adjustments, the team at Your-local-plumber carries out jobs of all sizes efficiently and without the guesswork. Have a look at completed plumbing projects to see the standard of work you can expect. For complex situations where DIY carries real risk, getting an experienced engineer in protects your floor, your pipework, and your budget. You can also brush up on common DIY plumbing mistakes before deciding how far to take this yourself.
FAQ
How do I drain a toilet before removing it?
Shut off the water supply valve behind the toilet, flush once to empty the cistern, then use a sponge and bucket to remove remaining water from the tank and bowl. A wet/dry vacuum speeds up the process for residual water in the trapway.
Why is there still water in the bowl after flushing?
The toilet's trapway holds a small reserve of water that flushing alone cannot clear. This residual water requires manual removal with a sponge, cup, or wet/dry vacuum before lifting the toilet.
Can I remove a toilet by myself or do I need two people?
You can drain and disconnect a toilet alone, but lifting and carrying it is much safer with a second person. A standard toilet weighs between 25 and 50 kilograms, and the awkward shape makes solo carrying a risk for both injury and damage.
What do I do with the drain opening after removing the toilet?
Block it immediately with a tightly packed rag or rubber drain plug to prevent sewer gas from entering the room. Leave the block in place until you are ready to install the new toilet.
When should I call a plumber instead of doing this myself?
Call a plumber if the shut-off valve will not close, the flange is cracked or damaged, the floor around the toilet base feels soft or shows signs of water damage, or if you encounter any pipework problems you are not comfortable resolving.