TL;DR:
- Most DIY toilet installations require proper flange height, sealing, and careful checking to prevent leaks and sewer gases. Using the correct tools, materials, and following step-by-step procedures is essential for a reliable, long-lasting fit. If problems like flange issues or pipe damage arise, consulting a professional plumber is recommended for safety and compliance.
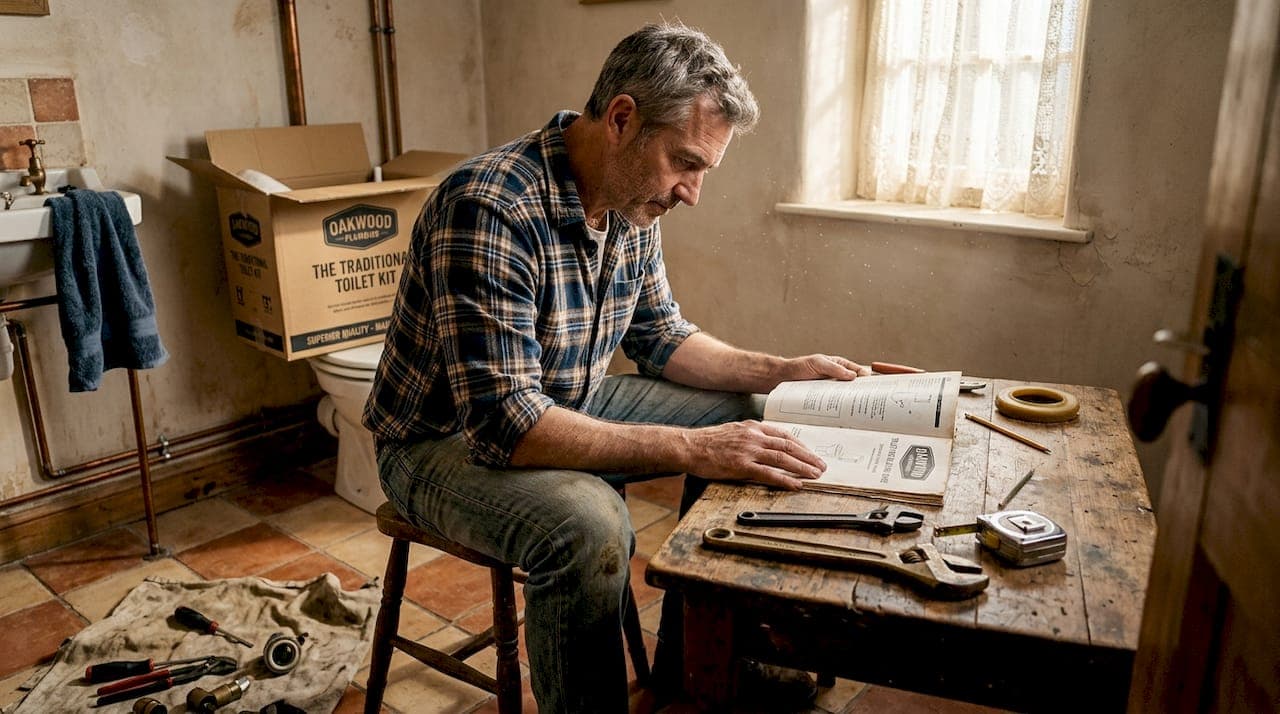
Fitting a new toilet yourself can feel daunting, especially when you start picturing water pooling across your bathroom floor or a call to an emergency plumber undoing all your hard work. The good news is that with the right preparation, tools, and a clear method, most homeowners in Reading and the surrounding areas can complete a toilet installation safely and to a professional standard. This guide takes you from switching off the water to the final flush test, covering the critical checks that prevent leaks, addressing UK-specific considerations, and flagging the handful of decisions that separate a long-lasting job from one you will be revisiting in six months.
Table of Contents
- What you need before you start
- Step-by-step toilet installation: the full process
- Troubleshooting and avoiding common problems
- Verifying your installation: the final checks
- Our take: what most guides skip about DIY toilet fitting
- Need help or want the perfect finish?
- Frequently asked questions
Key Takeaways
| Point | Details |
|---|---|
| Preparation is key | Gather all tools, assess flange height, and plan for possible extenders before starting. |
| Use the correct seal | Always choose an extra-thick wax ring or flange extender for low flanges instead of stacking rings. |
| Follow each step | Work methodically through the installation checklist for best results. |
| Test thoroughly | Flush and inspect your new toilet several times to catch leaks or issues early. |
| Professional help is available | For tricky problems or total peace of mind, reliable plumbers are just a call away. |
What you need before you start
Now that you are committed to tackling your own installation, it is critical to start with the right kit and prep. Rushing out to buy a wax ring without checking your flange height first is one of the most common and costly preparation mistakes homeowners make.
Workspace safety first. Before touching anything, isolate the water supply by turning off the stopcock or the dedicated isolation valve on the supply pipe running to the toilet cistern. Flush the existing toilet to empty the cistern, then bail or sponge out any remaining water from the pan and cistern. Lay down old towels and move anything breakable away from the work zone. You will be manoeuvring heavy porcelain, so a clear path matters.
Understanding the plumbing installation process before you begin will help you spot any surprises hiding behind the existing toilet, such as non-standard pipe configurations or older push-fit connections.
Tools and materials checklist
| Item | Notes |
|---|---|
| Adjustable spanner | For supply pipe connections and cistern bolts |
| Screwdrivers (flat and cross-head) | Pan and seat fixings |
| Junior hacksaw | Trimming bolts to length |
| Wax ring (standard or extra-thick) | Match to flange height |
| Flange extender kit | Required if floor height has increased |
| Closet bolts (T-bolts) | Replace if corroded |
| Plastic washers and nuts | Included with most toilet kits |
| Silicone sealant | Around pan base edge |
| Bucket and sponge | Water removal |
| Spirit level | Checking pan sits flat |
| Rubber gloves and knee pads | Comfort and hygiene |
| Tape measure | Rough-in distance verification |
Pro Tip: If you have recently retiled or added floor levelling compound in your bathroom, plan flange height and check whether you need a flange extender or an extra-thick wax ring before you buy anything else. A flange that sits even 6mm below the finished floor will cause a seal failure within months if you do not address it now.
Common material selection mistakes to avoid:
- Buying a standard wax ring when the flange is low
- Reusing old, corroded closet bolts because they look fine
- Choosing a foam or rubber gasket in place of wax without checking compatibility
- Forgetting to verify the rough-in measurement (typically 305mm from the wall in UK bathrooms)
- Selecting a toilet that does not meet essential bathroom plumbing requirements for your property type
- Overlooking whether you need an isolation valve fitted on the supply pipe
UK Building Regulations Part G covers sanitation, hot water and water efficiency. While a straightforward toilet swap does not normally require formal approval, any changes to pipework or drainage may. Always check with your local authority if you are unsure. Checking bathroom tile sealing around the new pan is also worth noting if you have freshly tiled floors, as improper sealing can trap moisture below the base.
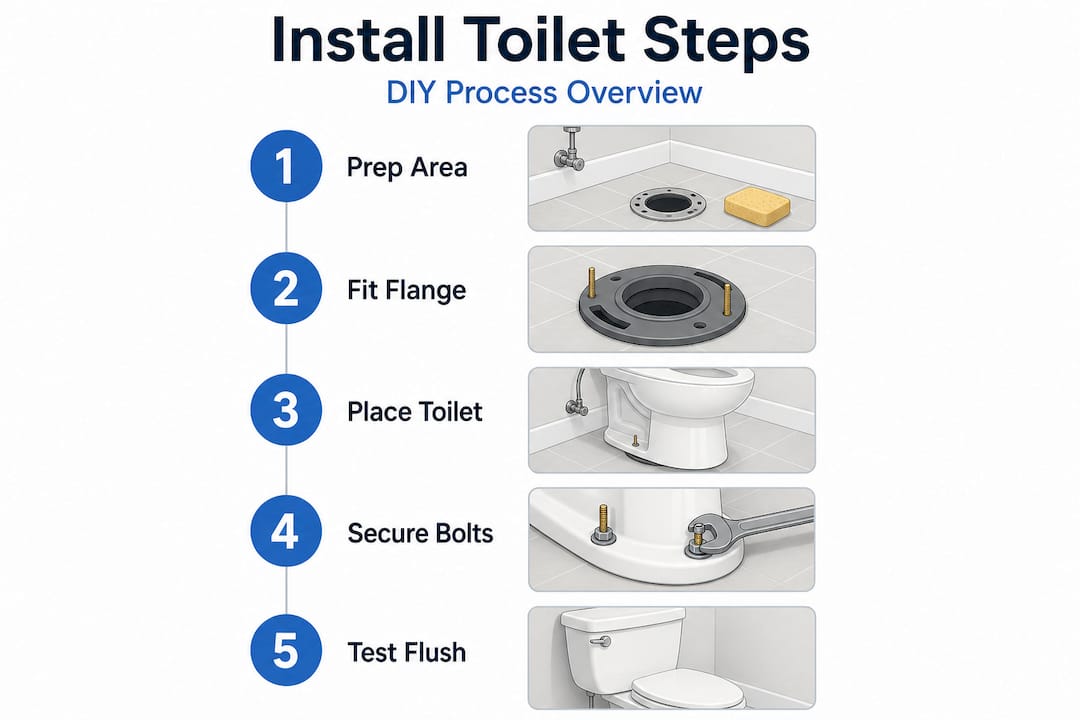
Step-by-step toilet installation: the full process
With your tools organised and workspace ready, it is time to work methodically through the installation itself. Taking your time at each step is far more effective than working quickly and having to disassemble everything to fix a problem.
The installation steps
-
Remove the old toilet. Disconnect the water supply pipe from the base of the cistern. Undo the floor bolts at the base of the pan. Lift the cistern first if it is a separate unit, then rock the pan gently to break the old wax seal before lifting clear. Avoid cracking tiles by having a helper support the weight.
-
Clean the flange area thoroughly. Scrape away every trace of old wax using a putty knife. Inspect the flange for cracks, movement, or corrosion. A damaged flange needs repair before you go any further. This is not a step to gloss over.
-
Check and set flange height. The top of the flange should sit flush with, or just slightly above, the finished floor surface. For a low toilet flange, use an extra-thick (jumbo) wax ring or a flange extender. Never stack two standard wax rings, as this is an unreliable solution that is prone to movement and failure over time.
-
Insert new closet bolts. Slide fresh T-bolts into the slots in the flange. Position them so they align with the toilet bolt holes, typically 165mm apart. Secure them temporarily with the plastic keepers provided.
-
Position the wax ring. Press the wax ring onto the toilet outlet horn (the underside of the pan), not down onto the flange. This gives you better control during placement.
-
Test fit the toilet. Lower the pan straight down over the bolts without sliding it sideways. Press firmly with your body weight to compress the wax. Do not lift the toilet back up once the wax has made contact, as this breaks the seal and you will need a new ring.
Pro Tip: Before you apply final pressure to the wax, check that the toilet sits level using your spirit level. Slide plastic toilet shims under the base to compensate for any uneven floor. An unlevelled pan will rock, which eventually destroys the seal. A thorough step-by-step process check at each stage prevents costly re-dos.
-
Secure the pan to the floor. Hand-tighten the nuts onto the closet bolts, alternating sides to apply even pressure. Use a spanner for a final quarter turn each side. Do not overtighten as this can crack the porcelain base.
-
Fit the cistern. Attach the cistern to the pan or wall following the manufacturer's instructions. Connect the water supply pipe to the inlet valve.
-
Apply silicone sealant. Run a thin bead of sealant around the base of the pan where it meets the floor, leaving a small gap at the back to allow drainage if a leak ever occurs. This prevents water ingress beneath the toilet.
Wax ring and flange options at a glance
| Option | Best used when | Reliability | Notes |
|---|---|---|---|
| Standard wax ring | Flange flush with floor | High | Most common choice |
| Extra-thick wax ring | Flange 6 to 13mm low | High | Preferred over stacking |
| Flange extender kit | Flange more than 13mm low | High | Adjustable, permanent fix |
| Stacked standard rings | Never recommended | Low | Prone to shifting and leaking |
Important safety note: A poorly seated wax seal will not just cause water damage. Sewer gases including hydrogen sulphide can enter the room if the seal fails entirely. Always take the extra ten minutes to verify correct flange height before sealing the installation. Familiarise yourself with the range of UK plumbing services available should any unexpected pipework issues arise during this stage.
Troubleshooting and avoiding common problems
Even experienced DIYers sometimes hit snags. Here is how to avoid rookie mistakes and what to check if problems arise after you have completed the main work.
The single most common cause of a failed DIY toilet installation is a problem with the flange and wax seal. If the flange sits below floor level due to added tile or levelling compound, a flange extender or extra-thick wax ring is the reliable long-term solution, whereas stacked rings can fail within months of fitting.
Symptoms that point to a poor seal or misaligned toilet:
- Water appearing at the base of the pan after flushing
- A sewer smell that is stronger in the bathroom than the rest of the home
- The toilet rocking or shifting when sat on
- Damp patches on the floor or ceiling below the bathroom
- Discolouration or staining appearing around the pan base over time
- Noise from the pan base during or after flushing
Studies into domestic plumbing failures consistently show that the vast majority of leaks following a DIY toilet swap trace back to flange height issues or improper seal seating, rather than supply connections or cistern fittings. The supply side is visible and easy to check; the wax seal is out of sight, which is why it gets underestimated.
Pro Tip: Before you replace the floor trim or apply finishing touches, flush the toilet three to five times and crouch down to watch the base closely each time. Then leave it and come back after an hour. Any slow weep around the seal will show up clearly on a dry floor.
Fixing an uneven pan or floor movement:
If your bathroom floor has any slope or unevenness, toilet shims are your best friend. They are inexpensive plastic wedges available from any hardware shop. Slide them under the pan until the toilet sits perfectly level, then trim them flush with a craft knife. Apply sealant over the top so they do not shift.
Understanding UK plumbing regulations is particularly relevant if your troubleshooting reveals corroded or incorrectly routed pipes, which is not uncommon in older Reading-area properties. And if you discover that the waste pipe itself needs attention, this pipe replacement guide will give you a solid grounding before you decide whether it is a DIY or professional job.
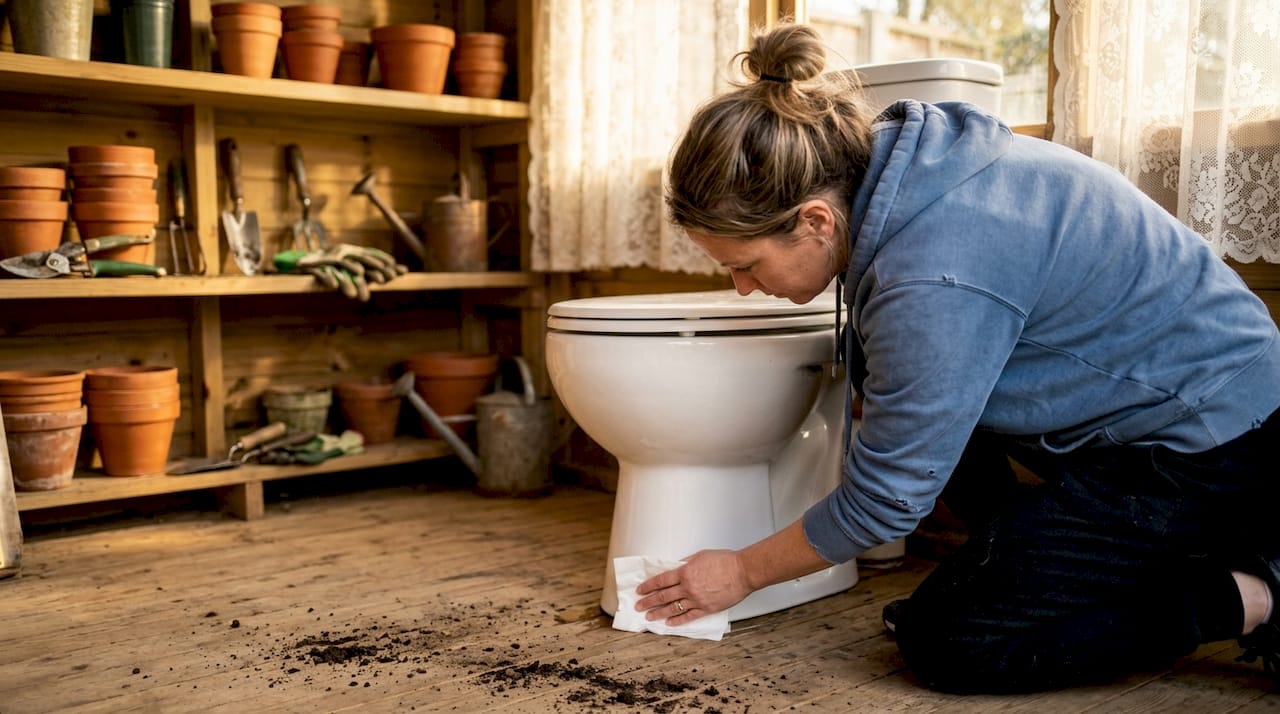
Verifying your installation: the final checks
Once the new toilet is fitted and connected, these checks ensure your hard work will stand the test of time. Skipping the verification stage is exactly how small problems become expensive ones.
-
Restore the water supply slowly by opening the isolation valve or stopcock a quarter turn at a time. Watch the supply connection at the cistern inlet valve immediately for drips.
-
Allow the cistern to fill completely, then perform the first flush. Watch the pan base, the supply connection, and the cistern-to-pan joint simultaneously.
-
Check beneath the toilet by running a dry hand around the base. Any moisture at all means the wax seal is not seated correctly and the toilet must come up for re-seating with a new wax ring.
-
Test the flush mechanism at least four or five times in quick succession to simulate heavy use. A good installation should show no movement, no odour, and no weeping water.
-
Leave overnight and inspect again in the morning. A watertight seal that withstands repeated use confirms the fit is solid before you box in any pipes or apply finishing touches.
-
Check for sewer odours 24 to 48 hours after installation, as this is when any minor gap in the wax seal will begin to be noticeable. If you detect any smell, address it before the issue progresses.
-
Make cosmetic touches last. Once you are fully satisfied the installation is leak-free, apply any finishing trim, re-caulk where needed, and clean the pan and cistern of any installation residue.
Getting comfortable with plumbing terminology makes these checks easier and also puts you in a stronger position if you do need to describe a problem to a professional.
Our take: what most guides skip about DIY toilet fitting
Here is what even confident DIYers and many popular online guides tend to miss.
Most articles treat a toilet swap as a simple like-for-like task. Remove old, fit new, done. What they do not account for is the reality of how floors change over time, especially in older Reading properties where bathroom renovations have often layered new tiling over old. A floor that was perfectly suited to a standard wax ring in 2005 may now have 12 to 20mm more height than when the original toilet was fitted. That gap is invisible until the first leak.
We see this pattern repeatedly. A homeowner fits a new toilet with a standard wax ring, everything looks fine on day one, and then three months later there is a damp patch on the ceiling below or an unexplained sewer smell in the bathroom. The culprit is almost always an undersize seal on a low flange. The fix is straightforward, but it means pulling the toilet out and starting the seal stage again.
The other overlooked detail is bolt condition. Closet bolts corrode in wet environments, and a bolt that looks intact may snap under the torque of tightening the nut. Always replace them as a matter of course rather than hoping the old ones will hold. They cost very little and the peace of mind is worth far more.
Our honest view: if you have a straightforward replacement with no floor changes, this is a very manageable DIY task. If your bathroom floor has been retiled or relevelled recently, take the flange height question seriously before you start rather than hoping it will not matter. And if you discover a cracked flange, corroded pipework, or a drain position that does not match your new toilet, that is the moment to call in a professional plumber rather than improvising a fix that will cost more to undo later.
Need help or want the perfect finish?
If you have worked through this guide and realised the job is more involved than you first expected, or if you simply want the confidence of knowing the installation is signed off by a qualified engineer, help is close by.

Your Local Plumber serves Reading and the surrounding areas with fast, transparent plumbing services for exactly this kind of job. Whether you want a fully booked plumbing expert to handle the whole installation, need emergency plumbing assistance because a DIY attempt has hit an unexpected snag, or you simply want to browse completed installations to see the standard of finish we deliver, the booking process is quick and pricing is clear upfront. No call-out surprises, just reliable local support when you need it.
Frequently asked questions
What is the difference between an extra-thick wax ring and stacking two regular rings?
An extra-thick wax ring is purpose-made to bridge the gap on a low flange and forms a reliable, single-piece seal, whereas stacking regular rings is widely discouraged because the two layers can shift independently under use and cause leaks over time.
Do I need a flange extender if I have just retiled the bathroom floor?
Yes, if new tiles raise the floor enough to push the flange below the finished surface, a flange extender or extra-thick wax ring is the correct solution to restore a proper seal height.
How can I check the toilet for leaks after fitting?
Flush several times and run a dry hand around the base of the pan after each flush, then inspect again after leaving it overnight before applying any finishing touches or trim.
Is it possible to replace a toilet without specialist tools?
Yes, most straightforward installations can be completed with common household tools and a moderate level of DIY confidence, provided you follow each step carefully and do not skip the post-install checks.
When should I call a professional plumber?
If you find a cracked flange, persistent leaking after re-seating the wax ring, corroded supply pipework, or a drain configuration that does not align with your new toilet, it is the right time to bring in a qualified professional for a safe and lasting result.