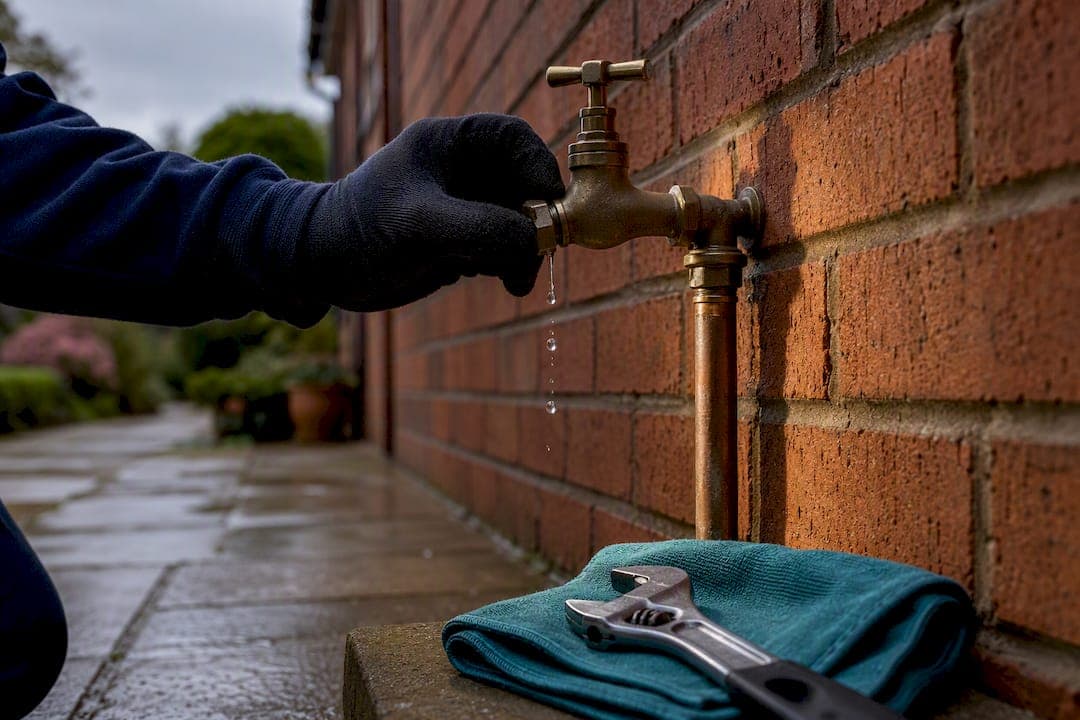
Most outside taps drip because of a worn washer or a loose gland, and both are quick DIY fixes. Isolate the supply now: find the internal isolation valve or stopcock, shut it, then open the outside tap to drain the pipe before touching anything. If water still appears after isolating, or you spot damp on the wall, stop and call a plumber.
TL;DR:
- Most leaks caused by outside taps stem from worn washers, failed gland packing, or poor threaded seals, especially after winter freezes.
- Isolating the water supply is crucial before attempting repairs, and most issues are fixable by DIY with inexpensive parts within 30 minutes.
- Persistent dampness, water when the supply is shut, or cracked tap bodies indicate the problem may be beyond surface repairs and require professional diagnosis.
- For common repairs like washer or O-ring replacements, tools and parts such as adjustable spanners and PTFE tape are essential, and work should be done carefully to avoid damaging fittings.
- Booking a professional is advisable if the leak persists after DIY attempts or if there are signs of pipe leaks, frozen pipes, or missing shutoff valves.
Table of Contents
- Why is my outside tap leaking? Diagnose by location
- How easy is it to fix, and what will it cost?
- Tools and parts to gather before you start
- Step-by-step: isolate, replace, repack, and reseal
- Testing the repair and verifying it holds
- Preventing frost damage and repeat leaks
- When to call a plumber instead
- A practitioner's take on what actually goes wrong
- Book a tap repair with Your-local-plumber
- Sources
- FAQ
Why is my outside tap leaking? Diagnose by location
Water rarely leaks from nowhere. Where it appears tells you exactly what has failed, and that saves you buying the wrong part twice.
- Dripping from the spout when the tap is off — almost always a worn washer, or occasionally a scored valve seat underneath it.
- Water around the handle or spindle when the tap is running — the gland packing has failed or the gland nut has worked loose.
- Drip at the hose connector — a perished O-ring or washer inside the coupler, common if a hose has been left attached over winter.
- Water pooling at the wall or damp patches spreading — a poor threaded seal, or worse, a hidden supply-pipe leak behind the brickwork.
This pattern of faults holds across most UK outside taps, and it means most problems are fixable from the surface without any digging. The diagnostic breakdown by leak location is consistent enough that once you know where the water is coming from, the repair almost writes itself.
How easy is it to fix, and what will it cost?
Genuinely, most of these jobs sit well within reach of someone who has never touched a spanner before.
- Washer replacement: 15 to 30 minutes once the supply is isolated.
- Gland repack or PTFE reseal: 20 to 60 minutes, depending on how stubborn the old fittings are.
- Parts cost: washers, O-rings and PTFE tape are all inexpensive, often just a few pounds for a full repair kit.
Quick fact: Basic washer swaps typically take 10 to 60 minutes and cost very little in parts, which is why it's usually the first thing worth trying.
A plumber callout for the same job costs more once labour is factored in, though it buys you speed and certainty if you're short on time or confidence. The one rule that applies to every job on this list: isolate the water first, and never force a stopcock that feels stiff or hasn't been touched in years.
Tools and parts to gather before you start
Nothing kills momentum faster than getting halfway through a repair and realising the right size washer is still sitting in a shop three miles away.
- Adjustable spanner for the main head nut and gland nut.
- Smaller spanner or pliers for hose connectors and tight spaces.
- Flat-head screwdriver to lift out old washers and packing.
- Old toothbrush and a cloth to clean threads and seatings before resealing.
- A selection of flat washers in common sizes, since outside taps vary.
- O-rings sized for hose connectors, plus a roll of PTFE tape and a little silicone grease.
Worth adding to the kit, though not essential for a first attempt: a small pressure gauge that screws onto the tap outlet, a valve reseating tool for scored seats, and some pipe lagging or an insulated tap cover for later. Stick to WRAS-approved fittings and backflow protection when buying replacement parts, since outside taps in the UK are expected to include a double-check valve.
Step-by-step: isolate, replace, repack, and reseal
1. Isolate the supply. Find the internal isolation valve, usually fitted just inside the wall where the pipe exits, or the main stopcock under the kitchen sink. Turn it off, then open the outside tap fully to drain remaining water from the pipe. If the stopcock feels stiff and hasn't been used in years, don't force it. A seized valve can snap, and that turns a five-minute job into an emergency.
2. Replace a worn washer. Hold the tap body steady with one hand or a spanner so it can't twist, then undo the head nut and lift out the spindle. The old washer sits at the base, usually flattened or split. Swap it for a matching size, dab a little silicone grease on it, and reassemble in reverse.
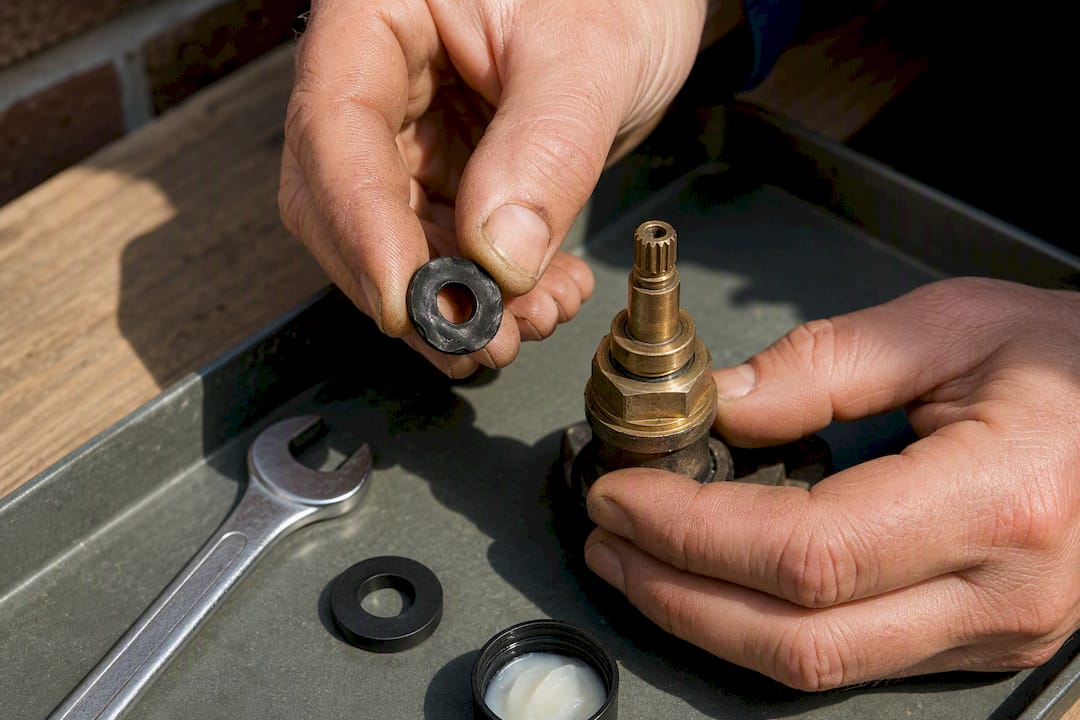
3. Repack or tighten the gland. If water seeps around the spindle while the tap is running, try a small quarter turn on the gland nut first. If that doesn't stop it, unwind the nut fully, remove the old packing material, and wind new PTFE tape or gland packing string around the spindle before retightening. Gentle tightening is the correct fix here, not brute force.
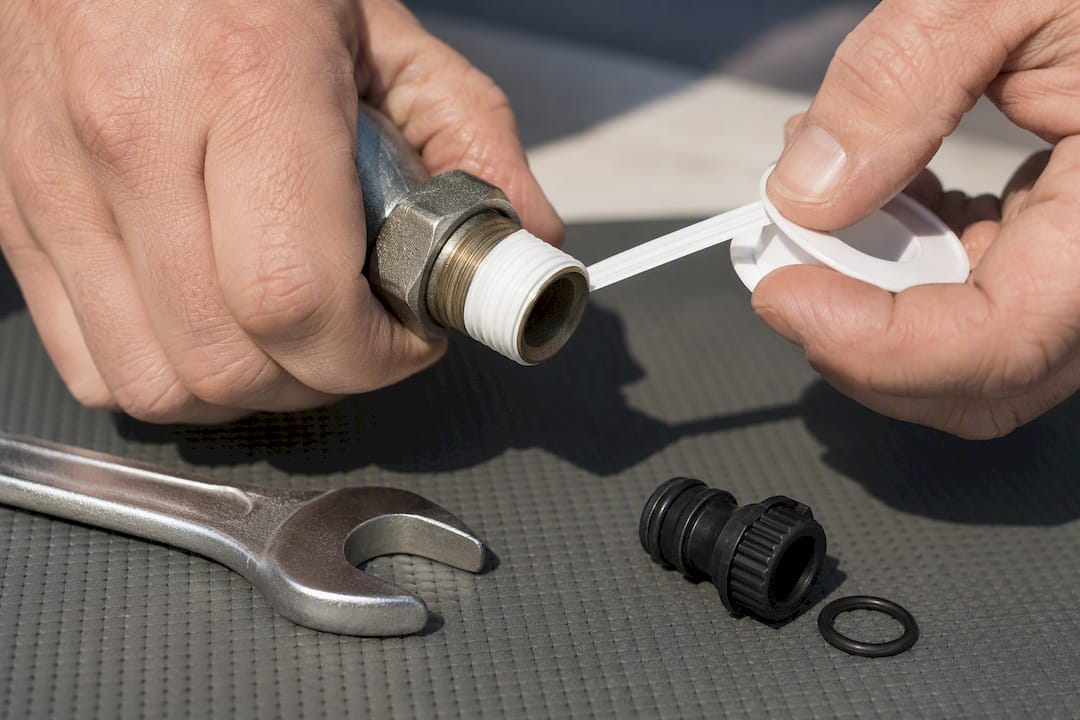
4. Reseal the threaded joint or hose connector. Unscrew the tap from the wall fitting, clean any old tape or debris off the threads, then wrap fresh PTFE tape clockwise around the male thread in 8 to 12 turns. For hose connectors, simply swap the O-ring. Hand-start the joint before using a spanner to finish, so you don't cross the thread.
5. Replace a cracked or frost-split tap body. If the casting itself is cracked, no amount of tape will fix it. This calls for a full replacement, and it's the point where many homeowners choose to book a professional rather than chase a wall-mounted fitting themselves.
Pro Tip: When you unscrew the tap from the wall, support the body rather than letting it spin freely. If the internal copper pipe rotates with it, you risk snapping the elbow fitting inside the wall, turning a simple reseal into a hidden leak.
Work slowly on cold fittings, since brittle plastic washers and frozen joints crack more easily under sudden force. Keep an eye on the wall behind the tap throughout. Damp appearing there mid-repair is your cue to stop and reassess.
Testing the repair and verifying it holds
Don't just turn the water back on and walk away. Open the isolation valve slowly and watch the spout, gland, and wall joint for a good few minutes before deciding the job's done.
- Check nearby cold taps briefly for pressure drops or unusual banging noises, which can signal trapped air or a fitting that isn't fully seated.
- Leave the repair alone for 24 hours, then check again, since some leaks only show once the fitting has settled under normal pressure.
- Re-check after the next frost or freeze thaw cycle, when fittings expand and contract.
- If the drip returns straight away, the washer size was likely wrong or the joint wasn't tightened evenly.
Preventing frost damage and repeat leaks
Winter is the single biggest cause of outside tap failures, and most of it is avoidable with a five-minute routine each autumn.
- Isolate the internal valve, open the outside tap fully to drain any standing water, and leave it slightly open over winter so nothing sits trapped inside.
- Never leave a hose connected once temperatures start dropping. It traps water in the coupler and that's exactly where it freezes and splits.
- Fit an insulated tap cover or pipe lagging around any exposed external pipework.
- If the same tap keeps failing, consider replacing it with a frost-proof model, which shuts off the water well inside the wall rather than at the spout.
Pro Tip: A cheap pressure gauge that screws onto the tap outlet can flag mains pressure that's running high. Consistently high pressure wears washers out fast, and a pressure-reducing valve solves it for good.
When to call a plumber instead
Some signs mean the problem has moved beyond the tap itself, and DIY tools won't help.
- Damp behind the wall that persists or spreads after you've completed a repair.
- Water still present when the internal isolation valve is fully shut, or a pressure drop appearing at other taps in the house.
- Visible cracks in the tap body, or a pipe you suspect has frozen and split inside the wall.
- No isolation valve fitted at all, or a stopcock too stiff or corroded to trust.
Persistent damp after a surface repair often points to a buried supply-pipe leak rather than anything wrong with the tap fitting itself, and that needs proper diagnostic testing rather than another washer. Catching it early with a water meter leak test limits the damage before it reaches the brickwork or foundations.
A practitioner's take on what actually goes wrong
Most call-outs for a leaking outside tap follow the same pattern: someone tried the fix, got the diagnosis wrong, and made the fault worse. My own checklist before touching any tap is short. Isolate first, diagnose by where the water actually appears, then try the washer fix before anything more involved.
The two mistakes I see most: forcing a stiff stopcock that hasn't turned in a decade, and overtightening a gland nut in the hope it'll stop the drip faster. Neither works, and both tend to turn a fifteen-minute job into a same-day emergency. If you've isolated the supply, tried a washer, and the leak persists, that's the point to book a proper inspection rather than keep guessing.
— Michael
Book a tap repair with Your-local-plumber
If isolating the supply feels risky, the leak keeps returning after a repair, or you simply don't have an evening spare to chase washers around a wall fitting, that's exactly the point to bring in a professional rather than keep guessing. A professional plumbing service handles tap repair and replacement with transparent pricing and no call-out fee, backed by a fix no fee guarantee, so you know the cost before work starts.

For anything urgent, a split pipe, a leak you can't isolate, or water appearing where it shouldn't, the emergency callout service offers a 60 minute response. For a straightforward tap repair or replacement, book directly through the main plumbing services page and get a fixed quote before anyone picks up a spanner.
Sources
- Bookabuilderuk
- Outdoor Tap Leaking? Causes and How to Fix It | DCI
- What to do when a tap is leaking from the handle | Checkatrade
FAQ
How do I stop an outside tap from dripping?
Isolate the water supply first, then identify where the drip is coming from. A drip from the spout usually needs a new washer, while a leak around the handle needs the gland nut tightened or repacked.
Why is my outside water tap leaking?
The most common causes are a worn washer, failed gland packing, or a poor threaded seal, especially after a cold winter. Frost damage is a frequent culprit, since trapped water can split fittings as it freezes and expands.
Do I need a plumber to replace an outdoor tap?
Not always. Washer swaps and gland repacks are manageable DIY jobs, but a cracked tap body, a hidden supply-pipe leak, or no isolation valve are all good reasons to book a plumber. Your-local-plumber offers tap replacement with fixed, transparent pricing if you'd rather not risk it.
How much will a plumber charge to fix a leaking tap?
Prices vary by job and location, and Your-local-plumber's current rates are listed on its booking page rather than fixed in advance. Simple DIY repairs using a washer or PTFE tape cost only a few pounds in parts if you tackle it yourself.