TL;DR:
- Fitting a new toilet involves removing the old unit and installing a compliant, secure fixture. Preparation, accurate measurement, and correct sealing are essential for a successful installation. Professional help is recommended for complex jobs or when plumbing modifications are required.
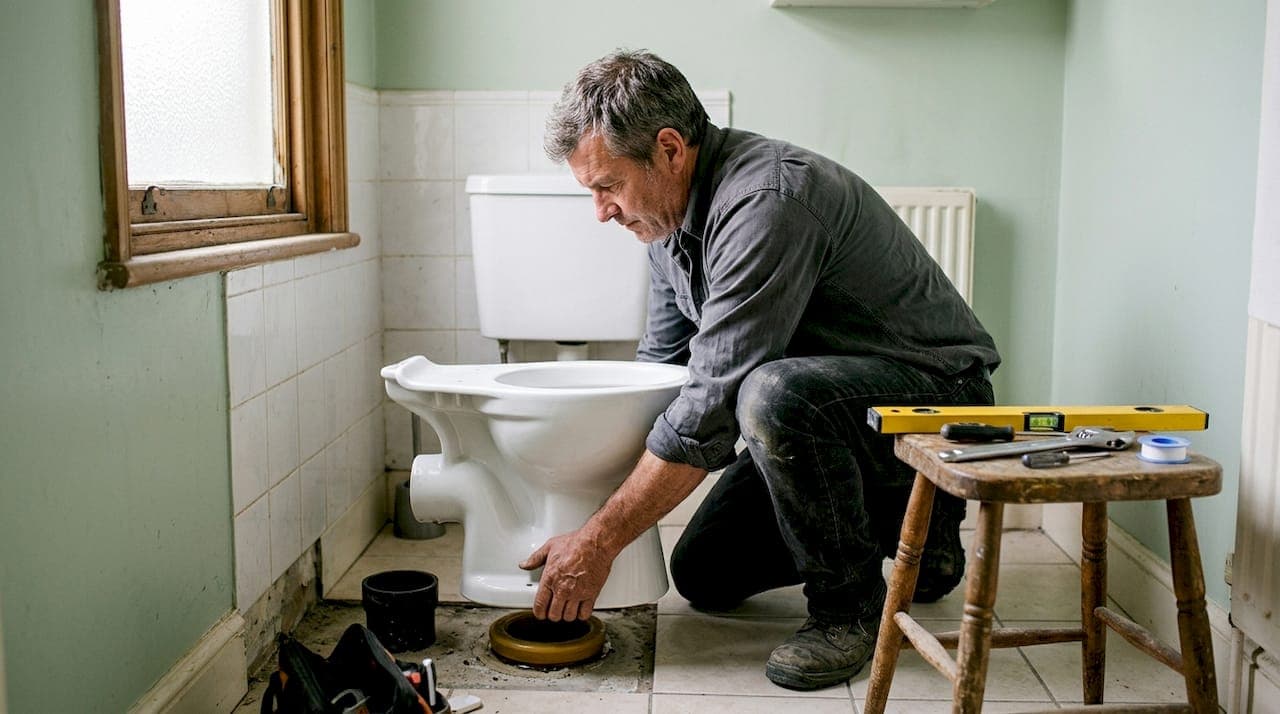
Fitting a new bathroom toilet is defined as the full process of removing an existing unit and correctly installing a replacement that meets UK plumbing standards, functions safely, and suits the space. The industry term is "toilet installation," and it covers everything from measuring the bathroom and selecting the right pan to connecting the cistern and testing for leaks. The UK national average cost sits between £200 and £550, rising to £270–£745 in London. Getting the preparation right is what separates a clean, compliant job from one that leaks, rocks, or fails a building inspection.
What do you need before fitting a new bathroom toilet?
The right tools and materials on hand before you start will save you at least one trip to the merchant mid-job. Skipping this stage is the single most common reason a straightforward bathroom toilet installation drags into a full weekend.
Essential tools
- Adjustable spanner and basin wrench
- Flat-head and cross-head screwdrivers
- Spirit level
- Hacksaw (for trimming soil pipe if needed)
- Silicone sealant gun
- Tape measure and pencil
- Bucket and old towels
Materials checklist
- Compatible toilet pan and cistern
- Toilet seat and fixings
- Wax ring or no-hub connector (to seal the pan to the soil pipe)
- Flexible water supply hose
- Plastic or brass pan fixings
- Silicone sealant (sanitary grade)
- PTFE tape
Before buying anything, check your existing plumbing layout. Note whether your soil pipe exits through the floor or the wall, and confirm the rough-in distance (the gap from the finished wall to the centre of the soil pipe outlet). Most UK bathrooms use a 305mm rough-in, but older properties vary. A like-for-like toilet replacement in the same position does not require building control notification under 2026 building regulations. Moving the toilet or altering the soil pipe does require approval. That single distinction can save you weeks of delay and unexpected fees.
Pro Tip: Schedule your installation on a weekday if you plan to hire a plumber. Weekend installations typically cost around 18% more than weekday jobs.
How do you measure your bathroom for a correct toilet fit?
Accurate measurement is the foundation of every successful toilet installation. Bathroom walls are rarely perfectly straight, so measuring at floor level alone gives you an incomplete picture. Minor wall deviations can throw off alignment enough to cause rocking or poor sealing.
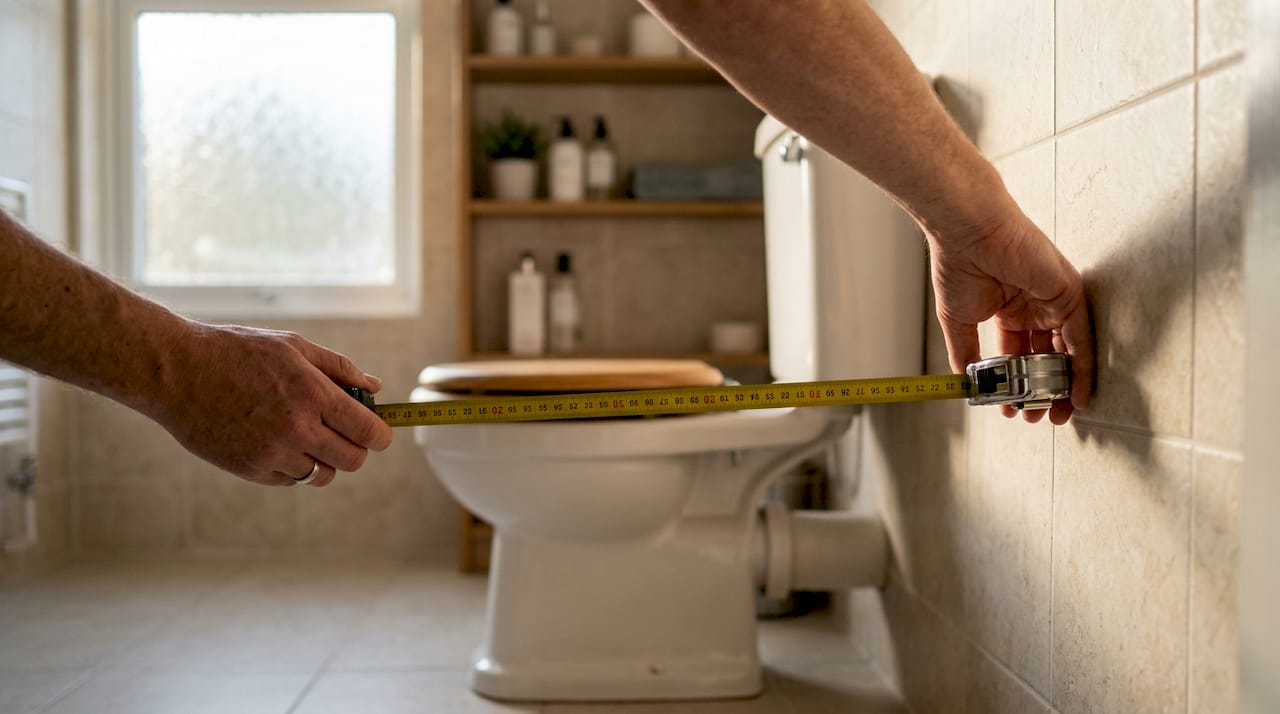
Measure the projection (the depth from the wall to the front of the pan) to confirm the toilet fits without blocking the door swing. Standard close-coupled toilets project between 650mm and 750mm. Measure the width of the space at both floor level and mid-height, because a wall that appears straight can bow by 10mm or more across its length. Record both figures and use the smaller one for your purchase decision.
Check the door swing separately. The door must clear the toilet pan by at least 200mm when fully open, or the bathroom will fail basic usability standards. Note the exact position of the soil pipe outlet and the cold water supply valve. Plan to keep the new toilet in the same position as the old one wherever possible. Moving the soil pipe even 100mm adds significant cost and triggers the building regulations approval process.
Pro Tip: Take a photo of the existing plumbing connections before you drain and remove the old toilet. You will thank yourself when reconnecting the water supply hose.
Step-by-step guide to installing a new toilet
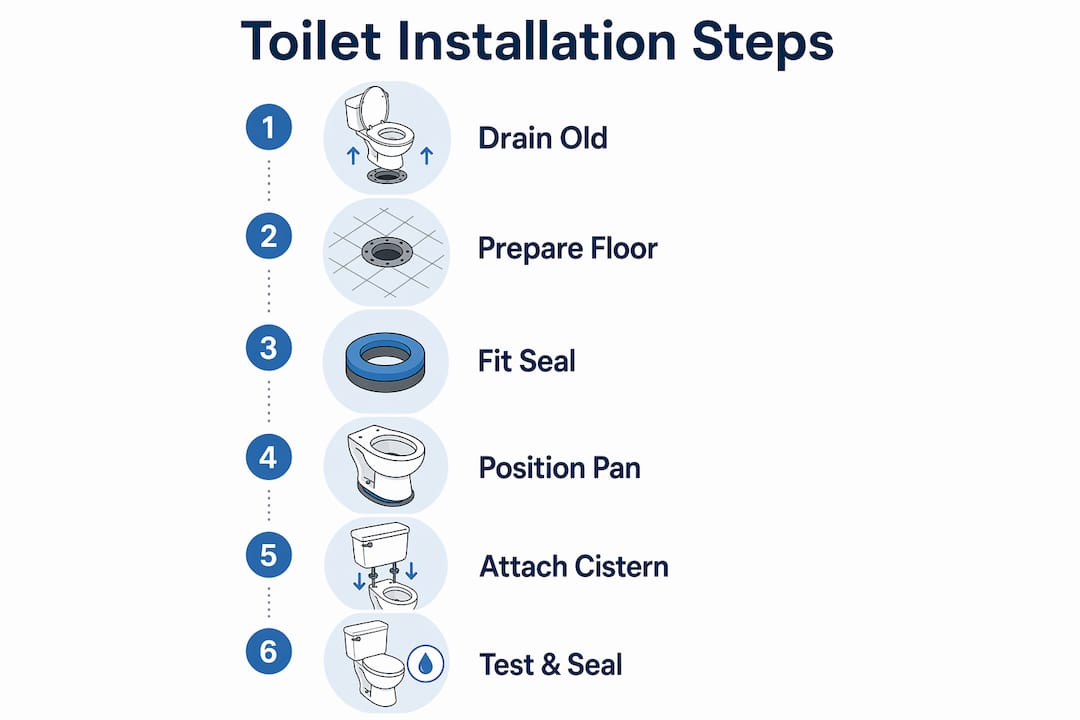
Typical toilet installation work takes between 2 and 4 hours for a standard close-coupled unit. Complex installations involving concealed cisterns or wall-hung toilets take considerably longer. Work through the steps below in order and do not rush the drying or curing stages.
Step 1: Drain and remove the old toilet
Turn off the water supply at the isolation valve on the supply pipe. Flush the cistern to empty it, then use a sponge and bucket to remove any remaining water from the pan and cistern. Disconnect the supply hose at the cistern inlet. For a detailed walkthrough of this stage, the draining a toilet guide from Your-local-plumber covers every step. Unscrew the pan fixings from the floor, then lift the pan clear of the soil pipe outlet. If the pan is sealed with silicone, score around the base with a utility knife first.
Step 2: Inspect and prepare the floor and connections
Clean the soil pipe outlet thoroughly. Remove any old wax, debris, or corroded fittings. Check the floor for damage, rot, or unevenness. A toilet fitted to a soft or uneven floor will rock and eventually crack the pan or break the seal. Use a spirit level across the fixing points and pack with tile adhesive or a thin mortar bed if needed.
Step 3: Fit the wax ring or no-hub connector
Press a new wax ring firmly onto the soil pipe outlet, or fit a no-hub rubber connector if the pipe diameter requires it. The wax ring creates a watertight seal between the pan outlet and the soil pipe. Do not reuse the old wax ring under any circumstances. A failed wax seal is the leading cause of toilet leaks at floor level.
Step 4: Position and secure the new toilet pan
Lower the pan carefully onto the wax ring, aligning the outlet directly over the soil pipe. Press down firmly and evenly to compress the wax ring fully. Check the pan is level in both directions with a spirit level. Insert the pan fixings through the base and into the floor. Tighten them evenly, alternating sides, until the pan is firm but not cracked. Over-tightening ceramic fixings is a common mistake that causes hairline fractures.
Pro Tip: Place plastic washers under the fixing nuts to protect the ceramic. Tighten by hand first, then add only a quarter turn with a spanner.
Step 5: Attach the cistern and connect the water supply
For a close-coupled cistern, fit the large rubber doughnut washer to the cistern outlet before lowering it onto the pan. Insert the cistern bolts, fit the rubber washers and metal plates, and tighten evenly. Connect the flexible supply hose between the cistern inlet and the isolation valve. Use PTFE tape on the threaded connections to prevent weeping joints.
Step 6: Test for leaks and flush performance
Turn the water supply back on slowly and watch every connection point for drips. Fill the cistern fully and flush twice. Check the base of the pan, the cistern bolts, and the supply hose connection after each flush. A slow drip at the supply hose connection usually means the PTFE tape needs one more layer.
Step 7: Seal and finish
Run a neat bead of sanitary silicone sealant around the base of the pan where it meets the floor. Smooth with a wet finger and leave to cure for at least 24 hours before use. After a bathroom renovation, a post-construction clean removes silicone residue, dust, and debris that accumulate during fitting work. A proper installation, as described in the plumbing installation process guide, always ends with a documented leak test.
Common mistakes when replacing a bathroom toilet
Most problems in bathroom toilet replacement come from skipping preparation steps rather than from technical errors during fitting. Knowing the pitfalls in advance saves time and money.
- Incorrect rough-in measurement. Buying a toilet before confirming the rough-in distance is the most expensive mistake. A pan that does not align with the soil pipe cannot be forced into position without moving the pipe.
- Ignoring wall and floor trueness. An untrue wall causes the cistern to sit at an angle. An uneven floor causes the pan to rock. Both problems get worse over time and eventually break the seal.
- Reusing the old wax ring. A compressed wax ring will not re-seal. Always fit a new one.
- Over-tightening ceramic fixings. Ceramic cracks under uneven pressure. Tighten to firm, not tight.
- Skipping the leak test. A slow leak at the wax ring can saturate the subfloor for weeks before it becomes visible. Always test with two full flushes before sealing the base.
If the soil pipe position makes alignment difficult, access difficulties to the soil pipe can significantly increase labour costs. Hidden or wall-hung toilets add further complexity. When the soil pipe is in an awkward location or the floor shows signs of rot, call a professional. Certified plumbers registered with CIPHE or listed on WaterSafe carry the training to handle non-standard layouts safely. Safety certifications such as CIPHE and WaterSafe indicate properly trained plumbers and reduce installation risk. For guidance on staying within the rules, the UK plumbing regulations guide from Your-local-plumber is a practical starting point.
Key takeaways
A successful toilet installation depends on accurate measurement, correct sealing, and compliance with UK building regulations before a single fitting is tightened.
| Point | Details |
|---|---|
| Measure twice, buy once | Confirm rough-in distance and wall trueness before purchasing any toilet. |
| Like-for-like avoids approval | Replacing a toilet in the same position requires no building control notification in 2026. |
| Never reuse the wax ring | A compressed wax ring will not re-seal; always fit a new one to prevent floor-level leaks. |
| Test before you seal | Flush twice and check all connections before applying silicone around the pan base. |
| Know when to call a professional | Soil pipe relocation, wall-hung units, and damaged subfloors require a CIPHE or WaterSafe certified plumber. |
What I have learned from fitting toilets in UK homes
Fitting toilets is one of those jobs that looks straightforward on paper and humbles you the moment you lift the old pan. The most consistent lesson I have taken from working in UK bathrooms is that the preparation phase deserves at least as much time as the installation itself.
Homeowners routinely underestimate how much variation exists in older properties. Walls that look plumb are not. Floors that look level are not. Soil pipes that appear to be in a standard position turn out to be 50mm off-centre. None of these problems are insurmountable, but they all require you to adapt on the spot. The homeowners who struggle most are the ones who bought the toilet before they measured the space.
DIY installation is genuinely feasible for a confident homeowner replacing a like-for-like unit on a sound floor. The job sits within reach if you follow the steps carefully and resist the urge to rush the sealing stage. Where I would always recommend professional input is when the soil pipe needs moving, the floor shows any softness, or the new toilet is a wall-hung or concealed cistern model. Those jobs involve structural fixing and precise plumbing that carry real consequences if done incorrectly.
The building regulations point is one most homeowners miss entirely. A like-for-like swap requires no notification. The moment you move the toilet even slightly, you are in building regulations territory. Getting that wrong does not just cost money to fix. It can complicate a property sale years later.
— Michael
Professional toilet fitting from Your-local-plumber
Fitting a new toilet correctly takes preparation, the right tools, and confidence in the plumbing connections. Not every homeowner wants to take that on alone, and there is no reason to.

Your-local-plumber provides experienced, locally based engineers who handle the full bathroom toilet installation process, from removing the old unit to leak testing and finishing. Every job is priced transparently before work begins, and all installations comply with 2026 UK building regulations. Book a plumbing service online and get a confirmed appointment without the wait. Whether you need a straightforward replacement or a more complex fitting, Your-local-plumber delivers the job done right the first time.
FAQ
How long does it take to install a new toilet?
Standard toilet installation takes between 2 and 4 hours. Wall-hung or concealed cistern models take longer due to frame building and additional plumbing connections.
Do I need building regulations approval to replace a toilet?
A like-for-like replacement in the same position does not require building control notification. Moving the toilet or altering the soil pipe does require approval under 2026 building regulations.
What is a wax ring and why does it matter?
A wax ring is a soft wax seal that sits between the toilet pan outlet and the soil pipe. It creates a watertight connection and must be replaced every time the toilet is removed.
How much does toilet installation cost in the UK?
The national average ranges from £200 to £550. London prices typically run between £270 and £745, depending on job complexity and access.
When should I call a professional plumber instead of fitting it myself?
Call a professional when the soil pipe needs relocating, the subfloor shows damage, or the new toilet is a wall-hung model. Look for plumbers certified by CIPHE or listed on WaterSafe.