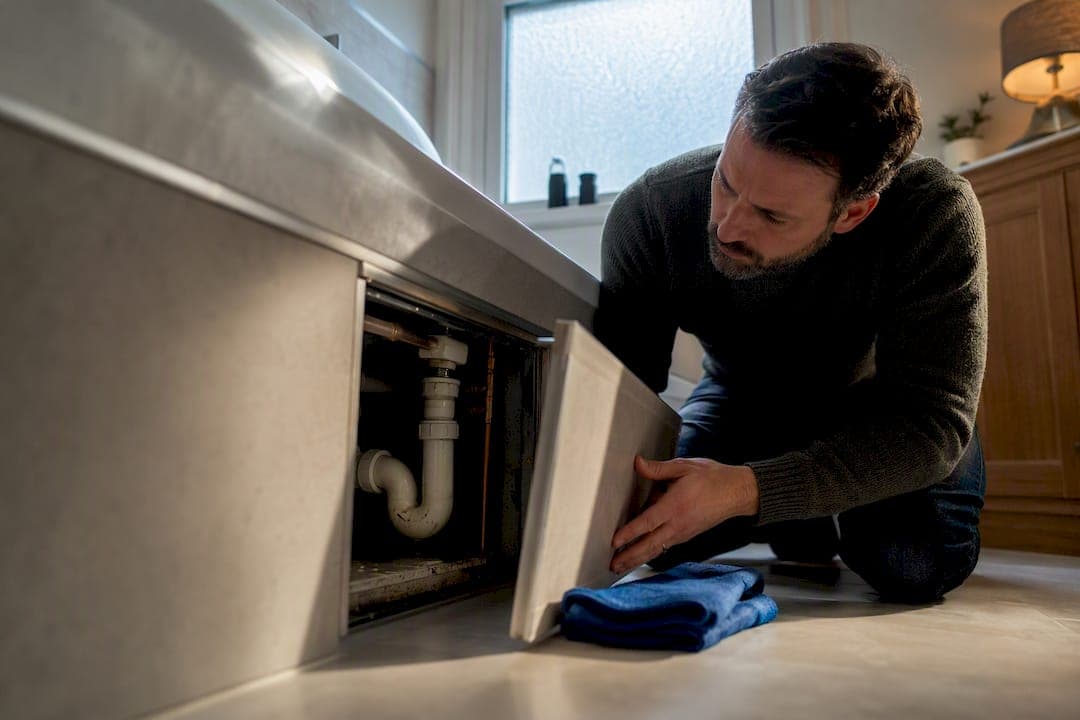
Most leaks under a bath come from a loose waste connection, a worn U-bend, a failed seal around the panel, or a supply pipe joint that has come loose over time. The first thing to do is catch the water, isolate the supply if you can find the stopcock safely, and avoid anything electrical nearby. If you cannot stop the leak yourself, call a plumber straight away rather than waiting to see if it dries out.
TL;DR:
- Most leaks under a bath come from loose waste fittings, worn U-bends, or cracked seals, often with multiple issues occurring simultaneously.
- Identifying whether the leak is due to plumbing or condensation requires checking if the damp patch remains wet during dry weather and inspecting for ceiling stains or warped floorboards.
- A thorough step-by-step diagnosis involves safely isolating the water supply, using a paper towel test, and conducting controlled fill-and-drain tests to pinpoint the leak source.
- Simple DIY fixes include tightening nuts, replacing perished washers, resealing with fresh silicone, and removing debris from traps, but complex jobs need a professional plumber.
- Emergency situations requiring immediate professional help include uncontrolled water flow, leaks near electrical fittings, or structural damage like sagging ceilings or soft floorboards.
Table of Contents
- Why a bath might be leaking underneath
- How to spot a leak under the bath
- Step-by-step inspection and diagnosis
- Simple DIY fixes you can try
- When to call a professional, emergency steps and typical cost guidance
- Preventing future leaks: routine checks and simple maintenance
- Trade perspective from Michael at Your Local Plumber
- How Your Local Plumber helps with leak detection and emergency repairs
- Sources
- FAQ
Why a bath might be leaking underneath
A leak under a bath almost always traces back to one of a handful of usual suspects, and matching the symptom to the fault saves time before you even lift the panel.
- A loose or corroded waste fitting, or a U-bend that has worked itself free, letting water escape every time the bath drains.
- Perimeter sealant that has cracked or peeled away, allowing splashed water to run down behind the bath rather than into the tub.
- A flexible hose, mixer tap connector or supply pipe joint that has loosened or perished with age.
- A cracked bath shell, a blocked overflow, or a waste that backs up and spills over the rim during use.
Older bathrooms tend to develop several of these faults at once, which is why a single damp patch can have more than one contributing cause.
How to spot a leak under the bath
Spotting the difference between a plumbing leak and simple condensation matters, because the fixes are completely different.
- Check whether the damp patch stays wet regardless of the weather. Genuine leaks do not dry out on a warm day, unlike condensation, which tends to ease off once the room airs out, according to council guidance on defective plumbing.
- Look below the bathroom for ceiling stains, puddles that appear only after a bath is run, warped floorboards, or a faint sewage smell that suggests a waste leak rather than a clean water supply issue.
- Run a paper towel test along visible joints and under the waste to see exactly where moisture first appears, then time it against filling, using or draining the bath.
These checks alone often point you straight to the fault area before you need any tools.
Step-by-step inspection and diagnosis
Work through the inspection in order rather than jumping straight to removing the bath panel, since the sequence protects you and narrows down the fault faster.
- Check for electrical risk first. If water is anywhere near sockets, extractor fans or light fittings, switch off the relevant circuit at the consumer unit and do not touch anything electrical until it is dry, in line with guidance from council repairs handbooks.
- Contain the water. Towels, a basin, or an old container underneath the leak point stop the damage spreading while you work.
- Find and use the stopcock or isolation valve. Shutting off the supply before you remove anything reduces the mess and the risk of a sudden burst.
- Access the area under the bath carefully, watching for mould or waste contamination if the leak has been going on for a while.
- Run a paper towel drip test along the trap, waste joint and supply connections to see which one is damp first.
- Try a controlled fill-and-drain test: fill the bath to a marked level, watch for drips while it sits full, then drain slowly and watch again. A leak that appears only on draining points to the waste or trap, while one that appears while full or filling points to the supply side, a distinction council plumbing guidance sets out clearly.
- Use a water meter check if nothing is visible but your bills have crept up, or call a professional leak tracer if the fault is hidden behind tiling or under flooring. A water meter leak test run over a few hours can confirm a hidden leak even when nothing is visibly dripping.
Pro Tip: Mark the water level with a wax pencil before you fill the bath for the drain test: it gives you an exact reference point rather than guessing where the water was.
Simple DIY fixes you can try
Many under-bath leaks come down to a fitting that has simply loosened, which makes them genuinely fixable without specialist tools.
- Tighten the waste connection nut by hand first, then with a wrench if it is still loose, checking it does not leak on the next fill-and-drain test.
- Replace a perished rubber washer or gasket at the waste or overflow, since these harden and shrink with age.
- Remove, clean and reseat the trap if debris or a poor seal is the issue, following the same basic step council repairs handbooks recommend for bath and basin leaks.
- Swap out a cracked flexible hose and re-run a fresh bead of silicone sealant around the bath perimeter once the area is completely dry.
Pro Tip: Never re-seal over old, mouldy silicone. Strip it back to bare tile and bath edge first, or the new seal will fail within months.
Some jobs are not sensible to tackle yourself: soldering copper pipework, tracing corrosion inside a wall or floor void, anything structural, and anything involving electrics near water all call for a qualified plumber. A mixer tap leak is usually straightforward to fix yourself, but a bath waste hidden behind tiling is a different job entirely.

When to call a professional, emergency steps and typical cost guidance
Some situations need a plumber immediately rather than a weekend DIY attempt.
- You cannot locate or isolate the stopcock, and water keeps coming regardless of what you try.
- The leak is anywhere near sockets, switches or light fittings.
- Ceilings are sagging, floorboards feel soft underfoot, or the damp patch is spreading rather than staying put.
- The bath itself is cracked, or the waste pipe is corroded beyond a simple tighten.
Before help arrives, CIPHE's emergency plumbing guidance recommends shutting the internal stopcock, opening cold taps to drain the system, and avoiding hot taps altogether. Photograph the damp patch, the ceiling below, and any visible fitting fault: insurers and landlords will want dated evidence of when the damage appeared and what caused it. Straightforward jobs such as tightening a joint or replacing a washer are typically inexpensive, while anything involving hidden pipework or structural drying costs considerably more, and regional rates and access difficulty both affect the final price.
Preventing future leaks: routine checks and simple maintenance
A short annual routine catches most faults before they become a ceiling stain.
- Check silicone seals around the bath and re-do them at the first sign of cracking or peeling.
- Inspect the waste, trap and any flexible hoses for looseness or perishing once a year.
- Fit a hair strainer over the waste and avoid pouring fats, oils or grease down the drain, since CIPHE guidance on cutting water waste links both to a higher risk of blockages and subsequent leaks.
- Book a pre-emptive check with an engineer if the bathroom is more than a few years old or the seals look tired.
- Keep photos and dates of every check and repair: they help insurers, and they save the next tradesperson time working out what has already been done. Our guide to preventing bathroom leaks covers this routine in more depth.
Trade perspective from Michael at Your Local Plumber
Most under-bath leaks I see start as a loose waste nut or a tired seal, and both are fixable in an afternoon. DIY attempts usually fail when someone reseals over old sealant without stripping it back, or tightens a joint without finding where the water is actually coming from first. Document the damage as you go: dated photos make insurance and landlord conversations far smoother later.
— Michael
How Your Local Plumber helps with leak detection and emergency repairs
If the fill-and-drain test has not made things obvious, or the leak is somewhere you would rather not dig into yourself, a proper diagnosis saves you from chasing the wrong fitting. Your Local Plumber handles leak repairs, waste and hose replacements, and full plumbing callouts, with fixed pricing agreed before work starts and no call-out fee.

Before an engineer arrives, it helps to know where your stopcock is, have the bath panel accessible, and have photos of the damp patch or ceiling stain ready to show. On site, the usual approach is to isolate the supply, run the same fill-and-drain checks described above, and confirm the exact source before touching anything. For a leak that will not stop or is close to electrics, the emergency plumbing or heating callout gets someone out fast, backed by a 12-month warranty on completed work.
Sources
For official steps, Newcastle City Council's damp guidance covers defective plumbing, CIPHE sets out emergency actions, and Citizens Advice explains landlord repair duties.
- Damp caused by defective plumbing | Newcastle City Council
- Plumbing emergencies: what to do before help arrives | CIPHE
- Repairs handbook for council tenants | Leicester City Council
FAQ
How do I fix a leak under the bath myself?
Start by isolating the water supply, then check the waste connection, trap and any flexible hoses for looseness or wear. Tightening a waste nut, replacing a perished washer, or resealing the perimeter with fresh silicone fixes many leaks without needing a plumber.
How much does a plumber charge to fix a leak under a bath?
Simple jobs like tightening a joint or replacing a washer are usually inexpensive, while a leak involving hidden pipework, corrosion or structural drying costs more. A fixed price quote is provided before starting work, with no call-out fee.
Why would my bathtub be leaking underneath?
The most common causes are a loose waste connection, a worn U-bend, failed sealant around the bath edge, or a loosened supply pipe joint. A cracked bath shell or a blocked overflow causing water to spill over the rim can also be the culprit.
Does home insurance cover bathroom leaks?
Buildings insurance typically covers the resulting damage from a sudden leak, though the policy details and excess vary by insurer. Even when a leak originates in a neighbouring property, guidance on building insurance and leaks advises claiming through your own insurer first and reporting promptly.
Who is responsible for fixing a leak if I rent my home?
Landlords are generally responsible for repairing sanitary fittings and pipework, and for social housing, Awaab's Law requires significant damp hazards to be investigated within 10 working days and made safe within 5 working days after that. Report the leak in writing and keep photos as evidence in case of delay.