Trace and access cover pays for finding and reaching a hidden water leak, usually through most buildings insurance policies with commonly stated limits around several thousand pounds. It typically does not pay for fixing the leak itself. If you suspect a hidden leak, call your insurer before booking any tradesperson, and photograph everything.
TL;DR:
- Investigation costs for leaks vary from a few hundred pounds for simple cases to several thousand for complex, underground, or slab leaks.
- Insurers often limit coverage to detection and access, not the repair or water damage, and the excess applies to the entire claim.
- Early communication with your insurer, documentation, and following approved processes are critical to ensure claim approval and reimbursement.
- Trace and access detection methods include thermal imaging, acoustic sensing, moisture meters, and CCTV cameras, with intrusive work only as a last resort.
- Responsibility for pipes depends on their location: the water company covers supply pipes up to the boundary, while homeowners are responsible beyond that point.
Table of Contents
- What trace and access leak cover actually pays for
- How leak specialists trace leaks: common methods you will see
- How insurers handle trace and access claims: what to do first
- Typical costs and policy limits: what a claim actually looks like
- Who pays: homeowner, insurer, or the water company?
- What to expect during the works: from detection to redecorating
- Our take on trace and access claims
- How Your-local-plumber can help right now
- Sources
What trace and access leak cover actually pays for
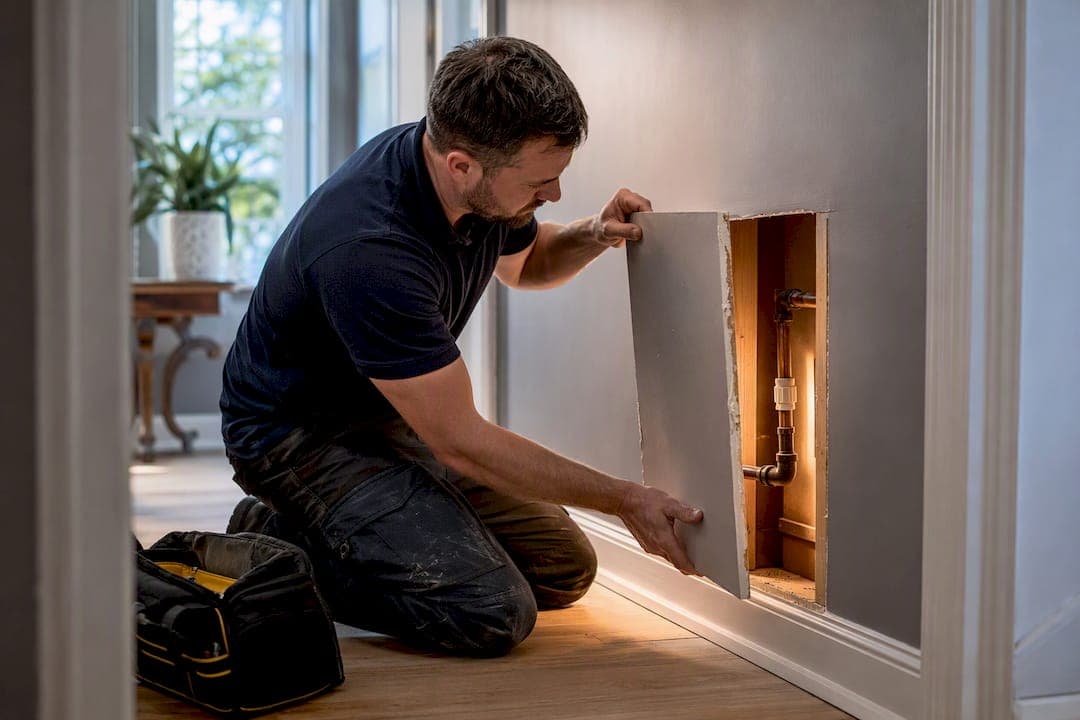
Trace and access insurance covers the detective work: locating a hidden leak and opening up whatever is hiding it, whether that's floorboards, a wall cavity, or a section of concrete slab. It generally does not cover repairing the pipe once found, and it doesn't touch the water damage itself, which usually falls under separate buildings or contents sections of your policy.
The distinction that trips people up most is escape of water versus ingress. Trace and access almost always applies to water escaping from your own pipework, not water getting in from outside through a failed roof or a cracked render.
Common gaps in cover include:
- Leaks caused by poor maintenance or known, unaddressed disrepair
- Garden supply pipes serving outbuildings, pools, or irrigation systems
- Leaks on shared or communal pipework outside your boundary
- Repair or replacement of the pipe once it's found
Your excess applies to the whole claim, not just the detection stage, so a straightforward job with a £250 excess and a £600 investigation bill leaves you paying most of it yourself. Some insurers structure this as "reasonable costs" rather than a hard cap, which sounds generous until a loss adjuster decides what's reasonable.
How leak specialists trace leaks: common methods you will see
Most detection work starts with the least invasive option and only escalates when it has to. A specialist arriving at your door isn't guessing; they're running through a sequence designed to pinpoint the leak with the smallest possible hole.
- Thermal imaging spots temperature differences where warm water is escaping into cold structure
- Acoustic sensing listens for the distinct sound of pressurised water leaving a pipe underground or in a wall
- Moisture metres confirm damp readings in suspect areas before anyone reaches for a drill
- CCTV drain cameras check underground runs and manholes without digging
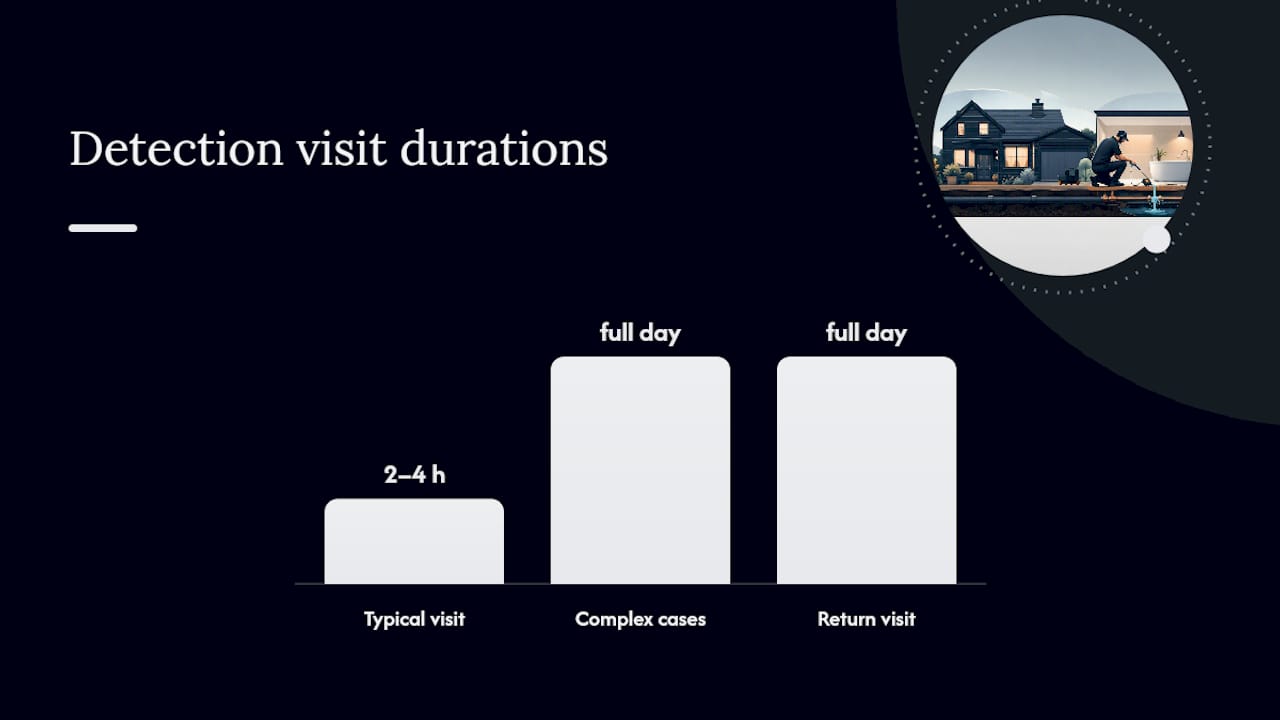
Intrusive access, lifting a floor or cutting into plasterboard, only happens once these methods narrow down a location, because targeted detection keeps the opening small and cheaper to reinstate. A typical detection visit runs two to four hours; complex cases involving slab leaks or long pipe runs can take a full day or need a return visit with different kit.
Pro Tip: Ask the specialist to photograph the leak source before they patch anything. Insurers and loss adjusters almost always want that evidence, and it's much harder to get once the wall's back up.
How insurers handle trace and access claims: what to do first
Insurers control most of this process tightly, largely because unauthorised work is the single biggest reason claims get reduced or refused. Instructing your own plumber before getting sign off risks you covering the bill yourself, even if the leak turns out to be exactly the kind of thing your policy covers.
- Call your insurer as soon as you suspect a hidden leak, before booking anyone
- Ask whether they have an approved specialist network or whether you need pre-approval for your own contractor
- Take photos, note meter readings, and keep every receipt from the moment you spot the problem
- Get a written report from whoever attends, most insurers ask for this to support the claim
- Keep the loss adjuster's contact details handy if the claim value is high enough to trigger one
If you've had to shut off water or arrange emergency drying before the insurer picks up the phone, document the timeline carefully; reasonable emergency action is usually reimbursed, but only with evidence to back it up.
Typical costs and policy limits: what a claim actually looks like
Policy limits commonly fall within a moderate range, though a few insurers offer unlimited or "reasonable costs" cover instead, and a handful set lower limits to keep premiums competitive on comparison sites. Checking your policy schedule, not just the marketing summary, is the only way to know your actual figure.
Investigation costs vary enormously by complexity:
- A straightforward leak behind an accessible stud wall might cost a few hundred pounds to locate and expose
- A slab leak or a run under a solid floor can run into several thousand pounds once specialist kit, multiple visits, and structural reinstatement are involved
- Adding a second trade, say an electrician checking wiring near a wet wall, adds to the bill and can push a mid-range claim closer to your policy cap
Your excess comes off the top regardless of how the claim is structured, and restoration work (drying, replastering, redecorating) usually sits under a different section of the policy entirely, with its own limit.
Who pays: homeowner, insurer, or the water company?
Responsibility for the pipe itself depends on exactly where it sits. Ofwat's guidance on supply pipes draws a line between the section a water company owns and maintains and the private supply pipe that serves your property alone.
- The water company is generally responsible for the main up to the boundary or stop valve
- You're usually responsible for the private supply pipe running from that point into your home
- If your supply pipe crosses a neighbour's garden or is genuinely shared, responsibility can be split, and it's worth checking with the water company directly
- Trace and access on your own side of the boundary stays a homeowner and insurer matter, not something the water company will fund
When in doubt about where the boundary sits, your water company can usually confirm it from their records rather than you having to dig to find out.
What to expect during the works: from detection to redecorating
A full trace and access job runs through distinct stages, and knowing the order helps you plan around the disruption.
- Detection visit: two to four hours for straightforward cases, longer for complex or underground leaks
- Access and repair: opening the affected area, fixing the pipe, then closing it back up
- Drying: dehumidifiers often run for several days to a couple of weeks depending on how saturated the structure is
- Restoration: replastering, flooring, and redecorating, usually arranged by the insurer's own contractor network
Insurers typically appoint restoration contractors directly once the leak's fixed, which can mean a different team to whoever did the detection work. Asking your insurer upfront how they sequence this, and whether you can use your own trusted plumber for the repair stage, saves a lot of back and forth later.
Our take on trace and access claims
Homeowners tend to assume trace and access cover means the insurer sorts everything from detection through to a repainted wall. It doesn't, and that gap catches people out at the worst possible moment, mid leak, with water already spreading.
What actually determines whether a claim goes smoothly isn't the size of your policy limit. It's whether you called the insurer before anyone touched a wall, and whether you've got a paper trail: photos, meter readings, a specialist's written report. We see this play out constantly. Two homeowners with identical leaks and identical policies get very different outcomes because one rang their insurer first and the other rang a plumber first.
We build our detection reports to the standard loss adjusters actually want, clear photos of the leak source, a written explanation of the method used, and a note on why the access point was chosen where it was. That's not extra paperwork for its own sake. It's the difference between a claim that gets paid promptly and one that sits in a queue while someone asks for more evidence.
— Michael
How Your-local-plumber can help right now
If you've found signs of a hidden leak and you're not sure where to start, Your-local-plumber offers something most independent tradespeople can't match on their own: detection reports written the way insurers actually want to see them, alongside clear fixed pricing agreed before any work begins.

We can usually get an engineer to you the same day for a genuine leak emergency, and every visit comes with a straightforward quote so there are no surprises when the invoice lands. If you'd rather understand the warning signs before booking anyone, our guide on spotting hidden leaks early is worth five minutes of your time. When you're ready, you can book an inspection with Your-local-plumber and get a specialist out to trace the problem properly, with documentation your insurer will actually accept.
Sources
For policy definitions and cover limits, see Compare the Market's explainer and MoneySuperMarket's guide. For pipe responsibility, consult Ofwat.
- What is the cost of water leak detection? | Checkatrade