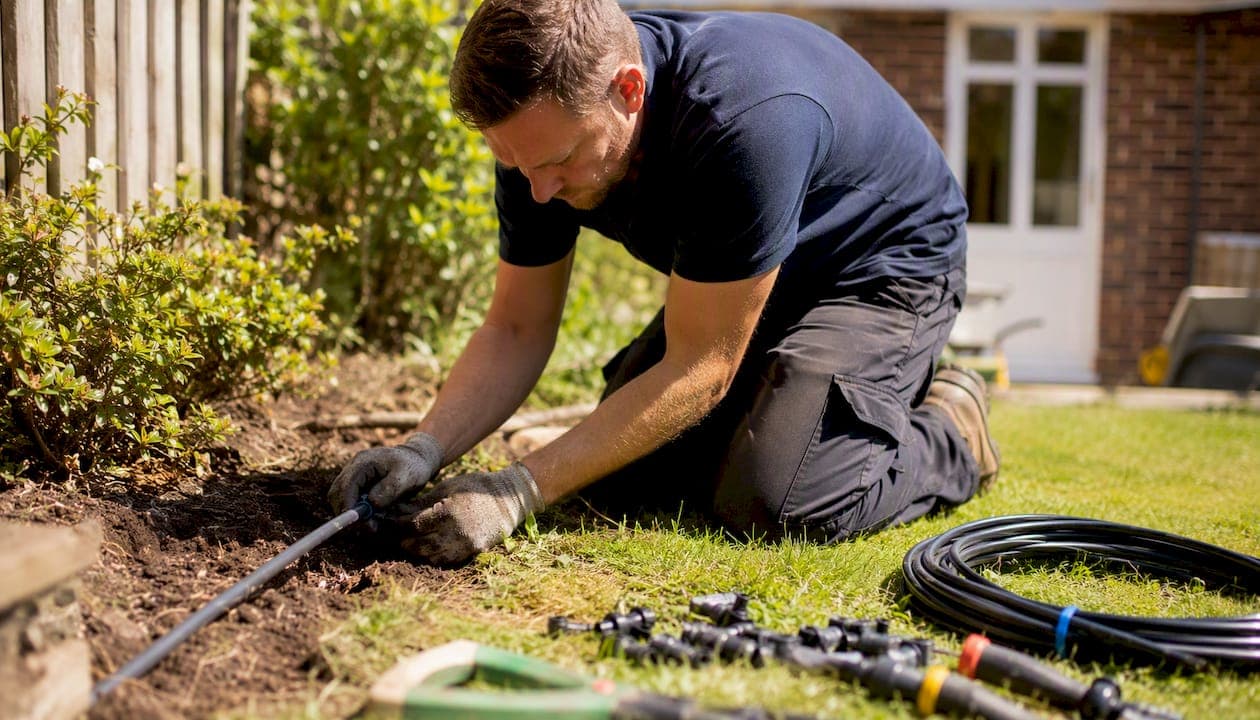
Most home gardeners can install garden irrigation plumbing themselves, provided the system connects to an existing outside tap, stays below a single zone, and uses a kit-based drip or micro-spray setup. Three checks decide whether you proceed alone or call a plumber:
- Water supply capacity and pressure. Measure your outside tap's flow rate (litres per minute) and check mains pressure. UK mains typically runs at moderate pressure, which is too high for most drip emitters without a pressure regulator.
- Backflow protection and notification. Any direct mains connection for irrigation requires a backflow prevention device under the Water Supply (Water Fittings) Regulations 1999. Some systems require prior notification to your water undertaker before work begins.
- Excavation and electrical risk. Trenching near buried services (gas, electricity, water, telecoms) or wiring a controller near outdoor sockets requires care and, in some cases, a qualified contractor.
Before you buy a single fitting, do this now: time how long it takes to fill a 10-litre bucket from your outside tap (that gives you flow in litres per minute), note whether you have an existing outside tap or need one fitted, and check whether your property has any listed-building or planning constraints that affect external groundworks.
Simple drip systems for borders and containers are genuinely DIY-friendly. Multi-zone pop-up sprinkler systems with mains backflow devices, pumped supplies, or complex hydraulic design are not, and attempting them without the right knowledge creates both a compliance risk and a real chance of contaminating the mains supply.
Table of Contents
- Which irrigation system suits your garden?
- How to check your water supply before you design anything
- UK regulations and backflow prevention you must consider
- What you need: components, sizes, and materials
- Step-by-step installation sequence
- How to test, commission, and balance your system
- Typical UK cost ranges and realistic timelines
- Maintenance schedule and winter care
- When should you hire a WaterSafe or approved plumber?
- Key takeaways
- A plumber's view on what actually goes wrong
- Your-local-plumber can handle the parts you should not DIY
- Useful sources and further reading
Which irrigation system suits your garden?
Choosing the right system type before buying anything else saves money and avoids the frustration of installing something that does not match your water supply or planting layout.
Drip irrigation (pressure-compensating dripline)
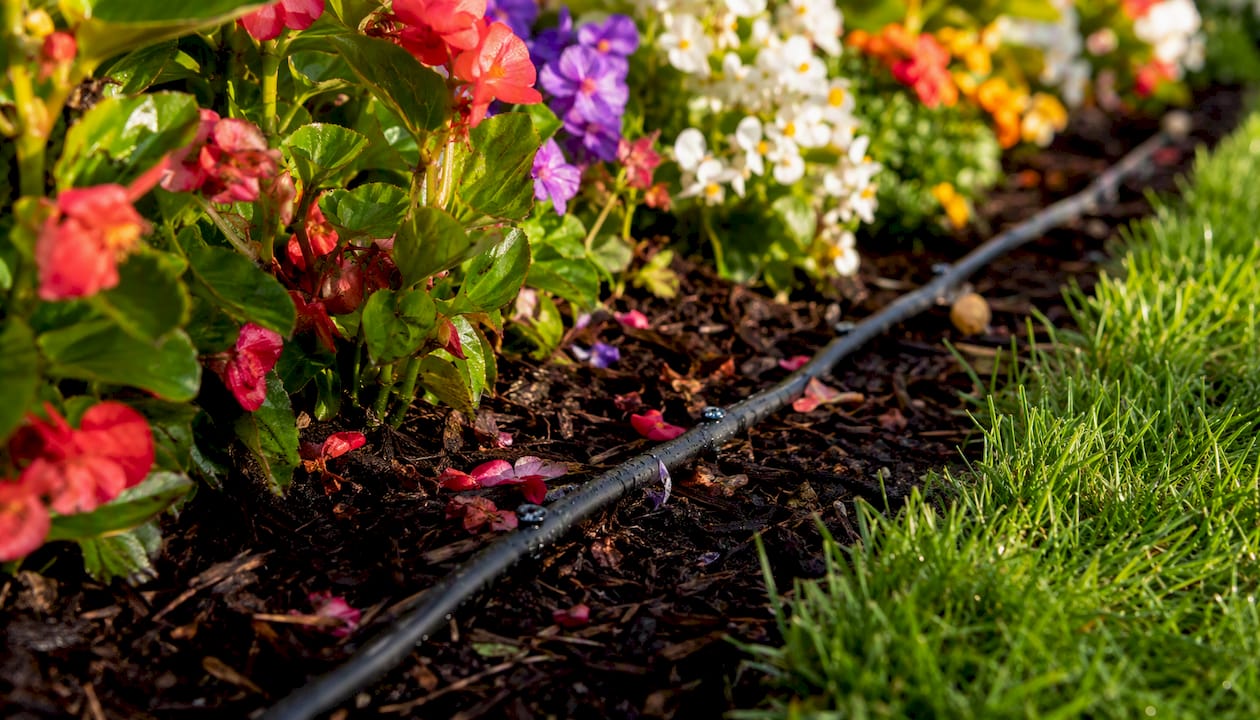
Pressure-compensating dripline, typically 16 mm with 2 l/h emitters spaced 30 cm apart, delivers water directly to the root zone at a controlled rate regardless of minor pressure fluctuations. It suits planted borders, hedges, and vegetable beds. Because it runs at low flow rates, it is also a very water-efficient option and may be permitted during hosepipe restrictions when appropriately fitted.
Micro-spray systems
Micro-sprays sit on short stakes and throw a fine spray over a radius of 30–90 cm. They work well for ground cover, densely planted beds, and containers grouped together. Flow rates are higher than drip, so zone sizing matters more.
Pop-up sprinklers
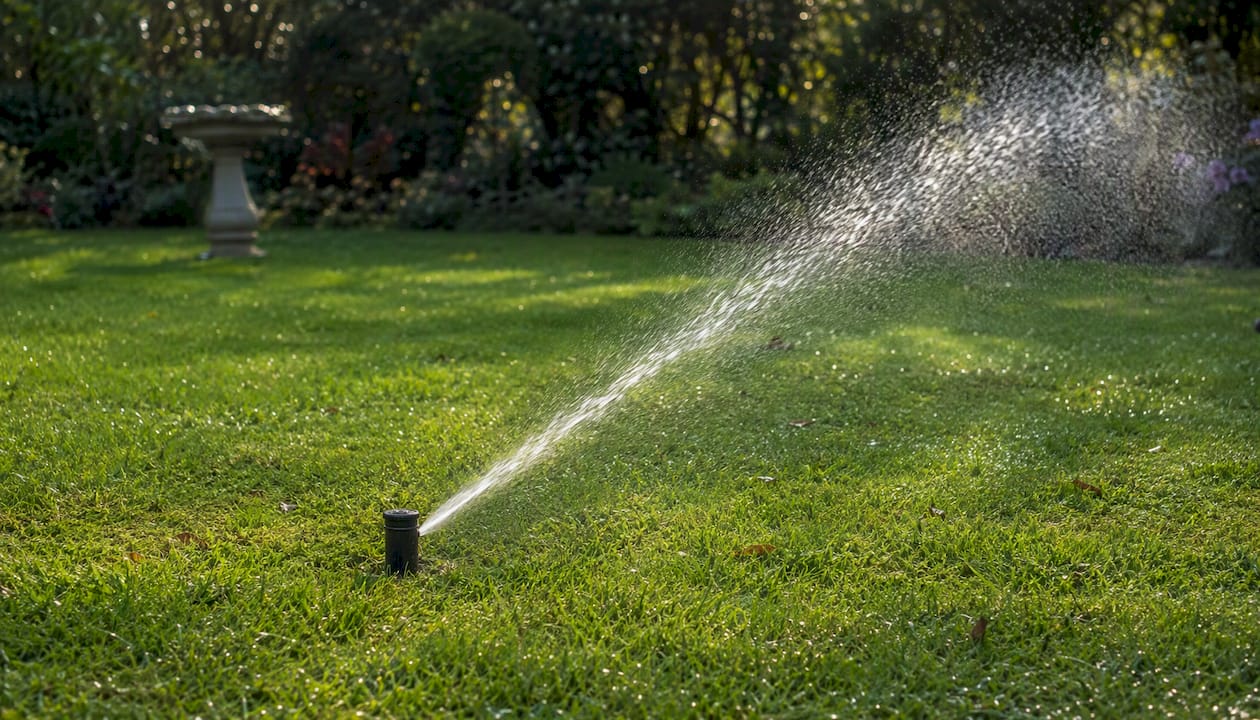
Pop-up heads retract flush with the ground when not running and are the standard choice for lawns. A small to medium lawn typically needs 3–6 heads per zone, with head-to-head coverage (each head reaches the next) to avoid dry patches. These systems run at higher pressures and flow rates, require careful hydraulic design, and almost always need a qualified installer when connected directly to the mains.
Soaker hoses and subsurface drip
Soaker hoses seep water along their entire length and are the simplest option for vegetable rows. Subsurface drip buries the dripline 10–15 cm below the surface, which reduces evaporation further and is often the most resilient option during drought restrictions. Both are DIY-friendly.
| Garden feature | Recommended system | DIY-friendly? |
|---|---|---|
| Planted border | Pressure-compensating dripline | Yes |
| Lawn | Pop-up sprinklers | Usually installer job |
| Containers | Micro-spray or drip kit | Yes |
| Vegetable bed | Soaker hose or subsurface drip | Yes |
| Slope or bank | Pressure-compensating drip | Yes (with regulator) |
| Mixed large garden | Multi-zone drip + pop-up | Installer recommended |
Pro Tip: Match emitter output to soil type, not just plant water need. Sandy soils drain fast, so shorter, more frequent cycles with higher-output emitters work better. Clay soils need slow, low-output emitters to avoid runoff — a 2 l/h emitter on clay is far more effective than a 4 l/h one that simply puddles.
For practical purchasing guidance on equipment types, the Screwfix garden watering guide gives a useful overview of how automatic systems are assembled from components.
How to check your water supply before you design anything
Hydraulic design is the single biggest variable in whether a garden irrigation installation works or fails. Getting this wrong means emitters that drip unevenly, pipes that burst, or a system that simply cannot supply enough water to run all zones simultaneously.
Measuring flow rate
Fill a 10-litre bucket from your outside tap, fully open, and time it in seconds. Divide 600 by the number of seconds to get litres per minute. A typical UK outside tap delivers somewhere between 12 and 20 litres per minute, though older properties or long pipe runs can be significantly lower. If your tap takes more than 50 seconds to fill a 10-litre bucket, you have a low-pressure or flow issue worth investigating before designing any zones.
Measuring mains pressure
A simple pressure gauge screwed onto the tap gives a reading in bar. Alternatively, a plumber can check it during a site visit. UK mains pressure commonly sits at higher levels than most drip emitters are designed for.
Zone demand calculation
Convert your emitter output from litres per hour to litres per minute (divide by 60), then multiply by the number of emitters in a zone. A border with 20 emitters at 2 l/h each uses 0.67 litres per minute. That is well within a typical tap's capacity. Add a second zone of 30 emitters and you are at 1 litre per minute, still manageable. Pop-up sprinkler heads typically use 1–3 litres per minute each, which is why lawn zones push supply limits quickly.
A 13 mm supply hose loses meaningful pressure over runs beyond typical lengths recommended in irrigation guidelines. If your garden is large, either upsize to 20–25 mm MDPE for the main run or split the system into shorter zones fed from a single manifold closer to the tap. Ignoring pipe sizing is the most common reason a well-planned system delivers uneven coverage at the far end.
UK mains pressure also requires a pressure regulator fitted between the tap and the main supply line. Running 3–4 bar directly into a drip system designed for 1.5 bar will blow emitters off their stakes, cause micro-tube to split at connections, and increase the risk of a leak that goes unnoticed underground. The Garden Patch installation guide confirms this is the most common hydraulic mistake in DIY drip installations.
UK regulations and backflow prevention you must consider
Connecting any irrigation system to the mains is a regulated activity. The Water Supply (Water Fittings) Regulations 1999 require that all plumbing installations prevent contamination of the public water supply. For garden irrigation, that means a correctly specified and installed backflow prevention device is not optional.
When must you notify your water undertaker?
Prior notification is required before starting certain works. The Thames Water code of practice explains that the water undertaker can refuse consent within 10 working days of notification, so you must wait before proceeding. Works that typically require notification include:
- Any new connection to the mains supply for irrigation purposes
- Installation of a pump on the supply pipe
- Systems that use a break tank or rainwater harvesting connected to mains top-up
- Any work crossing a public sewer or mains pipe
Thames Water's code of practice states that using a water industry approved plumber removes the requirement for prior notification in many cases, because the approved plumber issues a compliance certificate directly. This is a practical advantage worth knowing: for complex mains work, hiring an approved plumber is often faster than the notification route.
For plumbing compliance questions beyond irrigation, the same notification framework applies to most new mains connections. Find approved plumbers through WaterSafe or the WRAS approved contractor list.
What you need: components, sizes, and materials
A complete garden irrigation setup requires more than just pipe and emitters. Here is the full shopping list for a typical domestic drip system, with UK sizes and notes on where each component sits in the system.
| Component | Typical UK size/spec | Where it goes |
|---|---|---|
| Tap connector / hose union | ¾" BSP | Connects system to outside tap |
| Timer / controller | Battery or mains-powered | Between tap and filter |
| Filter (Y-type or disc) | 3/4" inline, 120 mesh | After timer, before regulator |
| Pressure regulator | 1.5–2 bar output, ¾" | After filter |
| DB valve | ¾" BSP, accessible position | Above highest emitter |
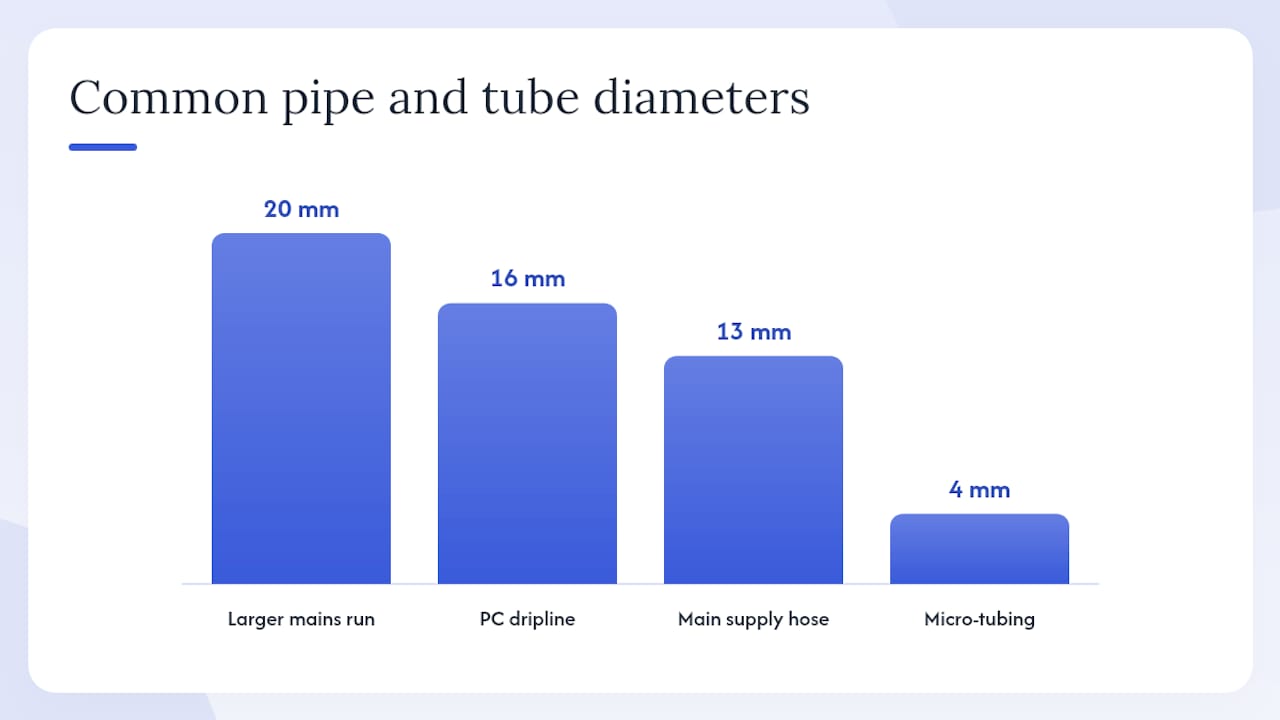
| Main supply hose | 13 mm layflat or MDPE | From tap to zone start |
| Larger mains run | 20 mm MDPE | For runs over 30 m |
| Pressure-compensating dripline | 16 mm, 2 l/h at 30 cm spacing | Along planting rows |
| Micro-tubing | 4 mm OD | From 13 mm main to individual emitters |
| Adjustable drip emitters | 0–8 l/h adjustable | Individual plants, containers |
| Micro-spray heads | 30–90 cm radius | Ground cover, dense beds |
| Pop-up sprinkler heads | 10–15 cm pop-up, matched nozzles | Lawn zones |
| End caps / goof plugs | 13 mm and 4 mm | Sealing unused ports |
| Zone valves (solenoid) | 24V AC or 9V DC latching | Each zone, wired to controller |
| Pipe stakes / clips | 13 mm saddle clips | Securing main line |
Kits from garden centres or plumbing merchants bundle the tap connector, filter, regulator, main hose, micro-tube, and a set of emitters. They are a sensible starting point for a single-zone border system. For multi-zone setups or anything involving buried MDPE, buying components individually gives you the right sizes and materials. Commercial-grade pressure-compensating dripline lasts significantly longer than the thin-walled layflat hose supplied in budget kits, and the difference shows within a few seasons.
Pro Tip: Buy 10–15% more micro-tubing and emitters than your plan requires. Punching a hole in the wrong place is easy to do, and having spares on hand means you finish the job in one session rather than making a second trip to the merchant.
Step-by-step installation sequence
Work through these steps in order. Skipping the planning and measuring stages is the most reliable way to end up with a system that does not work on the first run.
-
Draw your layout plan. Sketch the garden to scale, mark planting zones, note the tap location, and identify any obstacles (paths, raised beds, trees). Mark where you want emitters and calculate the number per zone.
-
Check for underground services. Before any digging, use a cable and pipe detector (available from tool hire shops) to scan the area. Contact your utility providers if you are unsure. Never assume a garden is clear.
-
Calculate zone demand. Add up emitter flow rates per zone and compare against your measured tap flow. No zone should exceed 80% of your available flow rate to leave headroom for pressure drop.
-
Connect the controller and backflow device. Fit the timer to the tap, then the filter, then the pressure regulator. The DB valve goes above the highest emitter point in the system, not at the tap. Refer to the UK plumbing regulations guide if you are unsure about compliance at this stage.
-
Lay the main supply line. For surface runs, secure with pipe stakes every 50–60 cm. For buried runs, dig a trench to the appropriate depth. Burial depth guidance suggests main pipes are commonly buried between 30–100 cm depending on frost risk, ground conditions, and local practice. In most UK gardens, 30–45 cm is typical for micro-irrigation mains, with deeper burial (60+ cm) for any pipe that must survive vehicle traffic or severe frost.
-
Mole ploughing. For longer runs across lawns, a mole plough (available from hire shops) pulls a pipe underground without open trenching. It is faster and causes far less surface disruption than hand-digging, but requires a clear run free of tree roots and buried services. Always scan with a detector first.
-
Run micro-tubing from the main line. Use a hole punch to make clean holes in the 13 mm main, insert barbed connectors, and run 4 mm micro-tube to each emitter position. Keep runs short (under 1.5 m per branch where possible) to maintain even flow.
-
Fit emitters and cap all ends. Push emitters into the micro-tube ends and stake them at the base of each plant. Cap the end of every main line run with an end cap. Uncapped ends are the most common cause of a failed first test.
-
Wire zone valves to the controller. Follow the controller's wiring diagram. Most domestic controllers use 24V AC solenoid valves or 9V DC latching valves for battery-powered units. Keep cable runs short and use waterproof connectors at all outdoor joints.
-
Commission before burying or mulching. Run each zone, check for leaks at every connection, adjust emitter output, and confirm coverage before covering any pipe. See the next section for the full commissioning procedure.
Safety during installation: wear gloves when handling MDPE pipe (cut edges are sharp), use eye protection when operating a rotary hole punch, and never use power tools near a trench until you have confirmed no buried services are present. If you strike a buried cable or pipe, stop immediately and contact the relevant utility provider.
How to test, commission, and balance your system
Commissioning is where most DIY installations either succeed or reveal a problem that is far easier to fix before the pipes are buried.
Pressure testing
With all emitters fitted and end caps in place, open the tap slowly and pressurise one zone at a time. Hold the zone at working pressure for at least 15–30 minutes and walk the entire run inspecting every connection, barbed fitting, and emitter stake. A significant pressure drop during the hold period points to a leak, a poorly seated barbed connector, or an end cap that has not fully engaged.
A pressure drop of more than 0.2 bar over a 30-minute hold test on a domestic drip zone indicates a leak that needs finding before the pipe is covered. Soap solution applied to fittings will bubble at the leak point. On micro-tube connections, the most common cause is a barbed connector that was pushed in at an angle rather than straight.
Flushing
Before fitting emitters, flush each zone by removing the end cap and running water through the main line for 30–60 seconds. This clears debris from the pipe that would otherwise block emitters within the first few days of operation. Refit end caps after flushing.
Balancing zones
Run each zone for a set period (say, 10 minutes) and check that emitters at the far end of the run deliver comparable output to those near the tap. A significant difference indicates either a pipe that is undersized for the zone length or a pressure regulator set too low. The Garden Patch commissioning notes recommend splitting zones by peak demand rather than area: calculate peak emitter flow per zone and confirm it does not exceed your measured tap flow before finalising the design.
Common commissioning problems
Low flow at far-end emitters usually means the main line is too long for its diameter or the pressure regulator is set below the emitter's minimum operating pressure. Blocked emitters on a new system almost always contain pipe debris — flush again. Uneven coverage on a pop-up lawn zone typically means head spacing is too wide or nozzle arcs are mismatched.
Typical UK cost ranges and realistic timelines
The gap between DIY and professional installation costs is significant, but so is the gap in complexity between a simple border drip system and a multi-zone pop-up lawn setup.
| System type | DIY parts cost | Professional installed cost | Typical timeline |
|---|---|---|---|
| Single-zone border drip | £80 | £400 | DIY: half a day |
| Multi-zone drip (3–4 zones) | £200 | £800 | DIY: 1–2 days; pro: 1 day |
| Small lawn pop-up system | £300 | £900 | Pro: 1–2 days |
| Full garden multi-zone system | £500 | £1,500 | Pro: 2–3 days |
Checkatrade's irrigation cost guide puts professional labour at £480–£720 per day, with basic drip system component costs starting around £250–£315 for a kit-based install. Per-zone professional costs typically range from £250 to £1,100 depending on system type, ground conditions, and whether backflow devices require testing.
Factors that push costs up:
- Rocky or clay-heavy ground that slows trenching
- Requirement for an RPZ valve (adds device cost plus annual testing fees)
- Pumped supplies or rainwater harvesting integration
- Long pipe runs requiring larger-diameter MDPE
- Multiple zones needing a multi-channel controller and solenoid valves
Where you can save money safely: buy components individually rather than in branded kits for anything beyond a single zone, hire a mole plough rather than hand-digging, and use a battery-powered controller rather than a mains-wired unit if the tap is close to the planting area.
Maintenance schedule and winter care
A garden irrigation system that is not maintained will fail quietly. Emitters block, filters clog, and micro-tube joints work loose over a season of ground movement and UV exposure.
In-season maintenance
Clean the inline filter monthly during the watering season. Most Y-type and disc filters unscrew by hand; rinse the mesh under a tap and refit. Check emitters and micro-spray heads every four to six weeks for blockages or displacement. Walk the main line after any significant ground disturbance (mowing, planting, pets) and check for pulled-out stakes or kinked micro-tube.
The single most common reason a drip system delivers uneven coverage mid-season is a partially blocked filter, not a faulty emitter. Clean the filter first before replacing any emitter.
Winterisation
The UK's frost risk is moderate but real, particularly in northern England and Scotland. Before the first hard frost:
- Drain all above-ground micro-tube and emitters by opening end caps and running the system briefly, then leaving end caps off overnight.
- For buried mains, a compressor blow-out (using a low-pressure air compressor at no more than 50 psi) clears residual water from the pipe. This is particularly important for pop-up sprinkler systems where trapped water in the head body will crack the casing.
- Remove batteries from battery-powered controllers and store them indoors.
- Store removable micro-tube, emitters, and any above-ground fittings in a dry shed or garage.
Annual service checks
Testable backflow devices (RPZ valves) require annual testing by a qualified engineer. DB valves should be inspected annually for correct seating and freedom of movement. Smart controllers with firmware update capability should be checked for updates at the start of each season. Buried MDPE mains, if correctly installed, can last 20 years or more; above-ground micro-tubing and dripline typically needs replacement after 8–15 years depending on UV exposure and ground conditions. For broader pipe maintenance habits, the same seasonal inspection logic applies to all outdoor plumbing.
When should you hire a WaterSafe or approved plumber?
Some tasks in a garden irrigation installation are genuinely beyond DIY scope, not because they are technically difficult, but because they carry legal, safety, or compliance consequences if done incorrectly.
Hire a qualified contractor when:
- Your system requires an RPZ valve (mandatory for higher fluid-category installations and must be tested annually).
- You need a new mains connection or a new outside tap fitted.
- The system involves a pump on the supply pipe or a break tank with mains top-up.
- Any pipe run crosses a public sewer, a shared boundary, or a mains supply pipe.
- You are unsure which backflow device is required for your fluid category.
- Prior notification has been submitted and you want the work completed with a compliance certificate rather than waiting for the notification period to expire.
- The system involves multi-zone hydraulic design with more than four zones, or a pumped supply.
What to ask an installer
Before agreeing to any work, ask for:
- Proof of WaterSafe membership or WRAS-approved contractor status.
- Evidence of public liability insurance (minimum £2 million is standard).
- A written quote that specifies materials, backflow device type, and commissioning procedure.
- Confirmation that a compliance certificate will be issued on completion.
- Details of any notification submitted to the water undertaker on your behalf.
A professional visit should include a site survey, a written quote, installation to Water Fittings Regulations standards, and a test certificate. Any installer who cannot provide a compliance certificate for mains-connected work is not operating within the regulatory framework.
Key takeaways
A correctly installed garden irrigation system requires proper hydraulic design, a compliant backflow device, and commissioning before any pipe is buried or covered.
| Point | Details |
|---|---|
| Measure supply first | Time a 10-litre bucket fill to calculate flow in litres per minute before designing any zones. |
| Fit a pressure regulator | UK mains at 3–4 bar will damage drip emitters; a regulator set to 1.5–2 bar is non-negotiable for drip systems. |
| Backflow protection is a legal requirement | A DB valve above the highest emitter is the minimum for most domestic drip systems under the Water Fittings Regulations 1999. |
| Commission before covering | Pressure-test each zone for 15–30 minutes and flush lines before fitting emitters or burying pipe. |
| Your-local-plumber for complex installs | For RPZ valves, new mains connections, or multi-zone systems, Your-local-plumber provides site surveys, WRAS-aware installation, and compliance certificates. |
A plumber's view on what actually goes wrong
The most common DIY irrigation mistake is not the trench depth or the emitter spacing. It is the backflow device. Specifically: either it is missing entirely, or it is fitted at the wrong height. The DB valve must sit above the highest emitter in the system. Fit it at tap height on a flat garden and it may still work. Fit it below a raised bed or a container on a wall bracket and it is non-compliant from day one.
The second most common error is overtightening plastic fittings. Push-fit and compression fittings on MDPE and micro-tube are designed to seal with hand pressure. Using a wrench on a plastic compression nut cracks the olive or distorts the seat, and the leak that results is slow enough that you might not notice it until the water bill arrives. Hand-tight, then a quarter turn, is almost always enough.
One thing that saves real time on installation day: leave your micro-tube coil in direct sunlight for 20–30 minutes before you start routing it. Cold 4 mm micro-tube is stiff and wants to spring back into its coil shape, which makes routing around plant stems and under mulch genuinely awkward. Warm tube is pliable and stays where you put it.
On pressure compensation: many gardeners buy adjustable drip emitters because they seem flexible, then wonder why the far end of a long run delivers half the water of the near end. Pressure-compensating emitters cost a little more but maintain consistent output across a range of pressures. On any run longer than 15 metres, they are worth the difference.
The Flourish Landscaping design guide makes a point that is easy to overlook: subsurface drip, installed correctly, is often the most resilient system during hosepipe restrictions because the water company's ban wording frequently exempts drip systems with timers. Check your water company's current ban conditions before assuming any system is exempt, but it is a genuine advantage worth designing for.
Your-local-plumber can handle the parts you should not DIY

For single-zone drip systems on a small border, a confident DIYer with the right kit can get the job done in a morning. The moment a project involves a new mains connection, an RPZ valve, a pumped supply, or more than three zones, the compliance and hydraulic complexity shifts the risk profile significantly.
Your-local-plumber provides site surveys, full garden irrigation installation, and compliance certificates for mains-connected systems across multiple UK towns and cities. Every installation is carried out by experienced engineers who understand the Water Fittings Regulations, specify the correct backflow device for your fluid category, and issue the paperwork your water undertaker expects. Fixed pricing means you know the cost before work starts, with no surprises on the invoice.
To book a site survey or get a quote for your irrigation project, contact Your-local-plumber and an engineer will assess your supply, design your zones, and handle notification if required.
Useful sources and further reading
- The Water Supply (Water Fittings) Regulations 1999
- Water regulations code of practice (Thames Water)
- How to Install a Garden Irrigation System in the UK — The Garden Patch
- Garden irrigation systems: design and installation guide | Flourish Landscaping
- LWS interpretations of regulations relating to domestic and commercial irrigation installations
- Irrigation system cost guide (Checkatrade)
- UK Water Regulations for Domestic Gardens — Access Irrigation
- Garden Watering System Guide (Screwfix)