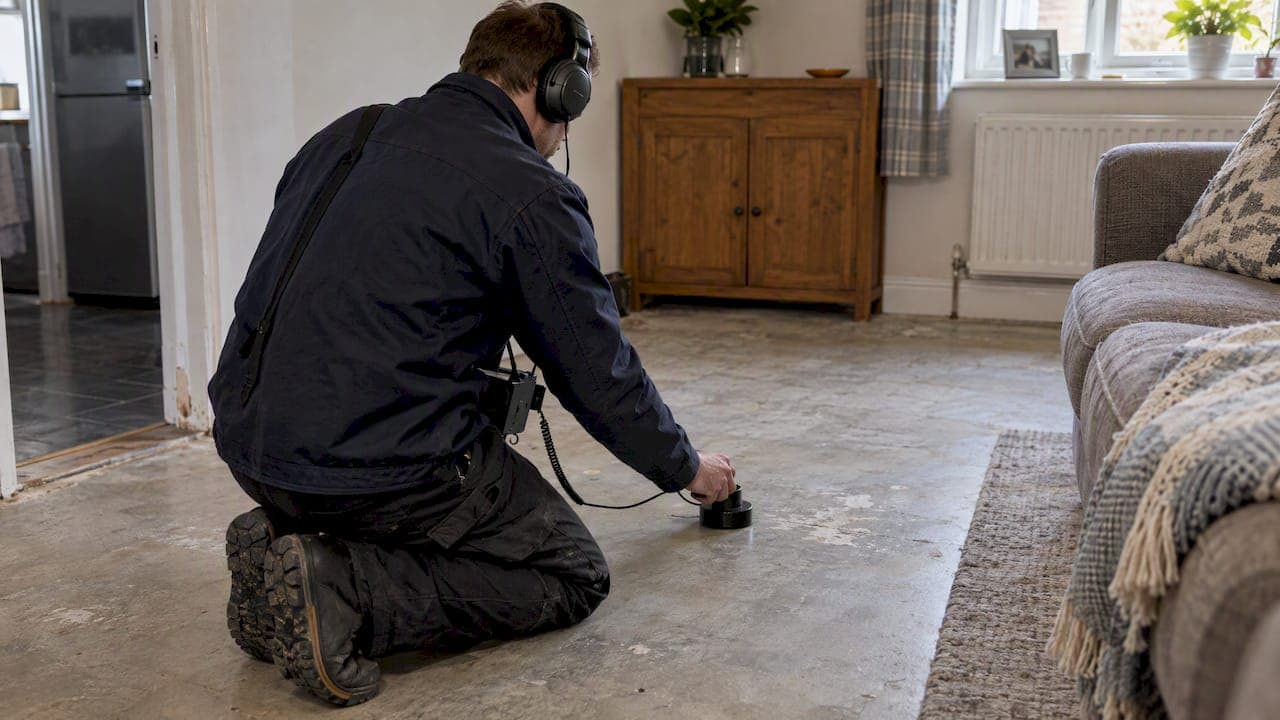
If you suspect a leak under a concrete floor, confirm it with a night-time meter check, isolate the supply if water is escaping, and call an accredited specialist from the WaterSafe register. Do not start digging. Acoustic, tracer and thermal methods find the fault without wrecking your floor, which also keeps your Ofwat leakage allowance and insurance claim on solid ground. We can attend as a local example.
TL;DR:
- For metered homes, leave all water unused for at least two hours, then compare readings; movement in the red digits confirms ongoing water loss.
- Damp finishes, unexplained pressure loss, and a moving meter together make a hidden leak more likely than any single clue alone.
- Acoustic detection works best on shallow pressurized supply pipes, but plastic pipework and noisy sites can make its readings less reliable.
- Pipe lining avoids opening most floor finishes, but it only works when the pipe is accessible at both ends and remains suitable for lining.
- Metered customers may receive credit for water lost after repair, but companies can refuse allowances when repairs were delayed unreasonably or negligence occurred.
Table of Contents
- How do you know if there is a leak under your concrete floor?
- What should you do straight away to limit the damage?
- How do professionals find a leak under concrete?
- Which repair options exist, and what are the trade-offs?
- Who pays, and what do insurance and leakage allowances cover?
- When should you call a leak-detection specialist?
- How long does leak detection and repair under a concrete floor take?
- What does fixing a concrete floor leak cost?
- Why precise detection usually saves money and time
- How we help with detection and repairs
- FAQ
- Sources
How do you know if there is a leak under your concrete floor?
Hidden slab leaks rarely announce themselves with a puddle. They show up first in numbers, then in small physical oddities, and the sooner you link them, the less water and damage you pay for.
Start with the meter. For metered homes, a reading taken during a stretch with no water use is the most objective test you have, and a rising red-digit reading points to a hidden leak, according to Thames Water.
- Warm spots: a patch of floor that feels warm underfoot when no heating runs below it can mean a hot pipe is escaping.
- Damp or lifted finishes: damp patches, bubbling vinyl, a lifting carpet edge or a musty smell near one area.
- Sounds: hissing or constant flowing noises when every tap is off, plus gurgling in drains.
- Pressure and bills: a drop in pressure or a usage spike nobody can explain.
- Outdoor clues: unusually lush grass or a sunken patch where a service pipe crosses a drive or garden.
Common leak signs include loss of pressure, damp patches, mould and unusual plant growth outdoors. One symptom alone proves little, but two together, especially with a moving meter, justify a professional visit. Our guide to signs of hidden leaks walks through a fuller checklist.
What should you do straight away to limit the damage?
Work through these steps in order while you wait for a specialist.
- Run the meter test: use no water for at least two hours (overnight is easiest), note the reading, then check again. Any movement in the red digits confirms water is going somewhere.
- Find and close the internal stopcock. Do not force a stiff valve: use the meter box valve instead or contact your water company. Our emergency water shutoff steps cover the process in more detail.
- Keep clear of sockets and appliances. Treat any significant leak near electrics as an emergency, and isolate the mains electricity at the consumer unit only if you can do so safely. Call a qualified electrician if water has reached wiring.
- Photograph the affected area, with time stamps, and write down every meter reading you take.
- Keep any receipts, survey notes and messages with tradespeople. Your insurer and water company will ask for them.
Pro Tip: Take a photo of the meter dial each time you read it, with the date visible in the shot. It is faster than writing and harder to dispute.
How do professionals find a leak under concrete?
Specialists work from least invasive to most invasive, and each method has a job it does well and a limit you should know about. Our acoustic survey case study discusses how this plays out.
- Acoustic detection: listening equipment picks up the noise of water escaping a pressurised pipe. It works best on supply pipes close to the surface and is less reliable on plastic pipes or very noisy sites.
- Thermal imaging: a camera shows surface temperature differences that can follow a leak, especially from heating pipes. Not every temperature variation is a leak, so images need interpreting by a qualified specialist to avoid false positives.
- Tracer gas: an inert gas is fed into the pipe and detected where it escapes through the slab. It is the tiebreaker when acoustic and thermal results are inconclusive.
- Ground-penetrating radar (GPR) and mapping: radar traces pipe routes and depths so that any access point is cut in the right place first time.
Locating hidden leaks usually needs specialised technology such as acoustic sensors or tracer gas, plus professional expertise, and the same source discourages DIY work on pipes embedded in concrete because clumsy intervention can make damage worse.
A typical survey begins with your meter and a walk-round, moves to acoustic or thermal checks, brings in tracer gas or GPR only if the picture is still unclear, and ends with a small, targeted opening in the floor. Expect the engineer to explain what each test showed and why the chosen spot is the likeliest source.
Which repair options exist, and what are the trade-offs?
Once the fault is pinpointed, the repair method depends on pipe type, depth and how much floor finish sits above it.
- Traditional excavation: breaking out the slab over the pipe gives full access and suits damaged or awkward pipework. It is the most disruptive and needs the floor finish reinstated afterwards.
- Tunnelling or targeted access: a smaller opening, or a route under the slab from outside, reduces surface disruption and suits a localised fault.
- Trenchless repair and pipe lining: a liner is fed through the existing pipe, so floor finishes stay largely untouched. It only works where the pipe is accessible at both ends and its condition allows lining.
- Hot versus cold pipes: heating circuits embedded in screed behave differently from cold supply pipes, and a leak on a heating loop can also mean a pressure drop on your boiler.
Newer installations should make repair easier. UK practice expects hot and cold pipework embedded in solid floors to be ducted or sleeved, which lets a pipe be reached or replaced without breaking out the whole floor. Older homes often lack that protection, which is why detection precision matters so much.
When you collect quotes, ask for:
- a written scope of works describing the method and where the floor will be opened
- the warranty on the repair itself and on the reinstatement
- who reinstates the floor finish, and to what standard
- a document your insurer can read, with the cause of the leak stated
Who pays, and what do insurance and leakage allowances cover?
Responsibility starts with where the pipe runs. Homeowners are responsible for repairing and maintaining supply pipes within their property boundary. Water UK also reports that approximately 25% of all water leakage occurs within domestic properties, where the homeowner is responsible for maintenance and repair.
Two routes can ease the cost:
- Leakage allowance: for metered customers, water companies may credit lost water once the leak has been repaired, though an allowance can be refused where repairs were unreasonably delayed or the homeowner was negligent. Repair quickly and keep proof.
- Buildings insurance: most buildings policies cover damage from burst or leaking pipes, but exclusions and claim conditions vary, so read your wording for trace and access cover.
Our guide to trace and access leak cover and our burst pipe insurance claim steps explain what to ask your insurer. The practical order is simple: isolate, document, arrange detection, get a written quote, then keep the final invoice.
When should you call a leak-detection specialist?
Stop DIY checks and call once any of these apply: the meter is moving with all taps off, water is visibly spreading, water is near electrics, or basic checks leave the source unclear.
On that first call, ask:
- whether the engineer is on the WaterSafe register
- which detection methods they use, and which they would try first
- how long a survey usually takes
- whether there is a call-out fee, and what it covers
On site, expect non-invasive tests first, a targeted opening only if needed, and a written estimate with options before any work starts. WaterSafe lists accredited leak detection plumbers who use advanced technology to locate and repair hidden leaks, which makes the register a sensible first stop.
Pro Tip: Ask for the survey report as a PDF with annotated photos. It strengthens both an insurance claim and a leakage allowance request.

How long does leak detection and repair under a concrete floor take?
Timings depend on access, pipe type and how many methods the engineer needs, so treat these as typical patterns rather than promises. We do not publish a fixed duration for every job, and a written estimate from your engineer is the figure to rely on.
- Confirming the leak: the meter test takes a couple of hours, ideally overnight.
- Survey and pinpointing: a straightforward acoustic or thermal survey is often completed within a single visit. Tracer gas or radar mapping can add time, particularly in larger properties.
- Repair: a small targeted opening and pipe repair is usually quicker than excavation across a wider area, and relining depends on pipe access and condition.
- Reinstatement: concrete needs time to cure and finishes such as screed, tiles or flooring have to be refitted. This stage often takes longer than the repair itself and is where homeowners get caught out.
- Paperwork: insurers and water companies take their own time to respond to claims and allowance requests, so submit evidence early.
The quickest jobs are those where the leak is found precisely, access is clear and the floor finish is simple to replace. The slowest involve vague symptoms, repeated guesswork and wider openings. A prompt, accurate survey is the single biggest influence on the total timeline.
What does fixing a concrete floor leak cost?
Costs vary widely with the pipe affected, the depth, the repair method and what sits on top of the slab, so no honest single figure fits every house. What we can say is where the money goes.
- Survey: the detection stage. Our acoustic survey example discusses supply-pipe surveys.
- Repair labour: at our rates, heating and boiler work is charged at £110 per hour. Leak repairs are quoted on the job, since scope differs so much from one slab to the next.
- Access and reinstatement: breaking out and making good concrete, screed and flooring often outweighs the pipe repair itself.
- Related costs: drying out, redecoration and temporary heating or water supply if the system is off for some time.
Targeted detection keeps the biggest line, reinstatement, as small as it can be. Before work begins, ask for a written breakdown that separates survey, repair, reinstatement and any follow-up visits. If a claim is possible, check cover first, because an insurer may want to approve costs or appoint their own contractor.
Why precise detection usually saves money and time
My view is that the cheapest repair is almost always the one that opens the smallest hole. Homeowners tend to fear the survey fee and then accept an expensive guess, when a precise pinpoint turns a room-wide dig into a patch-sized repair. Accurate evidence also makes insurers and water companies more comfortable agreeing to a claim or allowance, because the cause, the location and the repair are all documented. Keep every invoice, choose an accredited engineer, and let one trusted local plumber coordinate detection and repair so the disruption stays small.
— Michael
How we help with detection and repairs
We find the leak, fix it and tell you the price before we start. Our engineers carry out non-destructive leak detection and leak repairs, offer an emergency response, and give transparent pricing with no call-out fee and a no fix, no fee guarantee.

- Leak detection survey and leak repair, with floor reinstatement planned into the quote
- 24/7 emergency attendance, including holidays
- Written quote before work, payment only after successful work, and a warranty
Book a plumbing visit, or if water is spreading now, use our emergency engineer booking.
FAQ
Why is water coming up from my bathroom floor?
Water at the floor surface usually means a leaking pipe, a failed seal around a toilet, shower or bath, or a drain problem. If the meter moves with everything off, a pipe under the floor is likely. Isolate the supply and call a specialist to confirm the source.
What should I do if there is a water leak under my house?
Turn off the water at the internal stopcock or meter box, keep clear of electrics and note the meter reading. Then contact an accredited engineer from the WaterSafe register and take photos for your insurer.
Can water seep into a concrete floor?
Yes. Concrete is porous, so water from a leaking pipe can travel through the slab and surface some distance from the actual fault, which is why damp patches can mislead. Professional testing pinpoints the true source before anyone cuts into the floor.
How do you fix a leaking pipe under concrete?
The repair depends on the pipe and its depth: a targeted opening and pipe repair, a tunnelled access route, or lining the pipe from inside. The specialist chooses the least disruptive option once the leak is pinpointed. DIY work on pipes embedded in concrete is discouraged because it can worsen the damage.