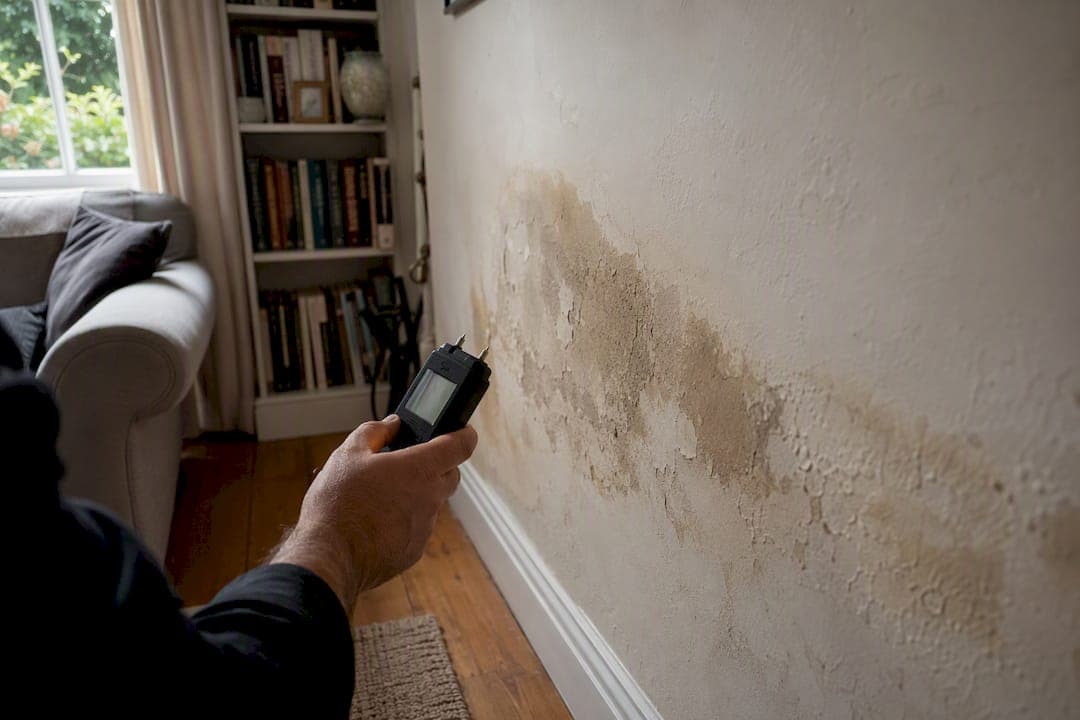
If you're seeing a spreading damp patch, bubbling paint, or a musty smell from a wall, it's very likely a leaking pipe behind it. If the patch is growing or you can hear running water, turn off your internal stopcock now. If water is near sockets or wiring, switch off the electrics at the consumer unit and call an emergency plumber immediately.
TL;DR:
- Water meter tests, acoustic detection, and thermal imaging provide effective non-invasive methods to locate leaks before any wall damage occurs.
- Homeowners should act immediately by shutting off the stopcock and affected electrical circuits when water damage or spreading damp patches are visible.
- Repair costs vary based on accessibility and extent of wall damage, ranging from low hundreds for simple fixes to much higher for extensive wall removal or pipe lining.
- Proper prevention, including regular pressure checks, insulation, and proactive inspections during other home work, can significantly reduce the risk of future leaks.
- Most UK home insurance policies cover damage caused by leaks, but timely reporting with documented evidence is crucial for a successful claim.
Table of Contents
- What to do right now to limit damage from a leaking pipe in wall
- What are the signs of a pipe leaking behind a wall?
- How can you confirm a leak before opening the wall?
- How do plumbers find a leak without damaging your walls?
- What causes pipes to leak inside walls?
- How much does it cost to fix a leaking pipe in a wall?
- When should you call a plumber instead of investigating yourself?
- How long does it take a wall to dry out after a leak?
- How do you safely inspect inside a wall without causing more damage?
- How can you prevent pipes from leaking inside walls again?
- Will your home insurance cover a leaking pipe in a wall?
- What most homeowners get wrong about a hidden leak
- Get a hidden leak found and fixed properly
- Sources
What to do right now to limit damage from a leaking pipe in wall
Before you diagnose anything, stop the water getting worse. Speed matters more than precision in the first few minutes.
- Turn off the internal stopcock, usually found under the kitchen sink or near the incoming water main, and shut any isolation valves on nearby appliances (washing machine, dishwasher, toilet cistern).
- If water is anywhere near sockets, switches, or light fittings, switch off the affected circuit at the consumer unit. Never touch a switch with wet hands or stand in water to reach it.
- Move furniture and rugs away from the wet area, lay towels or a bucket to catch drips, and take timestamped photos of the stain, any bulging plaster, and the surrounding room.
- If the leak is active and spreading, or there's any risk of water reaching electrics, call an emergency plumber straight away rather than waiting to see if it dries out.
These four steps won't fix the leak, but they buy you time and give a plumber or your insurer a clear record of how the damage progressed.
What are the signs of a pipe leaking behind a wall?
A hidden leak rarely announces itself with a burst. It seeps quietly for days or weeks before anyone notices, which is why the visible signs matter so much.
The most common giveaways include:
- Yellow or brown staining that spreads slowly across plaster or wallpaper
- Bubbling, blistering, or peeling paint, especially in a patch rather than a general damp area
- Soft, crumbling, or spongy plaster when you press it gently
- A musty or earthy smell that lingers even after ventilating the room
- Mould spots appearing in a localised patch rather than spread evenly across a wall
- Warped skirting boards or floorboards near the affected wall
- A patch of wall that feels noticeably warmer or cooler than the rest
These discoloured patches, peeling paint, and unexplained damp smells are exactly the symptoms WaterSafe identifies as classic markers of a hidden leak, alongside a rising water bill with no obvious extra usage.
Statistic to note: UK household leaks, including hidden ones behind walls, are estimated to cost around £700 million a year in wasted water and repairs. A single leaking pipe or toilet can waste a significant amount of water every day without a drop appearing on the floor.
If you spot two or more of these signs together, especially alongside a sudden pressure drop or the sound of running water inside a wall, treat it as a leak rather than a coincidence. Our guide on spotting hidden leaks early covers how to catch these before they cause structural damage.
How can you confirm a leak before opening the wall?
You don't need to cut into plaster to get useful evidence. A handful of simple checks will tell you whether water is actively moving through your pipework, even if they can't pinpoint exactly where.
- Run the water meter test. Turn off every tap, appliance, and outdoor hose, then note the reading on your water meter. Wait at least 30 minutes without using any water, then check it again. Any change confirms an active leak somewhere in the system, as Thames Water's guidance explains.
- Isolate sections of the system. Turn off the internal stopcock and individual appliance valves one at a time to see if the meter stops moving, which can suggest whether the leak sits before or after a particular fixture.
- Listen carefully. In a quiet room, press your ear near skirting boards or pipe runs to listen for hissing, dripping, or trickling sounds.
These tests confirm that water is escaping, not exactly where. That distinction is why the next step usually involves proper detection equipment rather than a hammer and chisel.
Pro Tip: Run the meter test twice, once during the day and once overnight when nothing in the house should be using water. A leak that only shows up overnight often points to a fault in the supply pipe rather than an internal fixture.
How do plumbers find a leak without damaging your walls?
Professional leak detection has moved well beyond guesswork and speculative drilling. Reputable engineers now rely on tools that map exactly where water is travelling before anyone touches a wall.
- Thermal imaging cameras pick up temperature differences in plaster caused by escaping water, often revealing a leak's rough position within minutes.
- Acoustic listening devices and correlators detect the specific sound frequency of water escaping under pressure, even through concrete or dense masonry.
- Tracer gas testing involves pushing a harmless gas mixture through an empty pipe; the gas escapes at the leak point and rises through the wall, where a sensor detects it on the surface.
- Moisture meters and CCTV pipe cameras confirm how far damp has spread and inspect the inside of larger pipe runs directly.
Combining a meter reading with these tools is now the standard workflow for tracing leaks accurately, as outlined by Leak Tracers Direct, particularly where pipes are embedded in concrete and microphones alone would miss the signal. Non‑invasive detection methods like these typically narrow the leak down to a specific section of wall rather than an entire room, which keeps repair work small and predictable.
A leak that's properly traced with thermal imaging or tracer gas usually means opening one small section of plaster, not stripping back an entire wall on a hunch.
Before booking anyone, ask what detection method they'll use, whether they can show you readings or thermal images as evidence, and whether their quote is fixed once the leak's location is confirmed. Our page on leak detection tools and methods breaks down what each device actually shows a homeowner.
What causes pipes to leak inside walls?
Most hidden leaks trace back to a handful of familiar culprits rather than anything exotic. Ageing copper or plastic pipework corrodes or degrades at the joints over years, and a compression fitting or soldered joint that was slightly imperfect at installation can weep slowly for a long time before it's noticed. High water pressure accelerates wear on weak points, and pipes that expand and contract with heating cycles gradually loosen fittings. Accidental damage from a nail, screw, or drilled fixing is also common, particularly in older properties where pipe runs weren't always mapped clearly.
Certain locations fail more often than others:
- Bathroom and kitchen partition walls, where pipe density is highest
- Behind boilers and inside airing cupboards, where connections and valves cluster together
- Along radiator pipe runs, especially where they pass through floor joists or wall cavities
- Near the point where the supply pipe enters the property
One detail catches most homeowners out: the damp patch you see is usually where water has travelled to, not where it started. Water tracks along joists, insulation, and the back of plasterboard before it finds a way to the surface, so the visible stain and the actual leak point can sit a metre or more apart.
How much does it cost to fix a leaking pipe in a wall?
Repair cost depends almost entirely on two things: how accessible the pipe is, and how much of the wall needs to come off to reach it. A confirmed leak on an easily reached section, behind an access panel or under a sink, is a much cheaper job than one buried deep in a load-bearing partition wall.
Typical approaches fall into three bands:
- Minor accessible fixes (joint replacement, tightening or resealing a fitting reached through an existing hatch or panel) tend to sit at the lower end, often in the low hundreds of pounds for straightforward call outs.
- Disruptive repairs involving chasing out plaster, cutting a section of drywall or plasterboard, replacing the pipe section, and replastering cost considerably more once materials, labour, and redecoration are added together.
- Internal rehabilitation methods, including pipe lining and spray coatings applied from inside the pipe, can fix certain leaks without opening the wall at all. These modern lining techniques work well for specific pipe materials and diameters and often cost less overall once you factor in the plastering and redecorating a traditional cut-and-patch job requires.
What actually pushes a quote up: difficult access (behind tiled walls or built-in furniture), the need for structural drying afterwards, whether an insurer needs to be involved before work starts, and whether matching plaster or paintwork adds a decorating bill on top of the plumbing itself. A fixed quote after proper detection is always preferable to an hourly rate on a job with unknown scope.
When should you call a plumber instead of investigating yourself?
Some situations don't leave room for trial and error. Call a professional immediately if you see active water pooling, any sign of water near electrics, plaster that's bulging or falling away, or damp that's visibly spreading hour by hour.
- Ask what detection method they'll use before any cutting starts, and whether they can show you the reading or image that confirms the leak's location.
- Confirm whether the quote is fixed once the leak is found, or charged hourly regardless of how long access takes.
- Ask about their drying plan afterwards, including whether they use dehumidifiers or bring in a specialist for structural drying.
A proper first visit typically includes a pressure or meter check, non-invasive detection, and a written quote before anything is opened up.
Pro Tip: Ask specifically whether the quote includes replastering and redecoration, or only the pipe repair. That single question avoids most billing surprises.
How long does it take a wall to dry out after a leak?
Drying time varies more than most homeowners expect. Solid plaster on brick can take several weeks to fully dry, while plasterboard with cavity insulation sometimes dries faster on the surface but traps moisture behind it for much longer.
Good ventilation and a dehumidifier speed things along for minor, contained damp. Anything beyond a small patch, or any hint of a musty smell persisting after two weeks, usually calls for a structural drying specialist or mould remediation, particularly given the health risks hidden dampness can create. Keep dated photos, plumber invoices, and any drying reports together. If you're making an insurance claim, our guide to burst pipe insurance claims explains exactly what evidence insurers expect.
How do you safely inspect inside a wall without causing more damage?
Opening a wall should always be the last step, not the first. The safest approach starts small and only expands once you have solid evidence pointing to a specific spot.
Once a plumber has narrowed the leak's location using thermal imaging, acoustic listening, or tracer gas, the first cut is usually a small inspection hole rather than a full panel removal. This lets an engineer visually confirm the pipe condition, check the joint or crack directly, and assess how much further plaster or board needs to come away. If the initial hole shows the leak sits slightly to one side, the opening extends incrementally rather than starting again with a bigger guess.
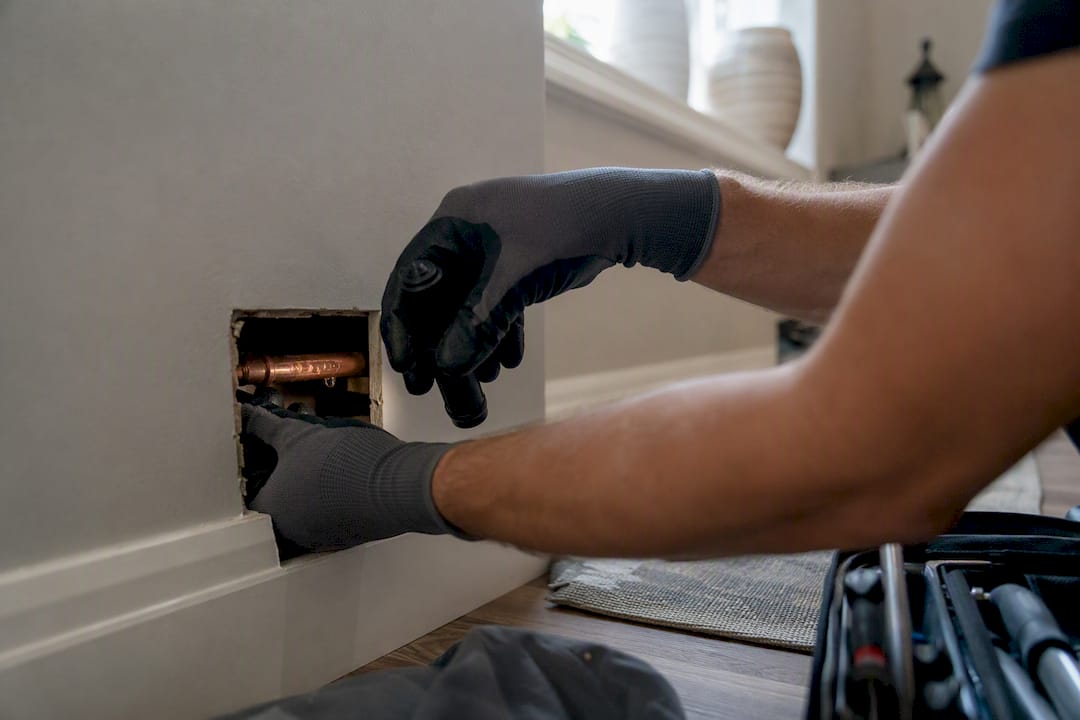
For homeowners tempted to check things themselves before calling anyone, resist the urge to start drilling or cutting speculatively. Specialists warn against intrusive DIY probing precisely because it's easy to hit a live pipe, damage wiring routed through the same cavity, or open up a much bigger area than the leak actually justifies. If you must check anything yourself, limit it to removing an existing access panel, lifting a loose skirting board, or checking behind a bath panel, all of which are designed to be opened and closed without damage.
Where a wall does need opening, ask whether the repair can be done through a single access point rather than a continuous strip, and whether the same opening can be used to inspect adjoining pipe runs while it's already exposed. That single decision often determines whether the job needs one visit or two. Our step-by-step leak detection guide walks through what a professional inspection sequence looks like from first suspicion to final patch.
How can you prevent pipes from leaking inside walls again?

Prevention is far cheaper than repair, and most of it comes down to a handful of habits rather than expensive upgrades. Ageing pipework and unnoticed pressure problems cause the majority of hidden leaks, both of which are manageable if you're paying attention.
Have your water pressure checked periodically, particularly in older properties where mains pressure has crept up over the years without anyone adjusting it. Consistently high pressure stresses joints and fittings long before anything visibly fails. Insulate exposed or vulnerable pipe runs, especially those in unheated spaces like lofts, garages, and external walls, since freezing and thawing cycles are one of the most common causes of split pipes each winter.
Get pipework inspected during other work rather than waiting for a symptom. If you're having a bathroom refitted or a boiler serviced, it costs little extra to have an engineer glance at nearby pipe runs while access is already open. Replace any exposed fittings showing early corrosion or limescale staining before they fail outright, and keep an eye on your water meter every few months even without a specific reason to suspect a leak. A five-minute check twice a year catches slow leaks long before they become a damp patch on the lounge wall.
Finally, know where your stopcock is and confirm it actually works. A stopcock that's stiff, seized, or hard to locate in an emergency turns a manageable leak into a much bigger one simply because nobody could shut the water off in time.
Will your home insurance cover a leaking pipe in a wall?
Most UK buildings insurance policies cover the cost of repairing damage caused by an escape of water, including plaster, decoration, and flooring damaged by a hidden pipe leak. Where policies differ significantly is the pipe itself: many insurers cover locating and repairing the pipe that caused the damage, but some only cover the resulting damage and expect the plumbing repair to be paid for separately, so it's worth checking your specific policy wording rather than assuming.
Insurers generally expect leaks to be dealt with promptly once discovered. A claim can be reduced or refused if there's evidence the leak was left running for weeks despite visible signs, so acting on the checks and signs covered earlier in this article matters for your claim as much as for your home.
Keep dated photographs from the moment you noticed the damage, invoices from any plumber who attended, and a written report if one was provided after detection work. Insurers typically ask for this evidence trail before authorising repair or drying costs, and gaps in the timeline are one of the most common reasons claims get delayed. If drying or mould remediation is needed, keep those invoices too, since they're usually claimable alongside the plumbing repair itself.
Contact your insurer as soon as you've made the property safe, rather than waiting until a plumber has finished the job. Most insurers want to know about the leak early, even if the full repair happens days later, and some require their approval before certain drying or structural work begins.
What most homeowners get wrong about a hidden leak
The biggest mistake I see is homeowners reaching for a hammer before a meter reading. Ignoring a small change on the meter, then cutting speculatively later, causes more damage than the leak itself. Confirm first, then call someone who can trace it properly and quote clearly.
— Michael
Get a hidden leak found and fixed properly
Your-local-plumber runs emergency detection and repair around the clock, using the same non-invasive tools covered above, thermal imaging, acoustic listening, and tracer gas, so you're not paying for guesswork or unnecessary wall damage.

On a first visit, expect a water meter check, a walkthrough of the affected area, and a clear explanation of which detection method fits your situation before any cutting is discussed. Pricing is fixed once the leak's location is confirmed, not billed by the hour for an open-ended search. If you're seeing damp patches, hearing water where there shouldn't be any, or you've already run the meter test and confirmed something's wrong, book an emergency leak detection visit and get it traced properly rather than guessed at.
Sources
- Thames Water — Identifying leaks
- How to find a water leak inside a wall — WaterSafe
- Detecting & fixing leaks — Ideal Response
- Ofwat — leakage and household guidance