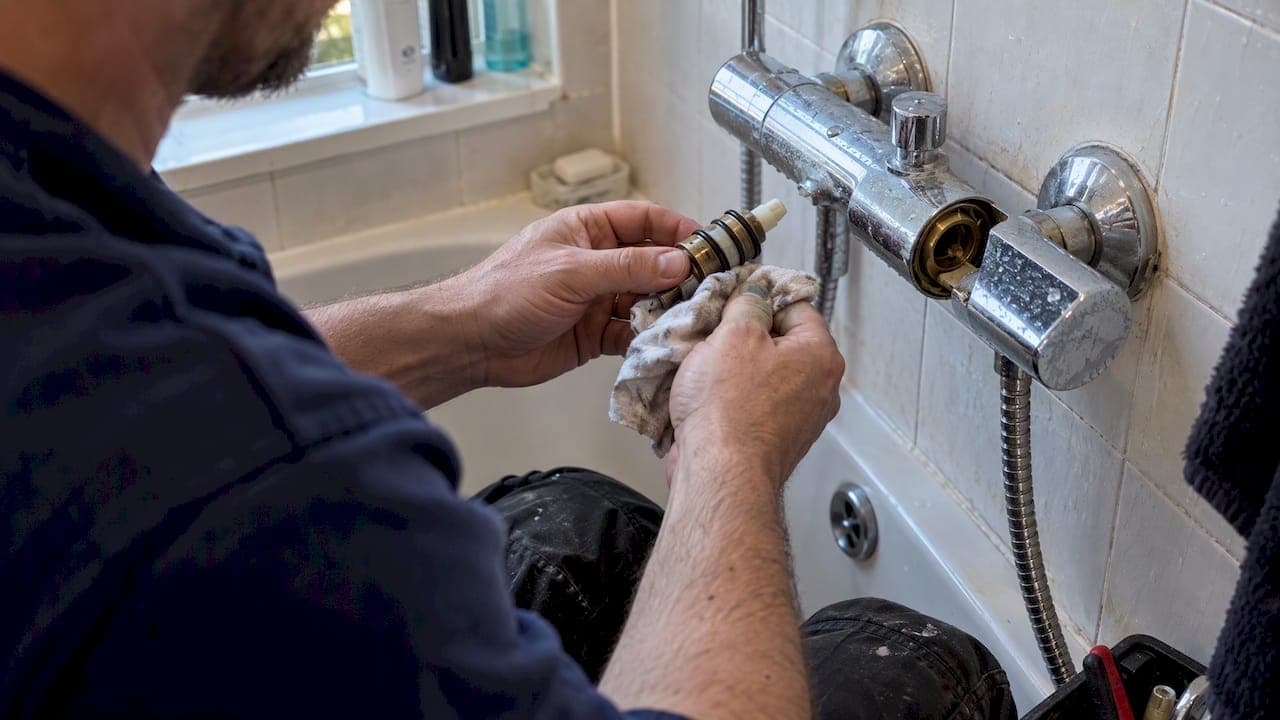
Most diverter faults come down to worn seals, trapped debris or a loose hose, and you can often fix them without calling anyone out. Start by unscrewing the hose, running the water, and moving the diverter through its full range while the water runs. If it still won't switch properly or keeps leaking after that, work through the cleaning and replacement steps below, or book a plumber if the fault involves your hot water cylinder or sealed system.
TL;DR:
- Most diverter faults stem from worn seals, trapped debris, or loose hoses, which can often be fixed without professional help.
- Checking for kinked hoses, clogged showerheads, or stiff/difficult selector feels can quickly identify simple causes before dismantling the mechanism.
- When cleaning or replacing the cartridge, track its orientation carefully and replace O-rings, applying silicone grease to ensure a proper seal.
- A worn-out cartridge usually requires replacement, as cleaning alone rarely restores full function once internal seals degrade.
- If the diverter fault involves a hot water cylinder or sealed system, or if leaks persist after repair attempts, professional plumbing services are necessary for safe diagnosis and fixing.
Table of Contents
- Quick checks and fixes you can try now
- Step-by-step: accessing and cleaning the diverter cartridge
- Replacing the diverter cartridge or tub spout diverter
- When to stop DIY and call a qualified plumber
- Diagnostic checklist and quick troubleshooting chart
- Author perspective: Michael's trade tips and common pitfalls
- Types of shower diverters and how troubleshooting differs
- How to bypass a faulty diverter while you wait for repair
- Tips for preventing shower diverter issues
- Signs the fault is in the valve, not the diverter
- Our take on DIY diverter repair
- How we can help if you'd rather not DIY
- FAQ
- Sources
Quick checks and fixes you can try now
Before you touch a spanner, rule out the easy causes. A surprising number of "broken" diverters turn out to be a kinked hose or a showerhead clogged with limescale.
- Unscrew the shower hose from the outlet and run the water directly from the pipe: a kinked, collapsed or blocked hose often mimics a diverter fault.
- With the hose off, move the diverter knob or lever through its full travel while the water runs, which can dislodge grit sitting on the seal.
- Descale or swap the showerhead and check flow at other taps in the house to rule out a wider pressure problem rather than a diverter fault.
- Note whether the selector feels stiff, feels loose, or switches but the outlet still runs weak, since each points to a different repair.
Mira's troubleshooting guidance lists worn internal seals, damaged cartridges and loose hose connections as the most frequent causes of diverter failure, and recommends checking the hose and showerhead before assuming the cartridge itself has failed. That order matters: it saves you from dismantling a valve that was never the problem. If you're also seeing temperature swings rather than just flow issues, that's usually a separate pressure or thermostatic fault rather than the diverter itself, so it's worth ruling that out early too.
Step-by-step: accessing and cleaning the diverter cartridge
When the quick checks don't solve it, the next step is opening up the valve to inspect the cartridge or stem directly. This isn't difficult, but it rewards working slowly and keeping track of what came from where.
- Turn off the water supply at the service valves if your shower has them, or at the main stopcock if not, then open the lowest tap in the house to drain remaining pressure from the pipework.
- Remove the decorative cap or cover over the diverter, which usually pulls or unscrews off by hand.
- Unscrew the retaining collar using the correct spanner. Manufacturer guides commonly specify an 18mm or 28mm spanner for this job, depending on the model.
- Slide the cartridge or stem out carefully, noting its orientation before it comes free, since most cartridges have locator pins that only fit one way.
- Lay the parts on a clean sheet or cloth rather than directly on the bath or floor, so grit doesn't get back into the mechanism.
- Rinse the filters, strainers and O-rings under clean water and loosen any trapped debris with a soft brush rather than a scourer.
- Replace any O-ring that looks torn or flattened, and apply a light coat of silicone grease to the remaining rubber seals.
- Reassemble in the reverse order, turn the water back on, and test first at low flow before opening it fully.
Pro Tip: Photograph the cartridge's orientation before you remove it, so you're not guessing which way round it goes back in.
If flow and switching are still wrong after a proper clean, the cartridge itself has likely worn out and needs replacing rather than cleaning.
Replacing the diverter cartridge or tub spout diverter
A worn cartridge rarely improves with cleaning alone, and once the internal seals have degraded, replacement is the more reliable fix.
Start by identifying the exact part. Most cartridges carry a model number or distinctive locator-pin pattern, and taking the old one to a plumbing merchant or matching it against a supplier's parts diagram avoids buying the wrong size.
- You'll typically need the correct spanner, a matching replacement cartridge, spare O-rings, silicone grease, a cloth and a small screwdriver.
- Fit the new cartridge with the locator pins aligned exactly as the old one sat, then hand-tighten the retaining collar rather than forcing it with tools.
- Turn the water back on gradually and test the outlet switching and any leak points before using the shower normally.
- If the cartridge fixes the leak and the selector switches cleanly, watch it over the next 24 hours for any intermittent drip.
If the problem continues after a correct, properly seated replacement, the fault is likely sitting deeper in the valve body or the inlet check valves, which is a job for a plumber rather than another round of parts.
When to stop DIY and call a qualified plumber
Some diverter faults are straightforward; others sit on systems where getting it wrong has real consequences. Knowing the difference matters more than knowing how to use a spanner.
- Never attempt to open up or service an unvented hot water cylinder or sealed system yourself: these are safety-critical and must be handled by a competent professional.
- Call a plumber if you can't isolate the water feed safely, if reaching the valve means removing tiles, or if leaks continue after you've already replaced the cartridge correctly.
- A plumber can diagnose wider pressure issues, fit a pressure-reducing valve where needed, and check inlet check valves for the backflow risk that UK water regulations require you to manage on any shower that could reach a toilet or bidet.
- Expect a same-day to 48-hour visit for an emergency leak, though part availability can add to that if your diverter is an unusual or discontinued model.
If you're not confident the system is vented, treat it as a job for a professional rather than guessing, since getting it wrong on a sealed system risks scalding or falling foul of plumbing regulations.
Diagnostic checklist and quick troubleshooting chart
Use this to match what you're seeing to the likely cause before deciding how much time and money to commit.
| Symptom | Likely cause | Immediate test | Next step |
|---|---|---|---|
| Drips from spout after switching | Worn seals or cartridge | Check cartridge filters and O-rings | Clean, or replace if worn |
| Diverter feels stiff or won't move | Debris or dried grease | Move through full travel with water running | Clean and re-grease |
| Weak flow from shower even when diverted | Hose or showerhead blockage | Run water with hose disconnected | Descale or replace hose/head |
| Water stays split between outlets | Misaligned or damaged cartridge | Reseat cartridge, check orientation | Replace cartridge |
A DIY clean usually takes under an hour and costs little beyond your time. A cartridge replacement adds the part cost plus one to two hours. A plumber visit adds labour on top of parts but typically resolves it the same day or within 48 hours.
Author perspective: Michael's trade tips and common pitfalls
Most repeat call-outs I see come from grit left on a cartridge during a rushed DIY job, or a cartridge forced back in the wrong way round. Locator pins exist for a reason, and ignoring them during reassembly is the single most common cause of a "fixed" diverter failing again within days.
Over-tightening the retaining collar to stop a drip usually just distorts the seal further and makes the next repair harder. On a booked visit, the first thing I check is the hose and strainer, not the cartridge, because that's where the quick wins are.
— Michael
Types of shower diverters and how troubleshooting differs
Diverters generally fall into three families, and the symptoms you'll see depend on which one you have.

A knob diverter, usually sitting on a bath spout or mixer body, pulls up to redirect water to the shower. These tend to fail through worn O-rings around the shaft, so a stiff or loose knob that won't hold position usually points straight to the seal rather than anything electrical or pressure-related.
A lever diverter, common on modern mixer valves, rotates or slides to switch flow. These typically use a cartridge rather than a simple rubber seal, so a lever that moves freely but doesn't actually redirect water usually means the cartridge itself has failed internally rather than a loose part.
A two-handle or three-valve setup, often found in older bathrooms, uses a separate diverter valve between two taps. These are more likely to develop leaks at the valve's own seals over time, and because the mechanism is simpler, a full strip-down and clean often resolves it without needing a replacement part at all.
Knowing which type you have narrowed the fault list considerably before you even open the access panel, and it also tells you whether you're looking for a cartridge or a simple washer kit at the merchant.
How to bypass a faulty diverter while you wait for repair
If your diverter won't switch at all and you need the shower working before you can fix or replace it, a temporary bypass is usually possible without any special parts.
Where the fault sits in a bath mixer diverter, running the bath tap and holding the shower hose manually over the bath lets you still use the shower, even though it's less convenient. For a fixed shower that won't divert away from a bath spout, a simple rubber bath plug or a shower diverter attachment that clips over the spout can redirect flow temporarily.

If the issue is the opposite, water stuck going to the shower only, you can usually still bathe normally since the bath tap itself is unaffected.
None of these are permanent answers, and running a diverter stuck half-open for weeks tends to accelerate wear on the seals that are already struggling. Treat a bypass as a stop-gap of days, not months, and prioritise the proper repair once you've got the parts or a booking sorted.
Tips for preventing shower diverter issues
A little regular attention keeps most diverters running for years without a single call-out.
Descale the showerhead and diverter outlet every few months, particularly in hard water areas, since limescale buildup is one of the most common causes of a stiff or sticking selector. Move the diverter through its full range occasionally even when you're not actively using both outlets, which stops grease and seals from drying out or sticking in one position.
Avoid yanking the shower hose or letting it kink against the bath edge, since hose damage is a frequent cause of flow problems that get blamed on the diverter itself. If your water pressure runs high, consider having it checked, since excess pressure can accelerate cartridge wear and cause the kind of water hammer that shortens a valve's working life.
Finally, address a small drip as soon as you notice it rather than waiting. A minor leak left for months often means a full cartridge replacement rather than a simple clean by the time you get round to it.
Signs the fault is in the valve, not the diverter
Not every flow problem is a diverter issue, and it's worth ruling out the valve itself before you strip anything down.
If temperature swings or surges happen alongside the flow problem, that's usually the thermostatic or mixing element rather than the diverter, since the diverter only controls where water goes, not its temperature. Similarly, if both outlets run weak regardless of how the diverter is set, the cause is more likely low incoming pressure or a blocked inlet filter upstream of the diverter entirely.
A diverter fault tends to be isolated: one outlet works fine, the other doesn't, or switching between them is the specific problem. A valve fault tends to affect both outlets equally, regardless of which one the diverter is pointing to. If you've cleaned and even replaced the diverter cartridge and the symptoms haven't changed at all, that's a strong sign the valve body itself, rather than the diverter sitting inside it, is where the fault actually lives.
Our take on DIY diverter repair
The conventional advice on this topic jumps straight to replacing the cartridge, and that's often the wrong first move. Most diverter complaints we see start as a blocked strainer or a kinked hose, not a worn part, and cleaning first saves you the cost of a cartridge you didn't need.
Where homeowners get this wrong most often is forcing a fix: over-tightening a collar to stop a drip, or pushing a cartridge back in without checking the locator pins. Both tend to create a second fault on top of the first.
Prioritise the free checks before buying anything. If you do need a part, match it exactly rather than guessing at a close fit, since a slightly wrong cartridge will leak or stick in ways that are hard to diagnose later. And treat any hesitation about your system type, vented or unvented, as a reason to stop rather than push on.
— Michael
How we can help if you'd rather not DIY
If the checks above haven't sorted it, or you've opened the valve and found something beyond a simple clean, we offer professional plumbing services to help resolve the issue, including diverter repair and replacement, leak diagnosis, and pressure checks.

- Emergency response aiming to reach customers promptly once booked.
- Pricing is provided and agreed before starting work, with a workmanship guarantee.
- Direct communication with the engineer carrying out the work.
You can book plumbing work directly, or use our emergency response service if the leak needs sorting today.
FAQ
Do you need a plumber to fix a shower diverter?
Not always. Many diverter faults, such as a blocked strainer, a kinked hose or a dirty cartridge, are fixable at home with basic tools. You'll want a plumber if the fault involves an unvented hot water cylinder, a sealed system, or if leaks continue after you've correctly replaced the cartridge.
My shower diverter won't pull up. What can I do to fix it?
A stiff knob diverter is usually down to dried-out grease or limescale around the shaft. Try moving it through its full range with the water running to loosen debris, and if that doesn't help, open it up to clean and re-grease the O-ring with silicone grease.
Can you replace just the shower diverter?
Yes, in most cases the diverter cartridge or spout diverter can be replaced on its own without touching the rest of the valve or pipework. You'll need to match the part exactly by model markings or locator pin pattern, since an incorrect fit will leak or stick again.
What is the lifespan of a shower diverter valve?
There's no single fixed lifespan, since it depends on water hardness, pressure and how often the shower is used. Keeping pressure within the manufacturer's recommended range and descaling regularly tends to extend how long the seals and cartridge last before they need attention.
Sources
- My mixer valve was leaking – this helped me fix it (Mira)
- What backflow protection is required for a shower? (WaterRegs UK)
- Ceratherm multiproduct guide (Ideal Standard)
- Guide to your new home (NHBC)