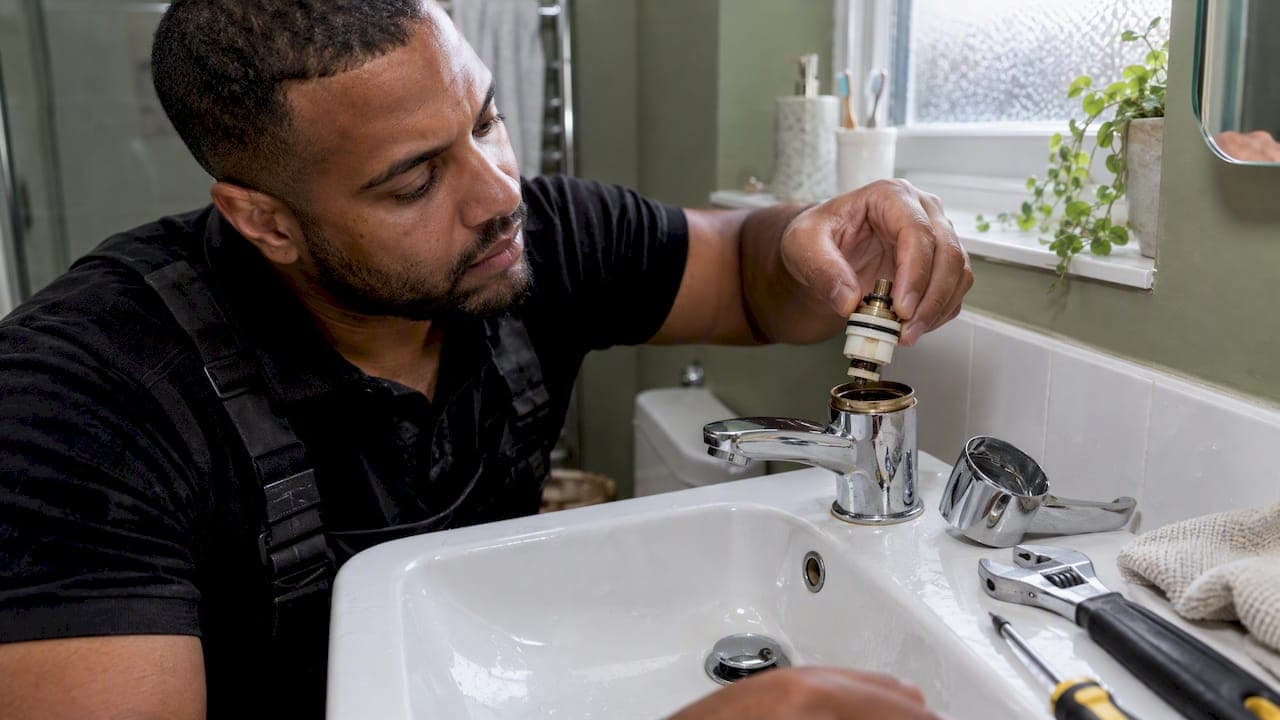
If a lever or mixer tap drips, leaks round the handle or has gone stiff, the cartridge inside is the usual suspect, and swapping it is often a job you can do in under an hour with a spanner and a screwdriver. The hard part is not the fitting. It is working out whether the cartridge is really the fault, and buying the one that actually fits. This guide covers both, then walks you through the change, the checks afterwards and what to do if the tap still misbehaves.
TL;DR
- A ceramic disc tap that drips usually has debris or damage between its ceramic discs. Clean the cartridge first; replace it if the discs are scored or the drip carries on.
- Match the new cartridge by taking the old one out: note the spline count, length, thread and base diameter in millimetres, and photograph it.
- Isolate both supplies, open the tap to release pressure, remove the cap, screw, handle and retaining nut, then pull the cartridge. Do not overtighten on refitting.
- Fixing a leaking mixer tap typically costs £45 to £200 from a tradesperson, so a £10 to £20 DIY part is worth a try on a straightforward tap.
- If you cannot isolate the water, the tap body moves, or it still leaks after a new cartridge, stop and book a plumber.
Table of Contents
- Is it the cartridge? Reading the symptoms
- Which taps have a cartridge at all
- Finding the right replacement cartridge
- Tools and preparation
- How to change a mixer tap cartridge, step by step
- Checking your work, and what if it still leaks
- A stiff or tight tap handle
- What a plumber charges to fix a leaking tap
- Our perspective
- Want it fixed without the guesswork?
- FAQ
- Sources
Is it the cartridge? Reading the symptoms
Before you buy anything, match what you see to the likely cause. Different leaks point to different parts, and a new cartridge will not cure an O-ring fault.
Dripping from the spout, or running on after you turn off. On a ceramic disc tap this normally means debris is stopping the two discs closing fully. Taps UK's helpdesk says grit or contamination from the pipework gets between the discs. Crosswater gives the same main cause, and adds that a drip can also persist because of incorrect seating, a scratched valve seat or a wrong replacement cartridge.
Water around the base of the spout. This is a different fault. Burlington separates a drip or overrun, which points to debris between the discs, from a leak at the spout base, which is more likely a dirty, worn or perished O-ring. If your lever tap is leaking at the base, you will still be taking the tap apart, but the part to replace may be a small rubber ring costing pennies.

A new tap that started dripping within weeks. Villeroy & Boch UK notes that dirt washed through the piping can damage ceramic discs and cause leakage soon after installation. If that is your story, expect to clean or replace the cartridge, and flush the supply before the new one goes in.
A stiff or tight handle. This is usually a worn, dry or limescale-clogged cartridge, though a handle that is jammed on its spline can feel similar. We cover it in its own section below.
The inspection that settles it
The reliable test is to remove the cartridge and look. Taps UK's advice is simple: if the ceramic discs are scored or damaged, replace the cartridge. If they look intact, wash it in hot soapy water, refit it and see whether the drip stops. If it carries on, replace it. That order saves you buying a part you did not need.
Which taps have a cartridge at all
Older pillar taps have a rubber washer on a spindle, and you turn the handle several times from off to on. Those are repaired by changing the washer or the whole valve. Most modern single-lever mixers and many quarter-turn taps use a ceramic disc cartridge instead. A quick check: if the handle moves a quarter or half turn, or lifts and swings as a lever, you almost certainly have a cartridge.
It matters because the repair route differs. Which? points out that a modern lever tap with a cartridge may not be repairable in the same way as a spindle tap, but the cartridge may be replaceable if the manufacturer supplies one. For an older or budget model, Which? suggests replacing the whole tap can be the easier option. If you can no longer find the make, or the tap is corroded and tired, that advice is worth following. Our guide on why regular tap replacement matters explains when a new tap makes more sense than another repair.

Finding the right replacement cartridge
This is where most DIY attempts go wrong. Cartridges look alike, but a few millimetres decides whether one seals or leaks. iFixit's community guide says there are around 4,000 variations of ceramic cartridge, so expect identification to take a little time.
Start with the tap itself
Wickes notes that most taps have the make and model engraved on the front or back. If you can read it, search the manufacturer's spares list and you may be done in minutes. Check under the spout, on the body behind the handle and, on a basin mixer, around the underside where you can reach.
If there is no name, measure the old cartridge
Take it out and record the following, all in millimetres. NotJustTaps asks for these details when you send a photo to identify a cartridge:
| Measurement | What to note |
|---|---|
| Splines | The number of teeth on the spindle where the handle fits |
| Total length | Top of the spindle to the base |
| Middle thread | The diameter of the threaded section |
| Base diameter | The width of the bottom disc end |
Also photograph it from the side and from underneath, and keep the old cartridge until the new one is fitted and tested. Take it to a plumbers' merchant if you can: holding the two side by side is the safest comparison. Check also whether you need a standard base or an open outlet type, and whether it is a hot or cold side, since some quarter-turn cartridges turn in opposite directions.
Tools and preparation
You do not need much. AXA's guide to fixing a dripping tap lists an adjustable spanner, slot and cross-head screwdrivers, scissors, a replacement cartridge and a few assorted washers and O-rings. Add an Allen key, since many lever handles hold with a grub screw, plus a towel, a small bowl and a torch.
Two practical points before you start:
- Plug the basin or sink so a dropped screw or cap does not vanish down the waste.
- Check you have isolation valves. Small valves on the pipes beneath the tap let you shut off just that tap. If there are none, you will need to turn off the stopcock and drain the system, which is more disruptive. Which? bases its tap repair prices on isolation valves already being present, which gives you a sense of how much easier they make the job.
How to change a mixer tap cartridge, step by step
The sequence below follows the steps in Grohe's guide to changing a basin mixer cartridge and the fitting order given by Crosswater. Your tap's design will vary, so use it as a map, not a manual.
- Shut off both supplies. Close the hot and cold isolation valves, then open the tap to release the pressure and let any remaining water run out.
- Remove the cap. Prise the small hot and cold indicator button off with a flat screwdriver, taking care not to scratch the finish.
- Undo the handle screw. It is usually underneath the cap, and often a hex key fits. Pull the lever or handle upwards and off. If it is stuck, wiggle it gently rather than levering against the body.
- Remove any cover or shroud. Many levers have a chrome collar that unscrews by hand or with a cloth around it to protect the finish.
- Undo the retaining nut. Use the adjustable spanner, supporting the tap body with your other hand. iFixit advises avoiding movement of the tap body, especially with rigid pipework, to prevent damage to connections.
- Pull out the cartridge. It should lift straight out. If it sticks, a gentle twist helps.
- Inspect the body. Grohe's instructions are to check that the mixer body holds no seals or foreign objects before fitting the new part. Wipe out any grit and look for a stray old rubber seal that could stop the new one sitting properly.
- Fit the new cartridge. Line up the tabs or locating pins with their slots. Press it fully home. Taps often need it oriented so hot and cold sit the right way round.
- Tighten the nut moderately. AXA warns against overtightening. Firm by hand plus a gentle spanner turn is typically enough, since cranking it can crack the body or cause stiffness.
- Reassemble in reverse. Refit the collar, handle, screw and cap.
The whole job normally fits within the time our own mixer tap guide suggests for a dripping mixer, and our companion piece on diagnosing a leaking mixer tap shows how to tell the faults apart if the cartridge turns out not to be the culprit.
Flush before you trust it
Because grit is the commonest killer of ceramic discs, run the water briefly before you fully reassemble, with the handle off and the cartridge out, so any loose debris in the supply clears into the basin. Taps UK stresses flushing pipework after installation, as loose debris can reach and obstruct the precise sealing surfaces. Villeroy & Boch gives the same advice for new taps.
Checking your work, and what if it still leaks
TapSparesUK says the cartridge locating pins must enter their holes, the retaining nut and handle must be secure, then the water goes back on and you check for leaks. Do it in this order:
- Open the isolation valves slowly, with the tap open, so air and debris leave the system.
- Close the tap and watch the spout for a minute or two. Dry the base with a tissue and check for moisture.
- Run hot and cold separately, and check the handle moves smoothly through its full range.
- Look under the basin at the isolation valves and tails for drips an hour later.
If the drip remains
Work through the likely reasons Crosswater lists: the cartridge may not be seated correctly, the valve seat in the body may be scratched, or you may have fitted the wrong size. Lift it out, check the seating and measure again against the old part. Water at the base after a new cartridge points to the O-rings, so replace those too. If the body itself is scored or corroded, no cartridge will seal and the tap needs replacing, which is where a plumber earns their fee.
Persistent leakage is also a reminder to watch for hidden damage. If you suspect water is escaping elsewhere, our partner-free checklist for detecting a water leak at home will help you spot slow leaks early. The Water UK guide, Looking after water in your home, reminds us that unsuitable or badly fitted products can affect drinking-water quality or leak and damage the property, and it recommends approved products and a WaterSafe plumber for plumbing work.
A stiff or tight tap handle
A stiff lever or a mixer handle that is hard to turn is a close cousin of the dripping tap. The usual causes are limescale or dirt in the cartridge, dried grease on the moving parts, or a retaining nut that has been tightened too hard. Hard-water areas such as much of Berkshire, Oxfordshire and Buckinghamshire tend to show this sooner.
Try this in order:
- Isolate the water and take the tap apart as above.
- Check the retaining nut. If it was overtightened, slackening it slightly may free the handle.
- Soak the cartridge in a descaler suitable for your tap finish, or white vinegar for a short time, then rinse well. Keep any descaler off chrome and plated finishes, and follow the product label.
- Refit, using a little silicone-based plumbing grease on the moving parts if the manufacturer allows.
If the handle is still tight, the discs are probably worn and the cartridge needs replacing. Treat a handle that is stiff and also dripping as a strong sign the cartridge is at the end of its life.
What a plumber charges to fix a leaking tap
The Which? survey of its Trusted Traders, dated November 2025, puts a fix for a constantly dripping standard mixer tap with washers at £45 to £200, excluding VAT, assuming isolation valves are fitted. A cartridge job on a lever tap sits in the same territory, though the final bill depends on access, whether parts are in stock and how long the diagnosis takes.
Our own published rate for heating and boiler work is £110 per hour. We do not publish a fixed price for tap repairs, because the cost depends on the tap, so we give the figure before we start work. There is no call-out fee, and our guarantee is no fix, no fee, with payment only after the work is done successfully.
The DIY maths is simple. The part may cost £10 to £20 from a merchant, and your time is under an hour. If the tap is cheap, ageing or impossible to match, spending that on a new tap and having it fitted can be the better route.
Our perspective
Most cartridge calls we see are not really about the cartridge. People replace one, the tap still drips, and only then do they find the valve seat is damaged or that the part was a millimetre out. Our advice is to spend ten minutes identifying the part properly before you spend ten pounds on it. Photograph everything as you dismantle, keep the old cartridge, and never force a nut or a handle.
We also think plenty of homeowners can do this job, as long as they can isolate the water cleanly. The moment you are guessing, with no isolation valve, a tap body that rocks, or corrosion you cannot shift, the cheap fix can become an expensive flood. At that point a short visit from an engineer, who carries common cartridges and can tell at a glance whether the tap is worth saving, costs less than the repair of a soaked ceiling. For related problems, such as the one in our shower mixer dripping guide or an outside tap that leaks, the same rule holds: identify, isolate, then fix.
— Michael
Want it fixed without the guesswork?
If you would rather not take the tap apart, our engineers repair and replace taps across Reading, Newbury, Oxford, Abingdon, Windsor, Bracknell, Basingstoke and the wider area we cover. You speak directly to the engineer, there is no call-out fee, and the work carries a 12-month warranty. You pay only after a successful repair.

You can book a tap repair or replacement online, or choose general plumbing for a wider job. If a tap is gushing and you cannot isolate it, use our 60-minute emergency response at any hour, holidays included.
FAQ
Can I replace a tap cartridge myself?
On most mixer and lever taps, yes, provided you can shut off the water at isolation valves and identify the correct cartridge. The job is mainly unscrewing, swapping and tightening moderately. If the tap body moves, the pipes are rigid and fragile, or there is no way to isolate the supply, call a plumber.
Why is my ceramic disc tap still dripping after a new cartridge?
The usual reasons are a cartridge that is not seated properly, a scratched valve seat in the tap body, or a replacement that is not quite the right size. Grit left in the pipework can also damage a brand new cartridge, so flush the supply. If the body is damaged, the whole tap may need replacing.
How do I know which cartridge fits my tap?
Look for the make and model engraved on the tap, and search the manufacturer's spares. If you cannot find it, remove the cartridge and note the spline count, total length, middle thread and base diameter in millimetres, then photograph it. Compare the old part with the new one before you fit it.
Why is my mixer tap handle hard to turn?
The most common causes are limescale in the cartridge, an overtightened retaining nut or a worn cartridge. Take the tap apart, check the nut and clean the cartridge. If it is still stiff, or also drips, replace the cartridge.
How much does a plumber charge for a leaking tap?
A November 2025 Which? survey of its Trusted Traders found £45 to £200 for fixing a constantly dripping standard mixer tap, excluding VAT. Prices vary with the tap and the access. We confirm the cost before we start.
Sources
- Dripping tap, Taps UK Helpdesk
- My tap is constantly dripping, Crosswater
- Frequently asked questions: Kitchens, Villeroy & Boch UK
- My tap is dripping or leaking, Burlington Bathrooms
- How much do plumbers cost? Which?
- Why does my bathroom tap only provide a trickle of hot water? Which?
- Identify your ceramic cartridge, iFixit
- Identify your tap or shower cartridge, NotJustTaps
- How to fix a dripping tap, AXA UK
- Change a basin mixer cartridge, Grohe
- Valve/cartridge change guide, TapSparesUK
- Looking after water in your home, Water UK
- Detect a water leak in 15 minutes